
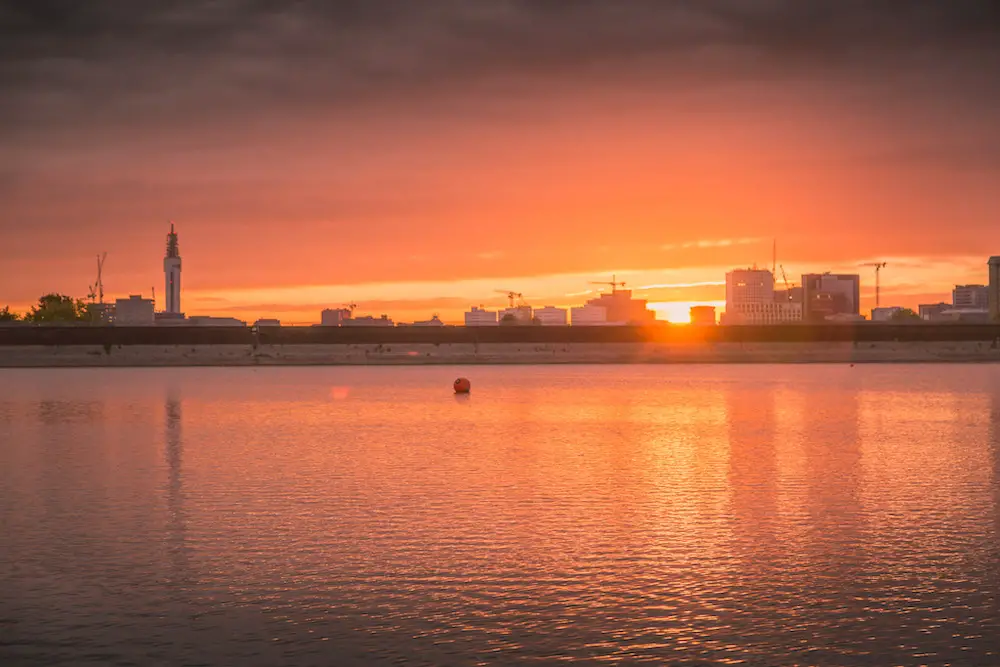
On the wall of fame of available light photography, sunsets occupy a special spot. They combine dramatic colors, extreme dynamic range, and high contrasts to make for scenes that can look exciting, romantic, and clean at the same time. The camera settings for sunset photography thus are an essential ingredient to success in this genre.
On the flip side, a good sunset shot is notoriously tricky to pull off. That’s unless you have the optimal camera settings for sunset photos. Sunsets are an excellent example of a shooting environment where program mode and automatic settings alone won’t suffice.
In other words, if you really want to make that sunset look good, you’ll have to take over from the camera. Let’s go over the basics and show you how to better configure your camera settings for sunset photos!
The Fundamental Problem Camera Settings For Sunset, And How To Overcome It
If you’ve ever tried shooting sunsets before, you’ve probably noticed one glaring issue.
Almost no matter your camera settings, every shot either totally underexposes the ground so that it appears pitch-black, or it overexposes the sky so that the sunset looks washed out and hard to see.
To try and understand what causes this problem, imagine your scene as being separated into two halves. The upper half, usually the sky, contains your sunset, the main subject. The lower half is the ground.
These surfaces have a huge level of contrast between them. The sky will be very well-lit at the moment of the sunset while the ground won’t be reflecting a lot of light.
This difference is called dynamic range. Within landscape photography, sunsets are some of the shooting scenarios with the highest possible dynamic range, which is what makes them so difficult to master.
Thus, you are working with two sets of exposure values to compensate for – the exposure value of the ground, and the exposure value of the sky. You can’t shoot both at the same time. Or can you?
Camera Settings For Sunset, Solution #1: Exposure Blending
The short answer is, yes, you can. But probably not in the way you thought.
If you want to expose both the ground and the sky of your sunset exposure perfectly, here is a method you can use in order to achieve this. Note that the below is mainly intended for a digital editing workflow.
If you are committed to a fully analog process, then this method could be significantly more complicated.
Prerequisites

First, assemble your gear! You would probably want to take a camera body capable of long exposures since they’re necessary for this technique. A tripod is a must for landscape scenery of this type.
And while the choice of lens and perspective is up to you, around 24mm (full-frame equivalent) is a rock-solid option you can’t go wrong with. In general, landscape photographers prefer wider lenses. Those who specialize in sunsets, even more so!
The Exposure Blending Method, Step By Step
Next, pick your spot, and set up your camera. We recommend either shooting in manual or aperture-priority for this kind of scene.
Because you’ll be exposing the sky first, and you don’t want it coming out too bright, select a low film speed and dial in the smallest possible aperture on your lens.
Either let the camera select the shutter speed automatically, or use manual exposure rules. In any case, the exposure should be relatively long, so this is where your tripod comes in.
Take your time to compose, and trip the shutter when you’re ready. But no packing up yet! This is where we transition to our second step.
By gently manipulating the exposure, you now have to take another shot from the same perspective. The aim is to catch the foreground, so recombine the sides of your exposure triangle accordingly.
Don’t move to re-compose, though! It is important that the perspective in your two shots remains identical.
What you should have are two photographs of the same scene, one with the sky properly exposed and one where the ground is equally visible.
You might have already guessed what comes next: you take your photos back home and using the post-processing suite of your choice, blend the two correct exposures together, resulting in one composite image where both the sky and the ground look just right.
Camera Settings For Sunset, Solution #2: Exposure Bracketing
While exposure blending does work, it is a bit cumbersome to pull off sometimes. If you are just trying to nail one particular shot, you might not notice this that much.
On the other hand, if a whole sunset series is on your agenda, exposure blending just involves too many finicky steps and variables to be convenient.
Enter automatic exposure bracketing. This alternative technique results in the same kinds of shots you could get from using exposure blending. In fact, at a technical level, the two work in almost exactly the same way.
However, automatic exposure bracketing removes a few steps for you, the photographer, making it much more intuitive to use. Read on to find out how!
Prerequisites
All in all, you will need the same basic equipment as with exposure blending before. However, you will need to check whether your camera supports auto exposure bracketing natively – consult the menus or your camera’s manual to find out!
The Exposure Bracketing Method Explained
What exposure bracketing does in simple terms is that it sets up your camera to fire a burst of shots – usually two or three – while varying the exposure values between them. At the end of the burst, your camera usually lets you decide which shots to keep.
Higher-end models might even do the hard work of merging the shots into a composite for you!
Compared with exposure blending, you get the same kind of shots, but the whole process only takes a fraction of the time. Nifty, huh?
For a quick overview of auto exposure bracketing and how to use it, feel free to consult this informative video:
On most cameras that allow for exposure bracketing, the menu system will let you choose the number of brackets as well as the exposure differential between them. Play around with these settings a bit to determine the best for your camera and lighting conditions.
To clarify, the above refers specifically to automatic exposure bracketing. That is, bracketing happens completely internally within the camera, and all you have to do is press the shutter.
If your camera does not support automatic exposure bracketing, that doesn’t mean that you can’t still make use of this technique! It just requires a slightly different technique to do so.
Manual Exposure Bracketing For Sunset Photography
In manual exposure bracketing, the goal is exactly the same as above. The only difference is that you will be stopping in between each bracket to adjust the exposure.
This makes it more similar to the exposure blending method.
In fact, strictly speaking, you will have to blend your exposures at the end of this process no matter what – unless your camera has the ability to do this for you automatically!
In order to adjust exposure in manual bracketing, you have to use your camera’s exposure compensation control. This is usually a dial to the left side of the viewfinder, labeled in full stops. Negative stops underexpose, positive stops overexpose.
What the exposure compensation does is essentially override your camera’s meter and exposure controls to automatically produce a shot that is either more or less exposed than the “normal”, uncompensated one.
So, to illustrate, you can shoot the foreground first manually as described above.
Then, with your camera set to aperture priority, use exposure compensation to immediately get another shot that exposes the background properly.
However, just like with automatic exposure bracketing, you can use more than two brackets if you’d like! Just keep going until you find a combination of exposures that best pleases your eye.
Merging the brackets will be done exactly the same way as described above in the section concerning exposure blending.
Camera Settings For Sunset, Solution #3: Using Filters
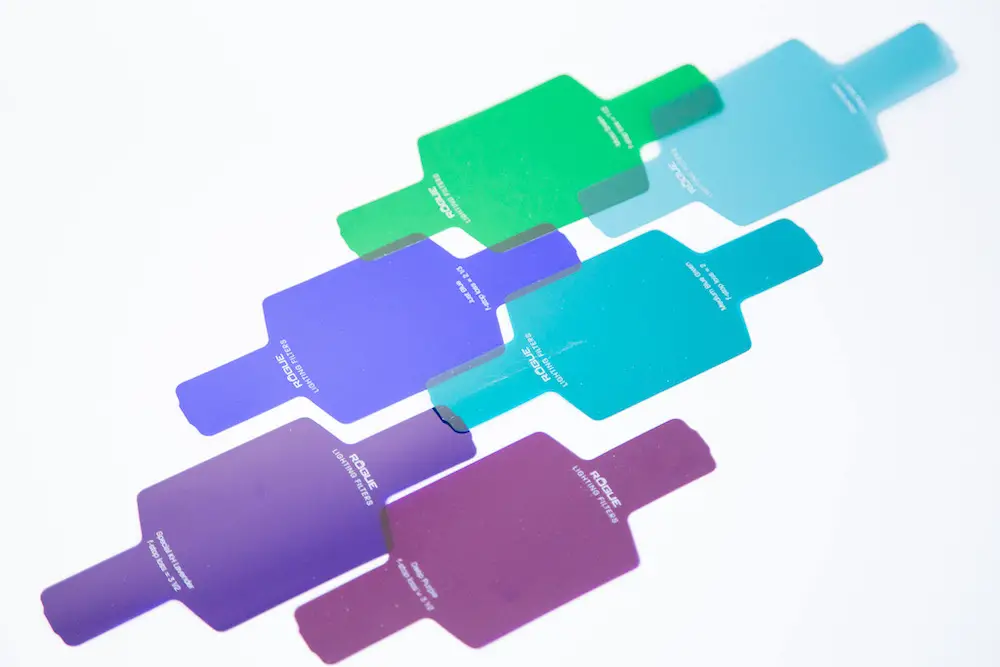
As an ingenious solution to creative ruts, “there’s a filter for that” is the photographer’s spin on “there’s an app for that”.
You can never have enough filters in your bag (really!), and there is one for almost any circumstance and scenario.
Exhibit A: meet the graduated ND filter. You might be familiar with normal ND filters already. They allow you to shoot wide open even during daytime by reducing the intensity of light that enters your lens.
However, graduated ND filters take it up a notch. Looking at one, you will see that one side of it appears very dark, while the opposite edge is almost perfectly transparent.
This is because graduated ND filters are meant to be used to shoot bright backgrounds against dark foregrounds, or vice-versa.
To catch a good sunset, you would mount the graduated ND filter such that the dark (filtered) part covers the sunset in your frame. Conversely, the unfiltered half should let in more light to properly expose the ground.
What this means for you is that using one of these, you can take a shot of a sunset head-on and treat it as though you were shooting with the sun towards your back. You will get a well-exposed foreground, but the sky won’t be too bright either. Truly the best of both worlds!
With this method, there is no need to make composites. Just make sure to attach the filter properly, and set up your shot based on the darkest part of your frame.
Proper Camera Settings For Sunset Photography
Now you should have a good idea of how to compose and shoot a sunset photograph.
So, let’s talk in more detail about how to set up your camera so that those shots come out well.
Aperture Or Shutter-Priority For Sunset Photography?
I mentioned earlier that you should either use manual exposure settings or aperture-priority when trying to photograph sunsets, but why is that?
The simple answer is that sunset photography is all about light and contrast. You want to control the level of exposure to a very fine degree for the shot to come out right.
You can of course use the shutter speed control to this end. But the simple truth is that it’s not as versatile as the aperture in natural lighting.
Think of it as akin to using engine braking while driving. Certainly possible, sometimes very useful indeed, but often more trouble than it’s worth. Not to mention, dangerous when used inappropriately.
Therefore, your aperture is the most important setting to consider here, second only to your film speed. Your shutter speed is of a secondary nature. Especially when used on a tripod, two shots taken at wildly different shutter speeds will look close to identical, all else being equal.
You cannot say the same about two shots taken at different apertures. This is because the aperture doesn’t just control the amount of light hitting the sensor; it also affects the depth of your shot.
And with large-scale landscape photography, sunsets or no, depth of field is one of your most important creative tools.
So, in short, this is why your best bet is shooting either in aperture priority or full manual when confronted with a sunset. Shutter priority might still work just fine, but you won’t have the same creative flexibility.
ISO, F-Stops, And Shutter Speeds For Sunset Photography
Now let’s talk some hard numbers. Don’t worry, we are not going to turn this guide into a math lesson. Instead, let’s take a look at some precise settings that can yield positive results in sunset photography.
Take these as rough estimates. Each sunset is unique, and the conditions of your surroundings will affect your shot to a great deal.
However, by taking the following as an example, it should be easier for you to compose your own sunset photographs without having to rely on so much guesswork.
1. Sunsets And ISO
Film speed, sensor sensitivity, or simply ISO. Whatever you want to call it, this little number plays a gigantic role in determining the look of your photograph. You can imagine the ISO as the foundation on which the rest of your composition rests.
The principle is simple. The higher the ISO number, the less light it takes to expose your photograph. This is why high ISOs have always been prestigious benchmarks – they allow us to shoot bright, punchy shots even in unfavorable lighting.
Of course, higher ISO numbers also generate higher levels of unpleasant noise.
Therefore, in most situations, you would want to shoot at the lowest ISO you can afford. This does often mean longer exposures. But for the sake of the quality of the shot, it might be a price worth paying.
In the case of sunset photography, our subjects aren’t moving and we are (hopefully) shooting on a tripod, so shutter speed is the least important side of our exposure triangle.
Therefore, leaving your ISO low is nothing to be afraid of.
Most digital cameras bottom out at ISO 100 – which should be perfectly fine for our needs. However, if you can go even lower, such as ISO 50, that could be even better.
If you are using bracketing or exposure blending as described above, then for properly exposing the ground, you should select higher ISOs of 200, 400, or even 800.
This is because the ground reflects a lot less light than the rest of your scene, so a higher sensitivity will catch that light more easily without you having to change any of your other camera settings.
2. Aperture Control For Stunning Sunset Photographs
The aperture is our second-most important setting to consider, right after film speed.
As you learned above, the aperture does not just control how much light passes through your lens. It also determines the depth of field of your shot, and for landscapes, this can make all the difference.
Traditionally, it was taught that you should use an aperture of f/16 for scenes like these. This is the smallest aperture available on most lenses, and it gives you a depth of field that should be enough to cover the entire frame.
However, you don’t have to stick to this classic paradigm. For example, maybe you have a tree in the foreground that you want to bring out in contrast with your sunset background. One way to achieve this would be to select a larger aperture, such as f/5.6.
However, be aware that you would need to compensate for this by adjusting your shutter speed. Instead of doing that manually, you can make your life easier by choosing aperture priority mode.
3. Optimal Shutter Speed For Sunset Photography
As previously mentioned, shutter speed is the least crucial aspect of exposure for sunset photography. In most cases, the shutter speed will not have a large effect on the outcome of your shot.
Therefore, feel free to either use aperture priority or manually control shutter speed in accordance with your camera’s meter.
One important exception is when there is an element of movement somewhere in your foreground. Using shutter priority here, we can create some stunning shots. Or, we could do the polar opposite and freeze everything in motion.
You have all the creative control in this case. However, do remember that this only matters if there are moving subjects in the frame.
The Element Of Focus In Sunset Photographs
Focusing is a crucial aspect of photography that is often overlooked. Some even regard it as a nuisance. This includes sunset photographers, and that’s quite a shame.
Without a doubt, you should focus manually when photographing sunsets. Why?
The answer is twofold. First, the intense dynamic range in this shooting situation can often overwhelm your camera’s metering and autofocus system, which can lead to unfortunate hiccups ruining an otherwise fine shot.
Secondly, in a scene such as this one, there are plenty of potential choices for subjects to be made – and if you leave that up to your camera to decide, you’re removing one degree of creative freedom.
You could, for sure, set your focus to infinity.
But you could also focus on a foreground object, or on a hilltop in the background, or any other interesting feature in your frame. Autofocus alone isn’t smart enough to differentiate between these things.
So, by using manual focus and re-composing as needed, you can really make your shot your own.
Field Of View, And How To Use It With Camera Settings For Sunset
Earlier in this guide, we mentioned that landscape photographers, including those who specialize in sunsets, enjoy using wide lenses. But why is that?
The simple answer is that when shooting scenery like this, your frame can never be big enough. Or at least, it can certainly seem that way.
Try it yourself! Set your camera up with a tripod, point it at a nice stretch of scenery anywhere, and compose. Now take a step back from the viewfinder and look at the whole view.
It’s so much more impressive through our own eyes, isn’t it? That feeling of openness, of scale? Well, this is because our eyes have peripheral vision. Even when we aren’t aware of it, we can see it within a very large field of view.
In order for a camera lens to come close to that, it needs to have a very short focal length. The shortest focal lengths available in consumer-grade lenses tend to be rated at about 14mm; anything below that will distort (it will give you a fish-eye effect).
Indeed, many landscape photographers shoot not on full-frame, but on medium format and large format. This is because the larger your sensor (or film) size, the wider your field of view can be. And so, on larger-format cameras, you can exploit shorter lenses even more.
Conversely, this is why landscape photographers will often shy away from using APS-C or Micro 4/3 cameras – the small sensors allow for less depth and FOV compared to full-frame.
However, this absolutely does not mean that these small-sensor cameras cannot take good sunset photographs. You will just need to adapt and learn to control what you have, just as every photographer has done throughout history.
Mistakes To Avoid When Configuring Camera Settings For Sunset
Now that you are aware of all the basics, let’s go over a few key tips on what to avoid when shooting sunsets. Believe me, you’ll be glad you noted these down later!
Always Double-Check White Balance
For many photographers, the white balance remains this elusive thing that is best left on “Auto” and not discussed. But it doesn’t have to be this way! Sure, white balance can always be adjusted in post-processing. But selecting the right value for your shoot can still make a big difference!
For sunsets, it’d be best to pick a white balance setting close to the “Daylight” preset on most cameras.
This should give you contrasts and colors that look lifelike, but still have a sense of drama.
When you’re ready to take a look at your work in post-processing, feel free to play around with the white balance a bit. It won’t be hard to intuitively find a sweet spot for the given lighting conditions.
Take Test Shots
When your subject isn’t moving, you can afford to practice your shot as many times as you like! Sure, the sun will set eventually – but while you’re there, you can take a minute to fiddle with settings here and there to make sure that your final shot comes out just right.
Show Up on Time
Speaking of timing, here’s one thing that’s trickier than you might assume: not missing the sunset. It’s true!
A great many budding landscape photographers who depend on natural light often feel disappointed time after time because their shots just won’t come out right. “There’s some secret ingredient missing,” some of them might say, “I just don’t know what”.
Well, speaking from experience, let me tell you something. That secret ingredient, more often than not, is that they showed up for the shot at the wrong time of day. Simple as that.
And being at a perfect scene, but at the wrong time, meaning that the lighting was messed up in ways they weren’t even consciously aware of.
For sunset photography – where the time window for our shot is definitionally incredibly small – this counts double and triple.
Timing Sunsets
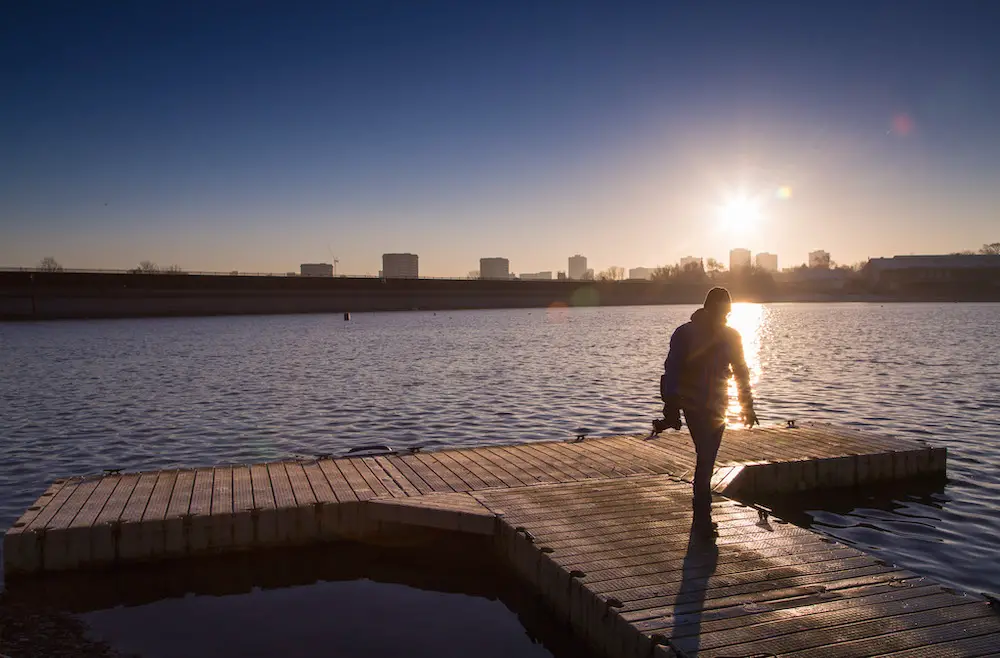
You might think you know the cycles of night and day pretty well where you live. This might be your hometown, and you could show me around the place blindfolded, I’m sure.
But human intuition can be so imprecise sometimes, it’s not a risk worth taking to trust it completely with timing your sunset photography. Instead, you should use some kind of reference to make sure to get it right.
Most photography journals, as well as online websites catering to landscape photography, hiking, and other outdoor communities, should have up-to-date information on when the sun rises and sets each day, down to the minute. You can also consult your local weather report.
And if you really want to make sure you’re dead on time, there’s a large selection of apps specifically catering to sunset photography that can help you out.
Not All Sunsets Are The Same
Apart from knowing the exact time the sun is going to set, another important aspect of showing up on time is planning how early you want to be there.
Contrary to popular belief, the best time for sunset photography is not at sunset.
It’s rather about an hour before. If you’ve ever heard of the so-called “golden hour”, well, this is what it is. Roughly 50-60 minutes before the sun starts to dip beneath the horizon, the Earth is baked in a wave of gold-rosy light.
And this just happens to create the most brilliant backdrop for perfect sunset photographs.
Do note that even over the course of this hour, the lighting in your scene is going to change a lot. Generally, the sky is going to start off more muted, with cooler tones. Within the hour, it is going to become much warmer and more contrasty.
As soon as the sun disappears from sight, the reverse will occur. Hence, the sky’s colors will gradually cool off and fade until you reach the dead of night.
Late into the sunset’s cycle, almost everything around you is going to appear pitch black. This does make it difficult to compose, but there’s a flip side. The sky will shine in an incredibly striking magenta or pink color.
Shots taken at this time may have an otherworldly look to them because we don’t get to see this phase of a sunset very often. It’s so short that we usually miss it!
When To Shoot Sunsets
In the end, it is up to you to choose which phase of the sunset to use for your photography.
Remember, though, that the latter part of the golden hour is much trickier to frame as you will be working mostly in darkness by that time.
If you want to make things simpler for starters, try a few pieces with the sun still some distance above the horizon.
With the sky still casting cooler tones and the landscape surrounding you well-lit, you should have an easier time handling the shot.