
As photographers, our job is to take the real world through a lens and come up with a picture that highlights the subjective, human interpretation of our surroundings instead of just documenting the way they look. A big part of this mission involves the question of how to make our photographs look professional.
- What Makes a Photograph Look Professional?
- How to Create a Professional-looking Photograph
- Using the Right Gear for the Job
- Professional Photography and Emotion
- Professional Composition
This is something that working photographers of every experience level sometimes struggle with.
After all, what do we mean by that “professional look”? And how do you achieve it by learning how to make photographs look professional?
We’re here to answer precisely that question. We’re going to take a look at this fundamental topic from every angle so that by the end of this guide you should know everything you need about what you can do to get that pro look coming out of your photos.
What Makes a Photograph Look Professional?
Before we dive into the technical aspect of our guide, we first need to narrow down what exactly it is that we are looking for.
In simple terms, a professional-looking photograph is one that combines a series of attributes that have crystallized over the years through a mix of cultural ideas and technical considerations.
These attributes have little to do with your skill level, or with how well you handle your camera. Instead, they are mostly conscious creative decisions that affect how the viewer perceives your photo.
Seeing professionalism in this way, instead of assuming it is the pinnacle of skill or inborn talent, allows you to target it much more effectively.
How to Create a Professional-Looking Photograph
Now that we understand the professional look in photography as being an amalgam of traits and stylistic devices that anyone can use, we can begin our mission to attain it in our own work.
Of course, the first and most important step to this will be knowing those traits and stylistic devices in the first place. Let’s go over the most important ones below!
Tip #1 How To Make Photographs Look Professional: Cleanliness
The first of the attributes of professionalism is what we like to call cleanliness. The cleanliness of a photograph includes many things. It could also be described as the “simplicity” or “neatness” of a picture.
Factors that go into cleanliness include the density of subjects in the scene, how they are arranged, and the number of distracting or eye-catching elements in the frame.
The “professional” look that we are aiming for here requires us to maximize cleanliness.
Thus, we should aim to cut down our scene to the bare essentials. There are a few tricks that can help with this.
Hiding Distractions
This first technique is something you should actually watch out for before taking your shot. During composition, there are a few things you can do to minimize extraneous distractions.
The goal here is to really make the viewer’s eyes latch onto the central subject of your frame. You can certainly set up your environment in order to ensure your subject fills out your shot nicely.
But this has its limitations. You don’t want the scene looking overblown and aesthetically unbalanced.
Instead, you should allow your subject to be in the perfect eye-catching position within your frame and drown out the background with your camera. How?
By using every pro portrait photographer’s favorite trick: bokeh. The word might sound strange at first, but rest assured the technicalities behind it are easy to understand.
If you have ever seen a professional headshot photograph, you already know what bokeh is. It’s that dreamy, out-of-focus appearance to backgrounds that makes light sources look like distant, floating orbs.
Bokeh is achieved through a combination of factors: a wide lens aperture, a long focal length, and a large distance between foreground and background objects.
By making use of bokeh, you can very easily hide, or at least draw less attention to, the miscellaneous parts of your shot.
Here’s a great video that can serve as a guide for how and when to employ bokeh in your photography:
However, don’t overestimate the necessity of bokeh either! A landscape shot should display a large sense of depth to be impactful – which is the opposite of bokeh.
In other words, adapt this advice to the needs of your circumstances.
Making Photographs Look Professional Through Touch-Ups
Post-processing is where you can really maximize your photo’s potential. Contrary to popular belief, this is where most of the “professionalization” happens, not behind the viewfinder.
To ensure cleanliness, the number one thing you can do right away is to crop unnecessary parts of your shot. Cropping is an essential photographic skill, and one many budding photogs often ignore to practice.
If there is one principle for learning the basics of professional cropping, it is to minimize clutter. Remove every part of your frame that isn’t essential to, or distracts from, your subject. Balance out this simplicity with a respect for aesthetic proportions, and there you have cleanliness.
Apply this principle to edits beyond simple cropping, too!
For example, have you noticed how many “professional” photographs, particularly portraits, feature a plain black or white background? This is incredibly easy to create in post-processing software, and can dramatically alter the look of your photo without much effort!
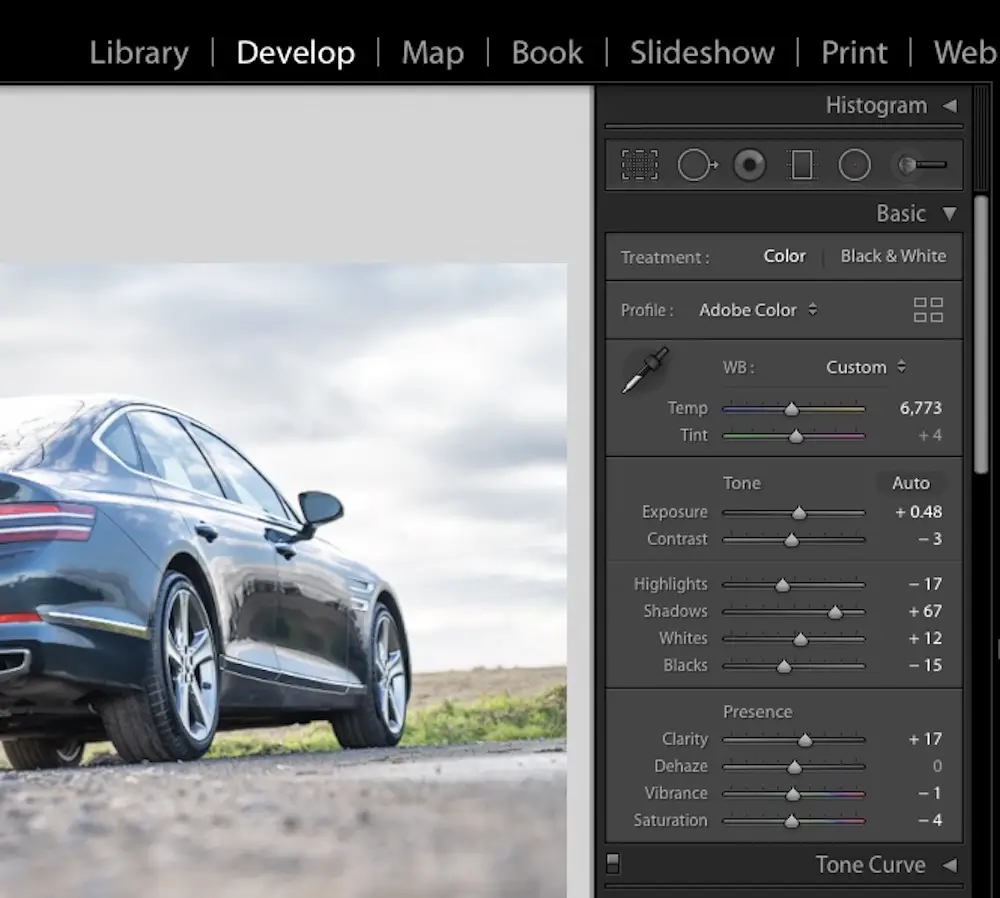
There are other basic techniques that many photographers will oftentimes ignore, then left to wonder why their shots don’t look like those of the pros:
- When shooting with wide lenses, it’s possible to almost entirely eliminate barrel distortion with a single click in most photo-editing software.
- Adjusting white balance and color temperature can dramatically alter the tone and “look” of a picture with just a small number of changes.
- For portraits, the most important task in post-processing is rendering skin tones appropriately – you should pay strong attention to color balance, saturation, exposure compensation, and white levels in order to achieve this.
- Simple, algorithmic fixes like noise removal take almost no effort to implement, can clean up the frame to make it look more polished, and almost never make a photograph look worse than without them.
Tip #2 How To Make Photographs Look Professional: Lighting
If there is any single thing that can absolutely make or break even the most impressive shot, it’s the lighting. No other aspect of a photograph demands this much attention in order to achieve a professional look.
Of course, your lighting needs to be as close to perfect by the time you trip the shutter, or there is probably no use trying to get anything out of the photo through editing.
This is best accomplished with a sound knowledge of basic techniques – how to use your meter, how to expose in aperture priority, shutter priority, as well as manually.
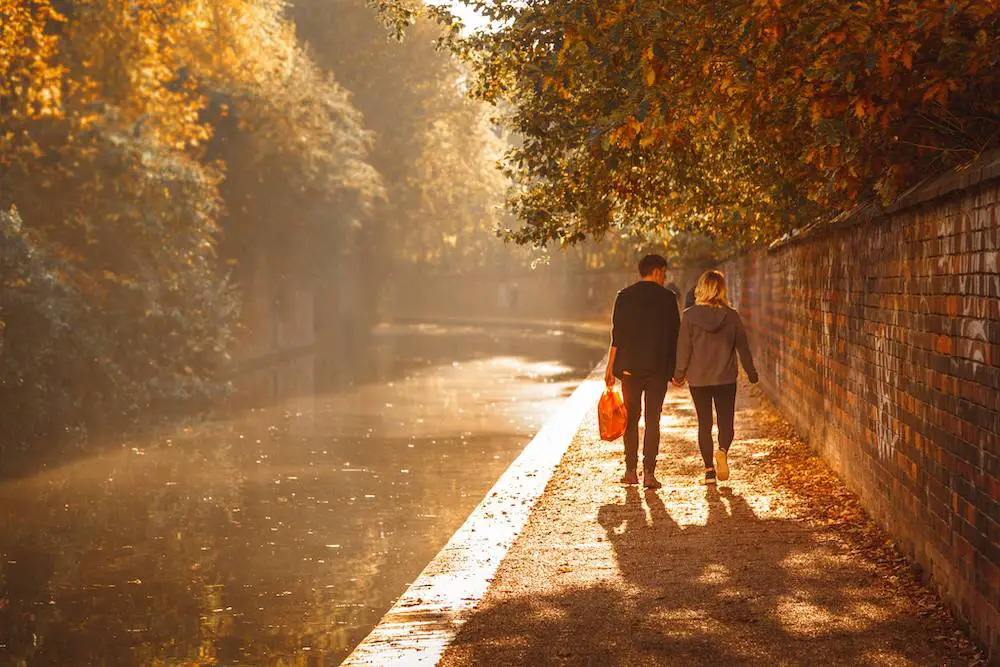
If you are shooting in natural light, you should acquaint yourself with the phases of daylight. A shot taken at noon will just never look the same as one taken at sunset, no matter how much you fuss with the controls on your camera.
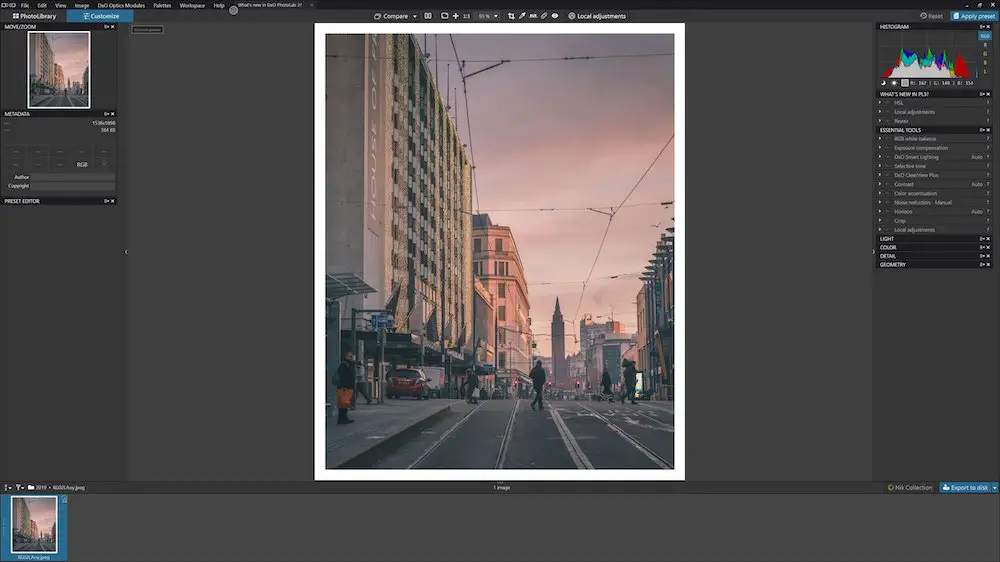
As before, post-processing is where the real magic happens.
By pushing or pulling the exposure, editing highlights, and re-balancing lighting, colors, and contrast, you can completely change the “look” of a photograph.
However, mind one piece of universal advice: don’t overdo it.
The beauty of post-processing is that you can make a photograph look completely different to the eye of the viewer without actually changing more than fine details.
If your edited photo looks nothing like the original shot out-of-camera, you’re doing it wrong.
Try to start with basic edits. Say, if your exposure came out looking a bit flat and dull, boost contrasts, maybe play with saturation a bit, and adjust highlights to fit.
Don’t rack the sliders all the way to the extremes, it will only make your image look cartoonish and overblown.
If you go from here naturally, you should see a quick improvement to the look of your photos.
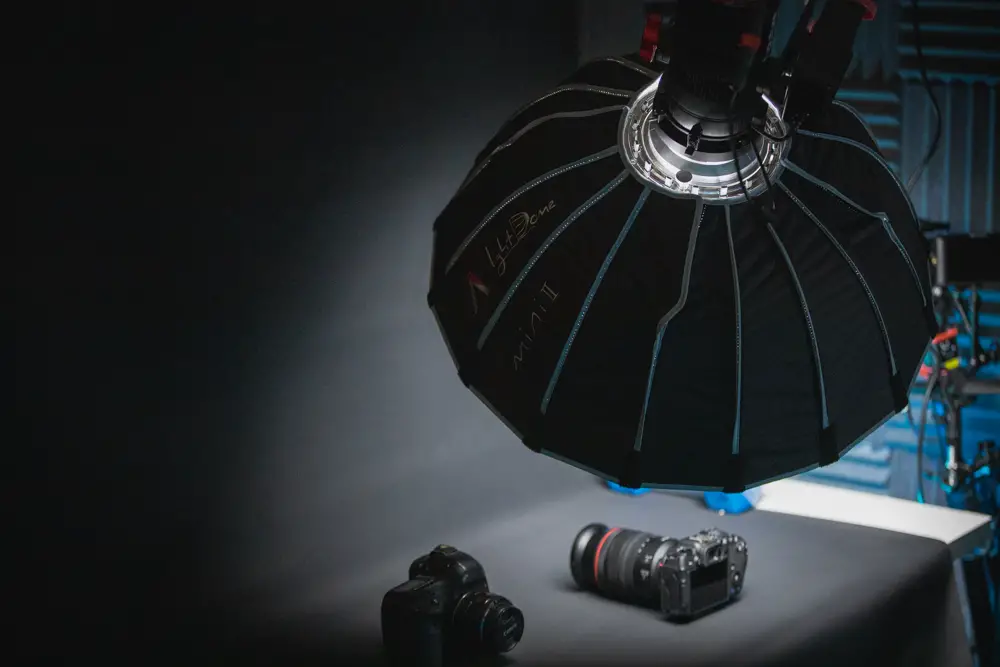
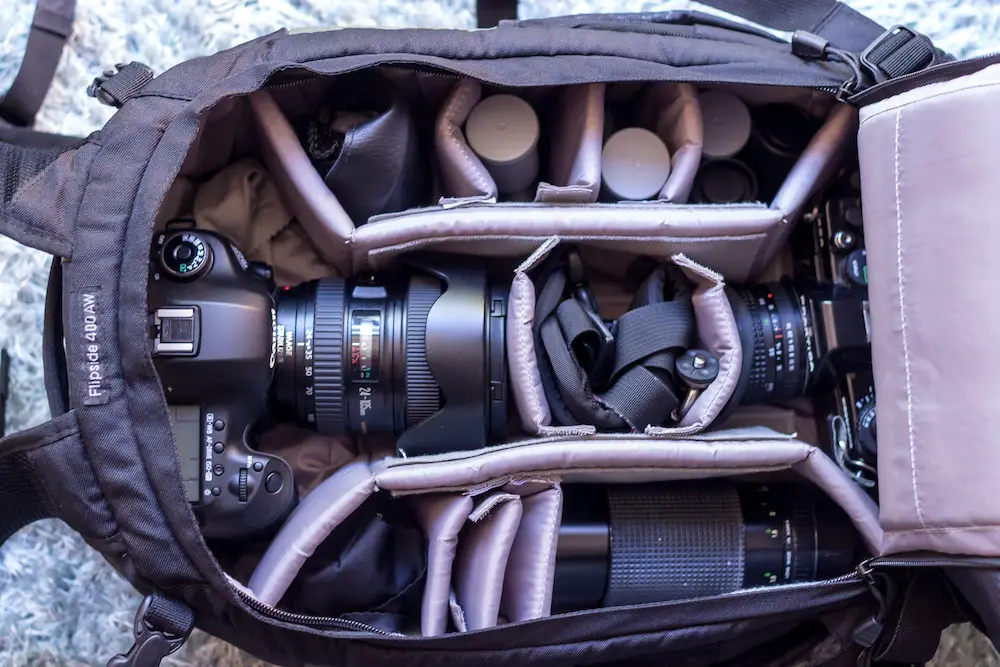
Tip #3 How To Make Photographs Look Professional: Using the Right Gear
To some, this might come off as stating the obvious. However, the choice of proper gear to suit the requirements of your shot is something that many photographers sadly overlook.
The truth is, if you’re wondering how to make your photographs look more professional, “gear” might just be part of the answer you’re missing.
“Gear” is not just your lens. It includes filters, tripods, flashguns, and more.
For career photographers who are often heavily invested in one particular camera system, it also includes the choice of a camera body. You might have a couple lying around that share the same lenses, but which is best for today’s job?
Questions like these never have textbook answers. Instead, you need to develop a certain sense of intuition for them.
Try to think of your gear as a toolkit, and try to imagine what kind of tools your particular job asks for.
For example, portrait photography generally benefits from a shallow depth of field. You want to accentuate the faces of your subjects. Remember bokeh? This is where that comes in, too.
So, in order to get that depth of field shallow, you should pack a long and relatively fast lens.
But it might be too bright in your location to shoot wide open – in that case, grab an ND (neutral density) filter.
Go through each and every piece in your photo bag like this, as if ticking off a checklist.
By becoming more aware of what you’re using to shoot, you will also become more aware of how to take advantage of it.
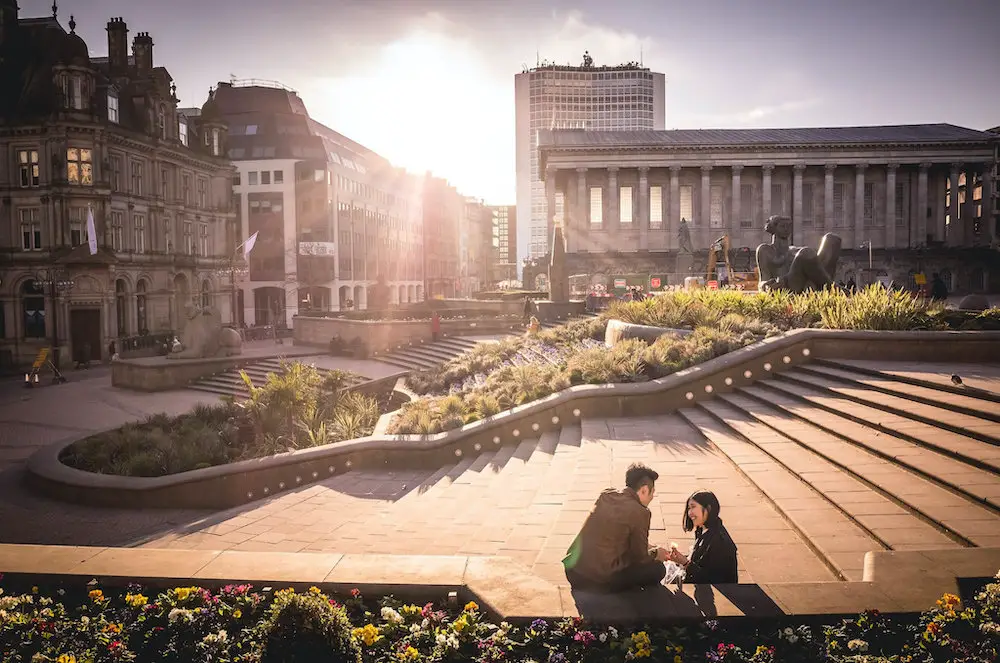
Professional Photography and Emotion
If you’re scratching your head at the title of this chapter, it’s alright. When we think “professional” – no matter whether that’s relating to photography or something else – we hardly ever associate that word with “emotion”.
Professionalism in our culture is all about buttoning up and being all serious. The two don’t seem to really connect. However, in photography, there is one important point where they do meet.
This is the very specific way in which professional photography tells us to express emotion. In other words, the role of emotion in a professional photograph.
Every photograph of any genre has some emotional content. This is normal, natural, and has nothing to do with the photographer’s skill. It’s simply in our human nature to assign emotional values and responses to nearly everything we see.
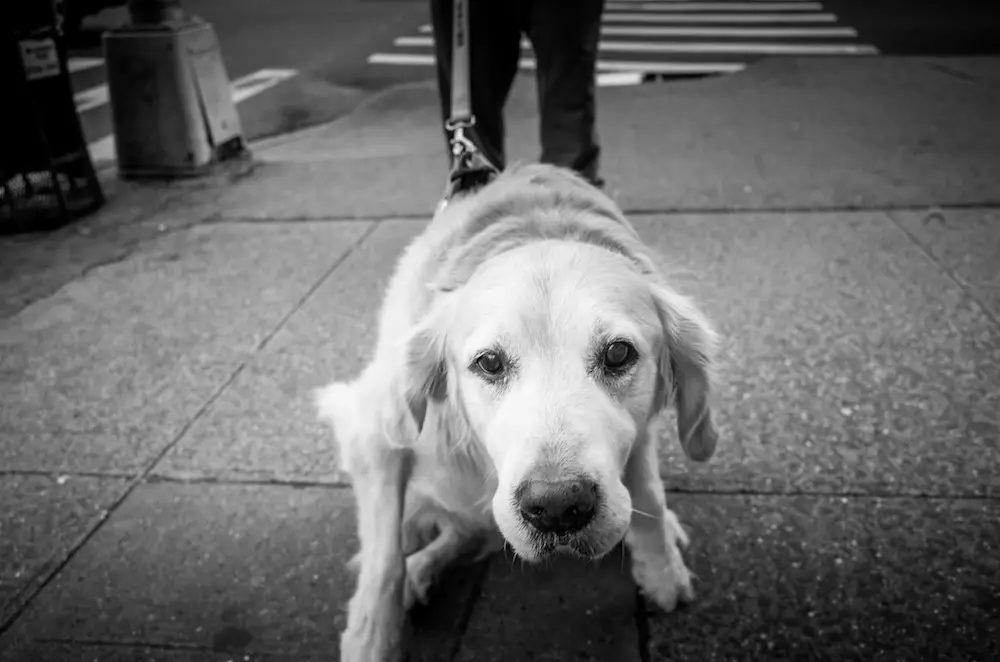
Where professionalism comes in is that it demands of us to take control of the emotions we express in our work, and to make them explicit.
Professional photography is there to communicate. Whether that be a certain message, mood, or feeling, it doesn’t matter.
The point is ultimately to communicate this certain something, using the aesthetics of the shot, and to do so in a way that most people can immediately understand.
Implementing Emotion to Make Photographs Look More Professional
Now think of the way you could turn this into a part of your work.
For example, let’s say your task is to take a simple portrait of someone.
You should begin by considering who this person is, what role they play within the context of the photograph. Are they a lawyer, a shop owner, a homeless drifter, a mother of three, a widower, a writer, a plumber? The list could go on and on!
Take note of this fact, and move on to the next question. What can you do with your camera and your skillset to represent who this person is through your photograph?
Remember, the idea is to be able to show the photo to anyone in the world and let them understand on their own.
An Example of Using Emotion Professionally
Let’s pick a hypothetical person from our above list. Let it be the first one, the lawyer.
This is an accomplished person, a person who believes in great careers and great success. They show up to the photoshoot in an impeccably-tailored cashmere suit and wearing a milky white Hollywood smile.
What you want to express here is this person’s aura. You want to capture their strength, confidence, their position of power and wealth, and so on.
There are no rules as to which part of this person you should bring out. People are complex and can’t be reduced to one word. You can’t cover all the bases.
If it helps, think of it as similar to writing the blurb on the back cover of your favorite book. Without giving anything away, and without dwelling on too many details, give a quick and easy overview of your subject that anyone can understand.
Let’s say you want to bring out the lawyer’s strength and authority.
An easy way to do this would be to shoot from a low vantage point, looking up at the subject.
Exaggerating their size this way, even if it’s subtle, already communicates to the audience that you’re dealing with someone who is larger, more important, more impressive than the average person on the street.
Moving further, experiment with posing, lighting (especially surrounding the face), and exposure in order to achieve the emotional content that best suits the photo.
Again, the rules are all yours. The shot is all yours.
What’s important is that you never stop thinking about what you’re expressing while in the process.
How Composition Can Help Make Photographs Look More Professional
Of all that goes into a great photograph, the composition might be the vaguest thing there is. It is also, unfortunately, the most important.
Forget about lighting. Even a photograph shot on a horrible day with miscast shadows and underexposed by a stop or two can be saved. But only if the composition was worth it, to begin with.
Similarly, even if you are shooting with a lens that didn’t give you the perspective you were going for – cropping can iron that out.
There are a million things you can do to a photo to freshen it up, remove flaws, and achieve something that looks professional.
However, a poorly-composed shot is just not capable of being turned into a stunner. Not through post-processing, nor by any other means.
Not going to happen.
Defining Composition
So, if there is one thing you can do, it’s to hammer it into your head to nail composition so you don’t have to feel sorry afterward in the darkroom (digital or otherwise).
How do you do this? Well, this is where the problems begin.
Composition is a vague thing. It’s not a science, it’s more like an art. No matter whether you consider yourself an artistic photographer or not, photography by itself has many artistic traits, the composition being one of the biggest.
There is no way to avoid that if you want to make this your profession.
Sure, there are some guidelines that are mostly black-on-white. Stuff you can write down to remind yourself of, like the rule of thirds. But beyond these basics, the composition is an individual thing, and it mostly comes from having a certain sense of it.
So, call it intuition, call it an eye for aesthetics, but the truth of the matter is, very few people on this Earth can look at a particular photograph and tell you exactly why it is well-composed.
So, the logical conclusion: you will have to figure it out yourself.
Learning Composition
Thankfully, photographers today have more resources at their disposal than ever before to achieve this goal. You might be thinking this applies more to the seasoned pros, but you’d be mistaken.
The advantage for younger, less experienced folks is actually greater than ever, both in absolute and in relative terms!
With today’s cheap and plentiful digital cameras, as well as the wide variety of software tools we can use, practicing your skills, and developing things such as composition, is easier to realize than you might think.
For instance, let’s say you are working on a composition for street photography. Your mission is to find what it is that makes some shots stand out, while others find their way into the trash bin.
Of course, you can always start by looking at your existing portfolio. Maybe what you find out is that you actually excel at working in controlled environments, and candid street photos taken “from the hip” just don’t come to you naturally.
Or it might be the polar opposite; maybe you’ve been trying to fine-tune your scenes way too much, and when you loosen up and shoot without thinking is when you get your most impressive results.
A Method for Finding Composition
If you truly don’t know where to start, the single most helpful thing you can do is what many older, conservative photographers might sneer at you for: set your digital camera to burst mode and shoot as many frames as you possibly can.
Really go wild, run the battery dry!
Experiment with every angle, every proportion, every choice of subject, every combination of lens, filter, aperture, et cetera.
By the time you’re done, you will probably have produced hundreds, if not thousands of photographs. Now comes the hard part.
You’re going to take all of these home and study them. Every last one.
The end goal here is to isolate those shots that have a certain something to them.
“A certain something” is what most people like to say when they can feel that a photograph is well-composed, but can’t really find the words to describe why. This is exactly what you should find in your giant pile of candid shots now. Trust me, it’ll be in there somewhere.
If you really took a ton of shots, there will probably be a whole group of ones that exhibit at least a certain something. You’ll know them when you find them.
So, let’s say you’re finished, you threw out 992 unremarkable photographs and are left with 8 promising ones. You’ve made it to the fun part.
Essentially, you’re going to be playing a game of Where’s Waldo.
In our case, Waldo is that intangible difference that is only there in our 8 shots that made it and missing in the 992 that didn’t.
It is not crucial to be able to articulate the difference between the former and the latter. However, you should at the very least be able to see it.
And once you do, you probably already figured what’s next. Go out again, try to replicate the results! Rinse, repeat, and most importantly, experiment.
Welcome to learning composition.
The Bottom Line on Composition
If the above guide left you with a bad taste in your mouth, I promise you you’re not alone. Learning composition, particularly by experimenting blindly, doesn’t sound hopeful.
It might make you feel like you know nothing about the photography you’re passionate about, or as if taking a good shot is a matter of pure luck.
It might also make you think that embarking on this quest to make your photographs look more professional was biting off more than you can chew. Where to even begin?
However, if you follow through with the steps laid out above, the opposite is what will eventually emerge.
Eventually, you will begin to develop an intuitive ability to recognize composition. Something that many photographers will call something like a sixth sense.
In the end, it isn’t much more than getting your brain accustomed to what kinds of shots move us, and what kinds don’t.
For some people, this intuition sets in after seeing a thousand different photographs and shooting a million more. For some, it’s after seeing a million and shooting a thousand.
And for some, it might require seeing a trillion and shooting just two. You can never know.
The goal here is to always keep trying, always keep experimenting, and always strive to keep perfecting the formula you already have.
Good luck!