
Whether you’re just starting out or have been practicing photography your whole life, an ounce of variety can never hurt. Changing up your routine and experimenting with new genres, styles, or techniques is always a good idea. Enter steel wool photography.
For some, it’s an esoteric practice that sounds too dangerous or risky to try. Others have wanted to dabble in steel wool photography for a long time, but just don’t know how and lack the resources to find out.
No matter which one you are, it’s never too late to try something new. That is why we’re going to go over the ins and outs of this subject today so that by the end, you will know everything you need to know to start producing stunning photography using steel wool.
- What is Steel Wool Photography?
- Gear You’ll Need
- Safety Guidelines for Steel Wool Photography
- Steel Wool Photography Step-by-Step
- The Best Camera Settings for Steel Wool Photography
What Is Steel Wool Photography All About?
First, let’s take a good look at what exactly steel wool photography is so that we all have a common understanding of what it involves (and what it does not).
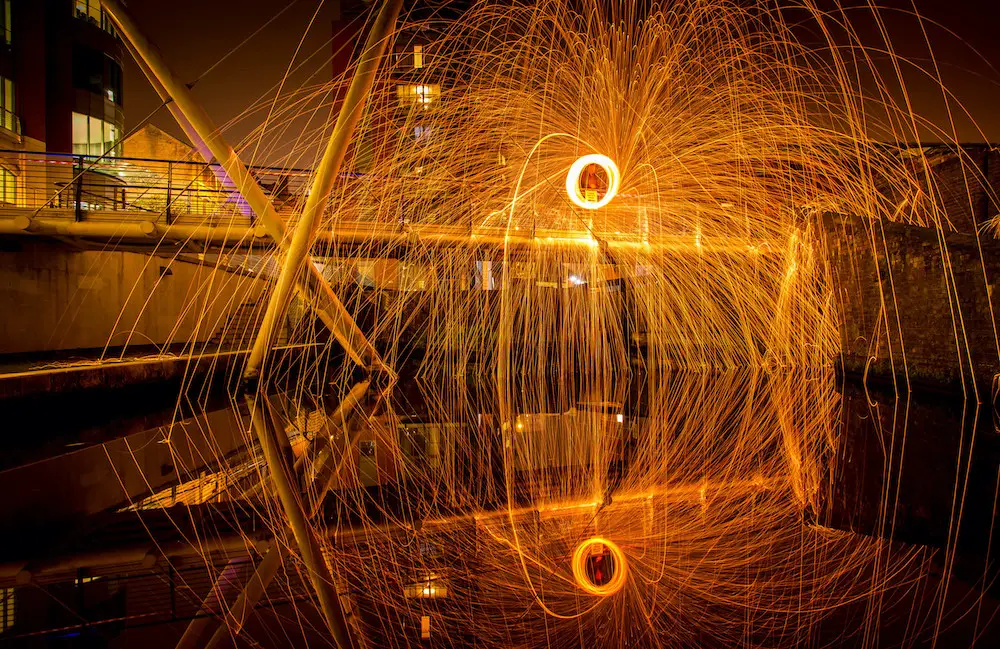
Steel wool photography is all about making use of a particularly expressive and exciting phenomenon – the appearance of steel wool when it is heated to extreme temperatures, producing glowing embers of light.
In person, this can look dramatic enough. But it is through long exposures that burning steel wool achieves its full impact. Usually, the steel wool is spun as it burns. This creates streaks of fire that are really a sight to behold.
Similar effects to burning steel wool are, for example, glowing campfires photographed at night, likewise under long exposures. Speaking of which: you would want to shoot your steel wool photography at night as well, as daylight contrast (even with the help of filters) will not be enough to let the streaks stand out.
Equipment Necessary For Steel Wool Photography
Steel wool photography done right can create gorgeous shots without the need for incredibly costly gear. This is one of the reasons why the genre is receiving more and more attention these days.
Let’s go over all the stuff you need in order to make great photographs using burning steel wool.
1. Steel Wool
First, the obvious. Perhaps of little surprise, you’ll need some good steel wool for this kind of shot. But this is where the self-evident part ends; you can’t just use any steel wool, like the kind that you might find by your kitchen sink.
High-quality steel wool has many uses besides scrubbing off dirt and grease. For example, it is used in metalworking to smooth and buff out surfaces, or even to polish steel or glass plates.
For these varying purposes, steel wool exists in many grades. If your steel wool doesn’t have a fineness grade anywhere on the packaging, you should assume it’s not suitable for the kind of photography we want to practice here.
Steel wool photography, with few if any exceptions, necessitates grade 000 or 0000 steel wool. This is the finest kind that you can normally buy at any regular hardware store. Any coarser number will not be suitable for creating the effect we’re going for, and steel wool of grade 1 or above will be entirely useless.
2. Lighter
You’re going to want to light the steel wool on fire in a controlled manner. For this, I recommend using some form of electric lighter. The ubiquitous BIC lighters with the long handle will work just fine, though if you want to be extra safe, consider a long-necked arc lighter.
3. Camera
Of course, even if you orchestrate all the action expertly, it’d be a waste if there was no camera there to immortalize the moment! Almost any kind of camera will be suitable for steel wool photography, as long as it is capable of long exposures.

Some cameras have long shutter speeds that go up to a few seconds. This can already be enough to achieve quite a pleasant effect with steel wool. However, if you want something more dramatic, you’re probably going to use either the self-timer, intervalometer, or the T or B shutter settings. More on that further below!
4. Tripod
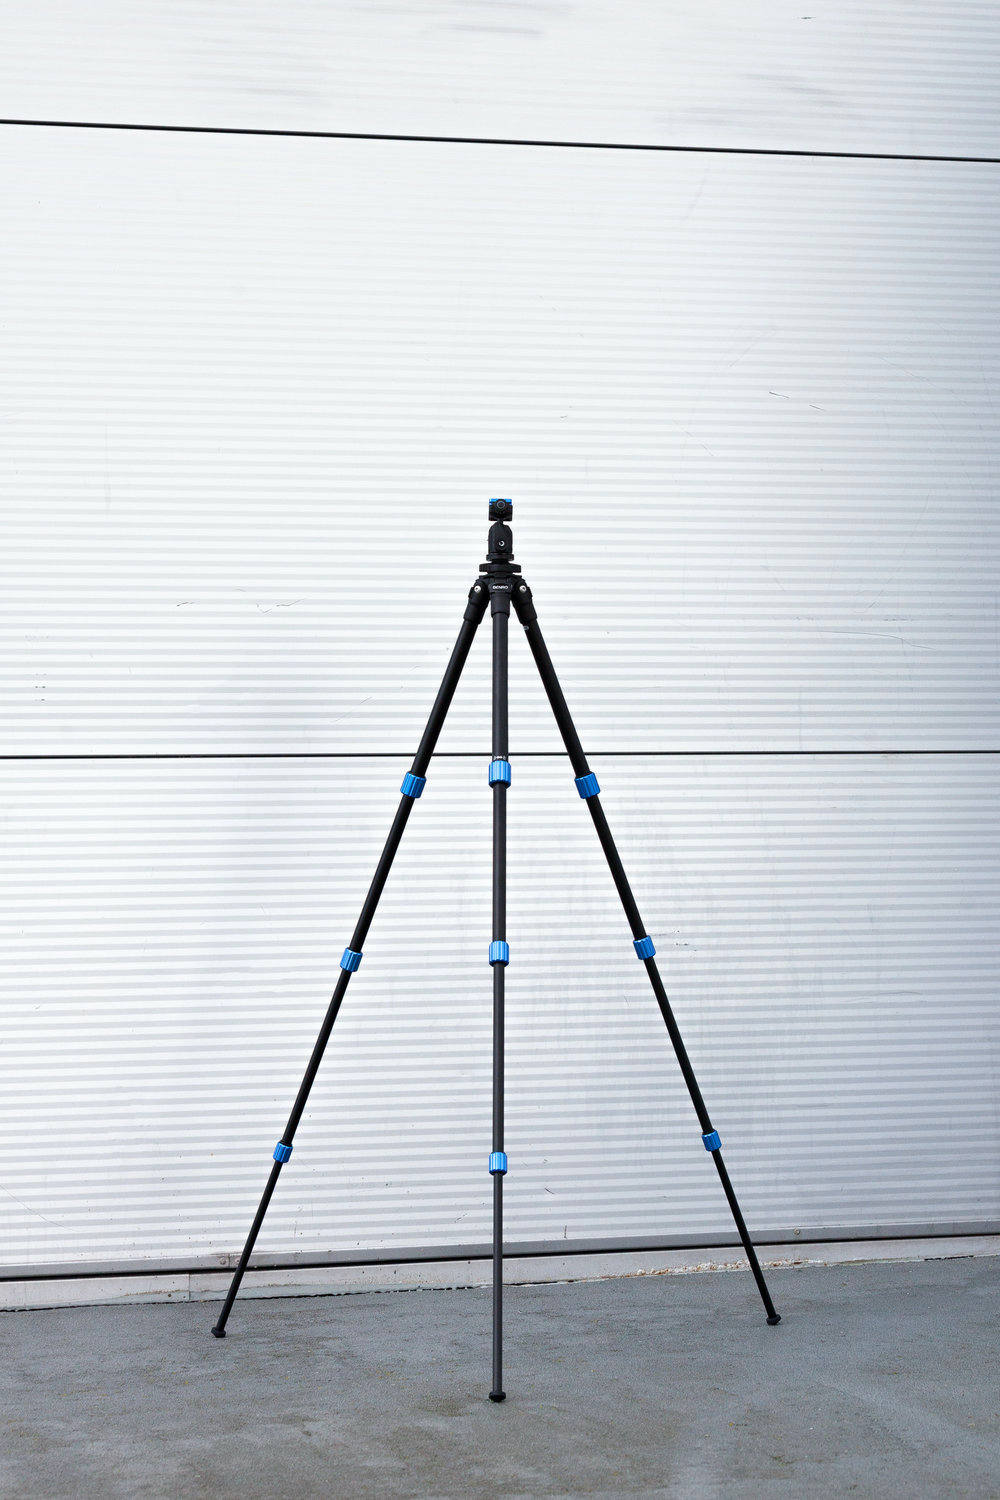
Your camera needs to be well-supported during the shot, so a tripod would be a good idea. I would only forgo the use of this if you have another stable surface at a reasonable, safe distance from the action in mind.
5. Cable Release
This one’s a no-brainer. It’s cheap, easy to use, and makes life so much easier for long exposures of any kind. A cable release allows you to not just keep the camera steady and mitigate shake. It also lets you keep a safe distance, which is particularly important for steel wool photography.
6. Whisk
In order to send our steel wool flying, we need to attach it to something with a solid grip. A simple metal whisk is the most common implement used for this since it’s cheap, most people have one lying around, and it does the job quite well.
Note that, because of safety reasons, you won’t be holding the whisk in your hand. Instead, you’re going to attach it to a rope or something similar to keep a safe distance. Hence, try to find a whisk with a loop at one end.
Also, note that a silicone whisk is not appropriate for steel wool photography. You’re going to work with extreme temperatures that can easily melt plastics and other materials, so a metal whisk is absolutely necessary.
7. Rope
As I said, you’ll need to attach this to your whisk to be able to hold it at a safe distance. You can use many things – a dog leash, a thick piece of fishing rope, a metal chain, or something else entirely. What matters is that it’s sturdy enough that it won’t tear, melt, or snap. It should also be long enough – preferably at least two or three feet.
Safety When Attempting Steel Wool Photography
Before we go over the process involved in producing steel wool photography, it’s crucial to understand the risks involved in this kind of work. Steel wool photography is not for the faint of heart, and by no means should you assume that it is perfectly safe even if you follow all of the instructions in this guide to the letter.
Cautiously decide for yourself whether you’re willing to take the risk of damage or injury before reading on.
1. Protect Yourself and Others Nearby
Many people shoot steel wool photography with the help of a friend. This is not necessary depending on your camera settings, but it can make life a bit easier and decrease the risk of accidental slip-ups.
That said, be absolutely sure that there isn’t anyone else besides you and your partner around. You wouldn’t want to risk bystanders getting hurt because they don’t know what’s going on.
Be sure that anyone who is going to be near the steel wool at the time of exposure is adequately protected. That is to say, wear safety gloves and thick clothing, protect your eyes with goggles, and make sure that there are no sensitive areas of your body exposed to potential burns and other injuries.
2. Protect Your Camera and Lens
As previously mentioned, it’s advised to position your camera at a safe distance on a tripod, with you some further distance away releasing the shutter remotely via cable.
Still, you would want to make sure the camera and lens are further protected, just in case. Think carefully about where you set your gear up and mind the possibility of stray debris flying your way. Consider adding a protective UV filter or even a lens hood to your front element to make sure it doesn’t get damaged.
3. Get A Permit
This might not be necessary depending on where you’re working, but it’s a good idea anyway. By getting a permit from your local authority, you can make sure that emergency services will be ready and notified more quickly in case anything happens.
It can also help in case anyone files a complaint or if there is some misunderstanding about what you’re doing.
Remember: to the uninitiated, steel wool photography can look quite dangerous, even frightening!
4. Practice Fire Safety
Accidentally starting a fire is arguably one of the biggest risks involved in steel wool photography.
Never, and that means never, under no circumstances light steel wool anywhere near wooden buildings, or any other structure that could easily catch fire! This includes cars, vegetation, and small sheds – you get the idea.
Further observe your surroundings to ascertain whether there are any risks should sparks or embers fly outward in any direction. If you really want to come prepared, bring a fire extinguisher as well. You never know what might happen!
Steel Wool Photography – A Quick Guide
Now that we have covered all the relevant bases, let’s get to the meat of the matter. How do you take compelling photographs using steel wool? The following quick guide should have you on your way there in no time.
Tip 1: Preparing Your Gear
First, before you head out, you need to make sure you come prepared. Take the whisk mentioned earlier and attach your rope, strap, cord, or what-have-you securely.
Next, fluff up your choice of steel wool and stuff it into the metal portion of the whisk. Make sure to not fill out the whisk too tightly. There needs to be space for small air pockets to form, or you’re not going to get a good burn.
With this done, head to your shooting location and set up your camera. As mentioned earlier, I’d strongly recommend a tripod and cable release for this job.
Tip 2: Shooting
While you have a few options here concerning camera settings and gear setup, we will cover those details later. For now, let’s look at the most straightforward way you can get good steel wool shots without much practice.
If this is your first time shooting steel wool, I’d recommend taking a friend with you. It just helps to have a few fewer things to worry about at once while stuff is flying and spinning in the air.
Tell your friend to hold the steel wool by the cord or rope. Position yourself by the camera, cable release in hand, and give them a mark to light the steel wool. You only need a small spark, as the air passing through the wool will allow the fire to grow by itself.
As soon as the spark flies, your partner should start spinning the whisk by the rope end. This is your call to fire the shutter.
Usually, steel wool photography is done at exposure times of between 5 and 10 seconds. Assuming that, you should be able to crank out 2-10 frames until the fire burns out. Yep, it’s that quick!
Tip 3: Re-Shooting, And Safety
If you want to use more than one ball of steel wool during your shoot, come prepared. I recommend bringing a bucket of water to dip the whisk in after use.
This makes sure that the spent wool doesn’t accidentally light anything on fire – remember, even if it isn’t burning, it’s still dangerously hot!
Especially if you’re going to do multiple takes, practice, and practice thoroughly the motions of spinning the whisk first. While intuitive, it’s not the easiest thing in the world, and a whisk hitting you in the face is a lot less of a nuisance than a burning whisk hitting you in the face.
When you’re ready, you can refill your whisk and re-take the shot exactly as described above.
What Camera Settings To Use For Steel Wool Photography?
Now that we know what steel wool photography is, what the risks are, and how to stay safe, the next thing to take a look at is what choice of camera, lens, or settings gets you the best results.
With regards to exposure settings, a quick look at our old friend the exposure triangle should already give you a fair idea of what we need.
Our shutter speed is relatively constrained for the purposes of this kind of shot because anything faster than 5 seconds will not really catch a dramatic “light streaks” effect. Conversely, anything longer than 20-25 seconds risks looking too overblown or too blurry. Try to find something within this range that suits you best.
With a shutter speed in this range, there is no way that we could get by shooting wide open. Instead, I recommend stopping down your lens to at least f/8, though with shutter speeds towards the very long end f/11 or f/16 would be even better.
Though you will likely be shooting at night or during the very early morning hours, it’s a good idea to keep the ISO low anyway. Why? The burning steel wool is going to lend your scene more than enough light as it is, so anything above 100-250 risks overexposure.
Best Camera For Steel Wool Photography
This might sound surprising, but for most people, the choice of camera is the least important thing to consider when it comes to steel wool photography. Nearly every digital camera ever made comes with some facility for long exposures, and as long as you’ve got that covered, there isn’t much else to consider.
However, if you happen to have multiple camera bodies lying around and are wondering which to take with you, my suggestion would be: take the toughest you have. A pro-grade, weather-sealed body will have much lower chances of accidentally getting damaged than an entry-level model.
Which Shutter Speed Mode To Use?
This is a bit more of a tricky question. Which shutter modes you have at your disposal will vary depending on your camera, but in basic terms, there is T (time), B (bulb), as well as interval timer shooting and using the self-timer.
If you don’t need speeds beyond 10 seconds, you might also use your shutter’s long speeds for the same effect.
In T, the shutter stays open indefinitely once triggered, and it takes another ‘click’ to close.
In B, the shutter stays open for as long as you hold the release. Letting go immediately ends the exposure.
Both of these modes are generally used when the camera is stabilized. T is usually used with a cable release.
A self-timer is a way to automate shooting when you know the exact moment of exposure in advance. It’s also helpful when you’re trying to shoot burning steel wool solo and don’t have a second pair of hands around.
Meanwhile, an intervalometer (or interval timer) is like a self-timer, but instead of counting down to a single exposure, it sets the camera to fire off a series with automated gaps in between. Very useful when operated correctly.
In the end, only a careful study of your camera’s controls and personal preference can determine which of these modes to use. A 10-second exposure is going to look the same (all else being equal) no matter which of these modes you use, so it’s all up to you!
Best Lens For Steel Wool Photography
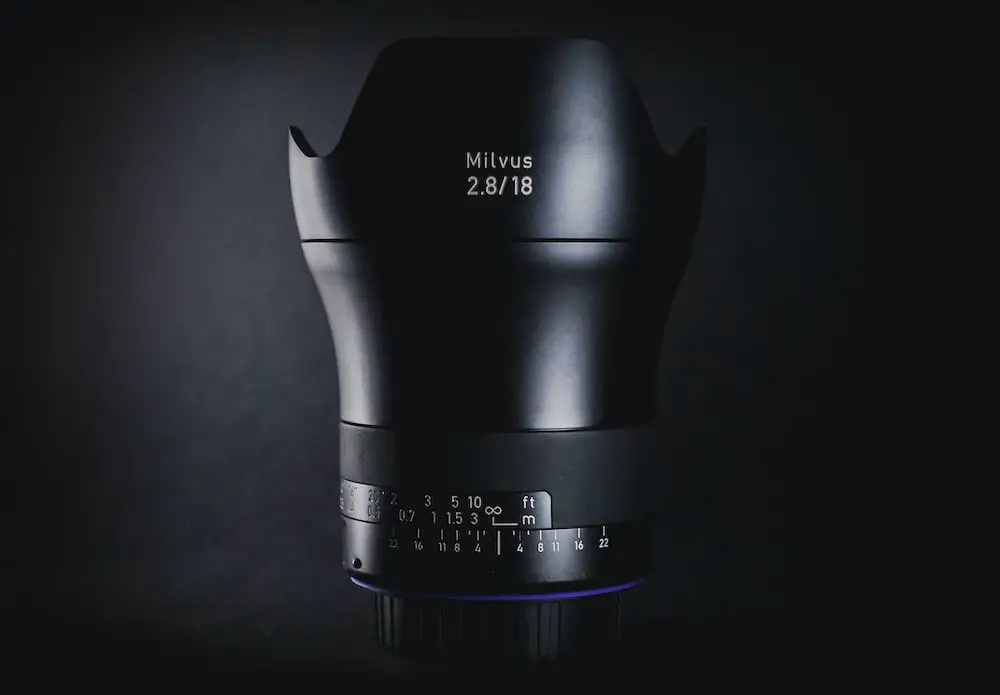
Your choice of lens when shooting steel wool is determined both by function and personal taste.
Some prefer the drama of a good wide-angle in the range of 18-35mm. Others swear by their trusty “nifty fifty”.
Yet others settle on a telephoto, usually 90mm and up. This has the added practical advantage of keeping you further away from the action.
In the end, there is no one type of lens that is the best for steel wool photography. It mostly depends on what perspective you’re going for. However, do consider how close to the fire you want to be.
A good ultra-wide-angle shot of burning steel wool, or even one taken with a fisheye lens, can look breathtaking. However, proper framing might involve getting a little too close for comfort.
With that in mind, perhaps it would make more sense to start off with a longer focal length if you don’t have a lot of experience with this yet.
The speed of your lens aperture generally doesn’t matter much for steel wool photography since you’ll be shooting stopped down in most cases. However, if you really want to, you can experiment with fast lenses and their shallow depths of field.
Do note that most digital cameras don’t usually go below ISO 100. As a result, a faster aperture will require a proportionately shorter exposure time.
Autofocus Or Manual Focus For Steel Wool Photography?
By far, most people I know who shoot steel wool photography prefer to manually focus the shot. Why?
There is a simple reason. Your camera will be firing from a stabilized position, and your subject will not change in terms of distance to you. This means that autofocus is hardly necessary, and can in fact ruin your shot if it accidentally messes up.
Sure, today’s autofocus systems are highly advanced, and the chances of a glitch are rare. But you’ll be dealing in an environment that is tough on any light meter – a pitch-black foreground combined with a brilliant, burning subject.
This, combined with the spinning motion of the steel wool, can throw off autofocus systems, especially in AF-C (continuous) mode.
Hence, I’d say you should save yourself the trouble and just focus manually. Set your camera up first, then select the spot you’re going to use to spin your steel wool from. Make sure to not move back and forth much during the shot.
Again, note that most steel wool photography necessitates stopping the lens down. This means that your depth of field will be quite large anyway, making fine focusing irrelevant.
The Bottom Line
Steel wool photography can be one of the most visually distinctive and exciting ways to add some oomph to your existing portfolio. It’s a lot of fun to experiment with, and the creative possibilities are all up to you!
At the same time, it is one of the riskier photographic endeavors out there. Sure, it does look cool and effortless when a pro does it. But that does not mean that you can just jump right in and fool around with something like steel wool photography carelessly!
Before lighting anything on fire, please familiarize yourself with the safety guidelines mentioned in this post and elsewhere. Do not attempt steel wool photography unless everyone present is properly briefed.
With that said, steel wool photography, performed in a safe environment, is one of the most magical phenomena you can record with a camera. Think about that for a moment – and don’t forget to have fun while you’re at it!
