
In the world of photography, myths and legends abound. The best time of day to take pictures is a good example of this. Many will tell you with full conviction that sunsets reign supreme, others will say shooting at noon always gets you the best results.
Whoever you ask, you will probably get different answers. What’s worse, different authorities on the subject like to contradict each other! This can be confusing, overwhelming, even discouraging.
But don’t worry! The best time of day to take pictures isn’t as arbitrary as it might seem.
In fact, there is somewhat of a science behind the cycles of the day. And this science can indeed be learned relatively quickly and easily.
Knowing all the rules is going to give you the freedom to make an educated decision for your own preferences.
So, join us in this comprehensive guide where we will take a look at the question of when and how exactly to take stunning shots outdoors.
- Are Sunrises the Best Time of Day to Take Pictures?
- Our Guide to Noon Photography
- Everything to Consider About Shooting in the Afternoon
- Is Sunset Photography the Best of Both Worlds?
- Nighttime Photography – The Trickiest of Them All?
Best Time Of Day To Take Pictures – Sunrise And Early Morning

Many will claim that the early hours just surrounding sunrise are the best time of day to take pictures. With the world still waking up and baked in warm colors, everything takes on a bit of a romantic hue.
There is a bit of a philosophical bent to it, too. By forcing yourself to get up and out of the house early, you bring yourself out of your comfort zone. Thus, many photographers take pride in sunrise photography as a sort of tradition that instills discipline.
If you want to experiment with sunrise and early morning photography yourself, you’ll find some quick tips below.
Don’t Be Scared Of Flares
If there’s one thing that’s classic about sunrise photography, it’s the appearance of lens flares.
These happen when sunlight enters your lens in a highly concentrated manner, often head-on. In most cases, they appear as streaks, beams, or star-shaped formations of light.
If you’re not careful, flares can consume your frame. This is why many photographers consider them a visual flaw, and something to avoid.
For sure, you can try to minimize flares. Using lens hoods, certain kinds of polarizing filters, as well as changing your composition can all help.
The thing is, when photographing subjects at sunrise, flares are often not a bug, but a feature. Because shooting away from the sun is very difficult in the dim light of the early morning, you will have to face at least some flares.
So, instead of trying in vain to eliminate them completely, play with them instead!
For example, you can frame a flare with a nice piece of architecture, or a tree. The rays of sunlight passing through narrow gaps like these can look very picturesque, especially after some editing.
Consider Pre-Sunrises
One shooting scenario that unfortunately doesn’t get due attention is the time just before sunrise. On the one hand, the sky remains bright enough to shoot with a moderately fast lens wide open. But with the sun still below the horizon, you get some very unique lighting.
During these hours, colors will appear a bit muted and tired, much like the very few passersby you’re likely to see outside.
There are some key visual elements that make a pre-sunrise shot stand out. For example, you will find that most street lamps and other lights will still be shining at this time. And not only that, but they will actually be rather easy to see, as the sun isn’t washing them out yet!
If you’re shooting in a normally busy environment but would rather do without the crowds, this is your time. The combination of empty streets and daytime colors only really exists during this short window.
Note that, because of the lack of direct sunlight during these hours, you will probably still need to use a tripod.
Use Sunrise Backlighting For Moody People Shots
As soon as the sun is up, your situation is going to change dramatically. Suddenly, you’re dealing with much higher exposure values. And as the world around you starts getting out of bed, expect a lot more movement and vibrancy.
Every minute during the initial sunrise phase looks slightly different, which is why timing is crucial. The term “golden hour” might come to mind. Don’t worry, it’s going to pop up a lot in this guide.
If you’re shooting portraits, this spectacle doesn’t have to compete with your subject. Instead, it can serve as a wonderful background!
If your subject is a couple, you can emphasize the warmer tones. Maybe even consider letting in a flare here or there in order to bring out the romantic aspect of the frame.
Best Time Of Day To Take Pictures – Photography at Noon, A Good Idea?
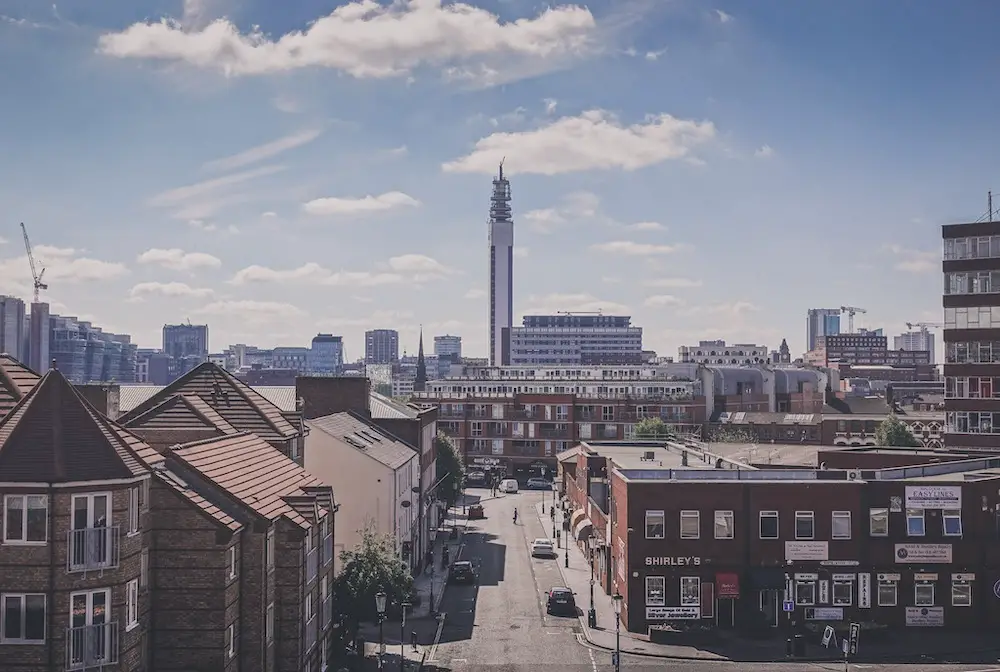
Many a young photographer has hesitated even attempting noon photography because they were told that this time of day creates “too much harsh lighting”.
This is only half-true. While the hours surrounding the sun’s zenith can be challenging, they can also be incredibly rewarding. With the right approach and some practice, noon can actually be the best time of day to take pictures!
Use Exposure Compensation Smartly
The single biggest challenge with photography at noon is that there’s just too much light. Almost every outdoor shot risks overexposure just by virtue of the sun being overhead.
You also won’t be able to balance this out much with shadows because, well, there won’t be that many!
A handy way to overcome this is by making use of exposure compensation.
This is one of those camera features that many sadly overlook. While you don’t hear about exposure compensation in many camera ads or reviews, and it’s not the kind of flashy thing that sells like super-fast lenses or crazy ISOs do, it can very much revolutionize your workflow.
In a nutshell, exposure compensation is an override to your camera’s exposure system. Turn the dial to -1, and every internal setting including your camera’s meter will adjust to give you an image that is pulled by one stop.
So, when faced with overblown highlights and too intense sunlight, what you can do is simply turn down the exposure compensation to immediately get a nicer shot. It’s almost like magic!
Use Fill Flash If Necessary
Particularly if you’re trying to do portraits out in the sun, fill-flash could be a good idea. With all the light coming in from right over your heads, you’ll run the risk of unsightly shadows appearing over your subjects’ faces.
Fill flash negates this by smoothing out these light differences. As the name implies, it literally “fills” smaller gaps of shaded areas with light. Facial geometry appears more even, and harsh edges become tamer.
Most DSLRs and even many mirrorless cameras these days generally have a small pop-up flash that is more than strong enough to act as a fill flash for daylight.
Just remember to set it up properly. You wouldn’t want to accidentally use the wrong kind of flash!
Use Shade As Much As Possible
When you’re shooting at high noon, shade is your best friend. Not just for avoiding sunburn, but also for making your shots look more interesting.
Sure, you can use exposure compensation so your work doesn’t come out overblown.
But even then, having everything evenly lit from above can make some subjects look less interesting than what they deserve.
Instead, try hunting for the few spots of shade that you can find and concentrate on them. You can make your composition much more compelling by incorporating varied elements of light and dark.
These can “pop” very effectively because at noon you’re working with particularly strong contrasts.
Of course, if you’re in an urban environment, buildings will be the single biggest source of larger shadows.
A traditional scene often seen in portraiture is a row of subjects standing right below the roof of a building. When shot at noon, this is very practical because you get to use the facade as a contrasting backdrop.
At the same time, the small sliver of shadow from the roof effectively takes the role of fill-flash in evening out your subjects’ faces.
If you’re a street photographer, you might also be interested in analyzing how patterns of light and shadow develop in streets and alleys. These can be used very creatively to give subjects an interesting look.
The most important thing is to be aware of your surroundings and experiment!
Best Time Of Day To Take Pictures – Get The Best Of Afternoon Photographs?
Once the sun begins slowly making its way back down to the horizon, the calmest shooting environment of the day will commence.
Shadows will appear softer than they were at noon.
At the same time, the light coming in from above will not be nearly as overbearing.
Afternoon photography is a solid option if you don’t want the sky or the sunlight to take up a significant role within your composition. However, you can generally still keep using the same rules outlined above for noon photography while composing.
Fill flash should be your constant companion, and the fine contrasts between light and shadow are key during this calmer phase of the day.
If the sky happens to be cloudy, this makes your job only that much easier (or harder, depending on what you’re going for). Contrasts will be even lower, the dynamic range also.
Your surroundings are going to take on a strong blue hue as well. Consider using filters to remedy this.
One more thing to note is that during the afternoon, sunlight will be at its most yellow in terms of temperature. This also applies to late mornings, and it is considered one of the most flattering environments for various skin tones.
So, if you are shooting portraits, note down the color temperature and see how it flatters your model. Opt for the time of day that really brings out their best features.
While afternoons are a good catch-all option, there is no one-size-fits-all. So, doing your homework pays dividends!
Best Time Of Day To Take Pictures – Is Sunset The Best Time?
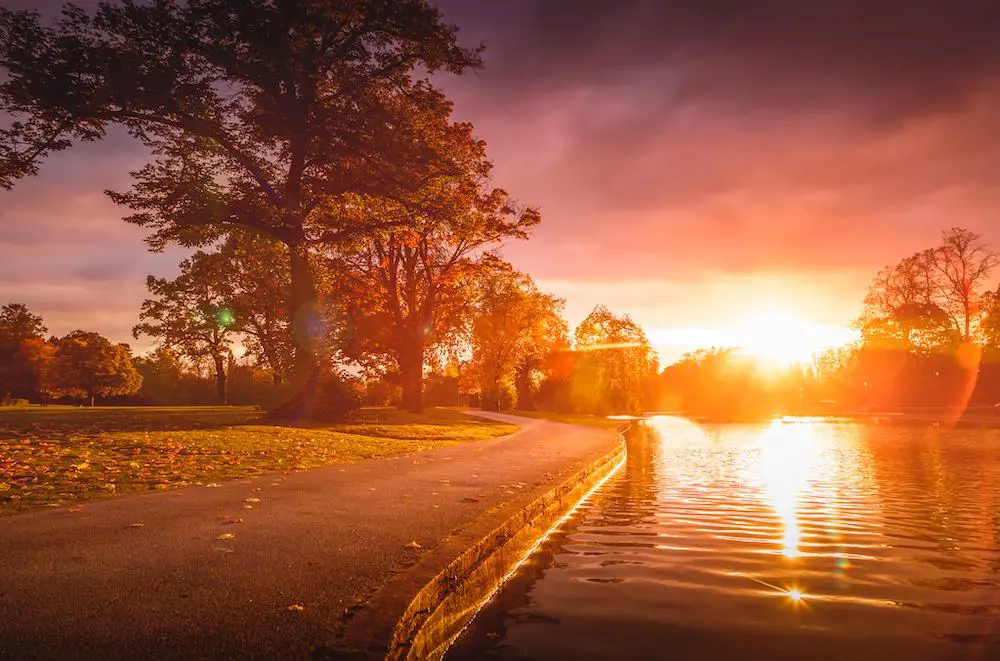
Of all the phases of daylight touted as the best for producing compelling photography, sunsets are probably some of the most well-known.
The evening hours give you everything that sunrises do. With its warm, soft romantic colors, the overall mood of a sunset and that of a sunrise are pretty close.
However, there are some strong differences, too.
Depending on your location, haze buildup might be significantly more noticeable in the evening. By contrast, the early mornings are usually when the sky is at its clearest.
Also, consider the issue of crowds. As mentioned earlier, sunrise photography gives you a sort of a loophole. You can photograph otherwise very dense, touristy areas in daylight, but without all of the passersby.
At sunset, things can be different. Sure, this depends on where you’re based, but generally speaking, a lot more people tend to be out and about by night than by early morning.
Of course, maybe big crowds are what you’re looking after. In that case, you’re going to have a great time shooting at sunset.
Also, just as a minor quibble to get out of the way: if you aim to really nail sunrise photography, you know that means getting up early. And not just that, most likely you’ll be setting up your gear outside in the dark.
By contrast, you can shoot sunsets without having to worry about any of that as long as you’re out of the house on time.
The “Golden Hour”, And What It Means
Alright, now let’s address the elephant in the room. “Golden hour” is a phrase thrown around with little remorse when people ask what the best time of day to take pictures is.
But what’s behind it, exactly? And how can it be useful to you out in the field?
In simple terms, the golden hour is a time frame spanning – you guessed it – about an hour before and after sunset and sunrise, respectively. Within this window, the sky is still giving off a large amount of light, meaning handheld exposures remain possible.
On the other hand, the sun will have already begun rising/setting, meaning that the colors of the sky can be incredibly dramatic and colorful.
Each minute during the golden hour has a slightly different look to it.
This is because the hour goes through distinct phases. At sunrise, the sky shifts from a neutral light blue to yellow, then gold, then red, culminating in a strong purple or magenta color.
As the ground will be less and less well-lit by the setting sun, the relative luminosity of the sky is also going to increase.
At some point, the sun will entirely dip beneath the horizon.
Only a few minutes thereafter, the last streaks of reddish light are going to disappear, and nighttime will begin.
For sunrises, simply reverse the above chronology.
The philosophy behind using the golden hour for your photography is very simple.
For lack of any better words, it just looks cool. That’s really it. Even mundane subjects can appear really stunning when baked in those rays of gold, yellow, red, or any tint in between depending on your exact timing.
Perfecting Golden Hour Photography
The one word of caution regarding photography during the golden hour is that it’s way harder than it looks.
This is because the dynamic range of your photograph will be very high during this period, and the closer you get to the actual sunset or sunrise, the more extreme this will be.
In other words, the contrast between your foreground and the sky is going to be tough to deal with. Either over-or underexposing your shot too much to compensate for this will not just be fiddly, it will result in unbalanced-looking photos.
Late during the sunset golden hour, you might not even be able to get out a good exposure at all. Consequently, shooting earlier, more than an hour ahead of the sun setting, can lack the excitement that the golden hour is all about.
Therefore, really mastering this shooting environment requires you to be an expert in timing. It helps to know the place where you’re shooting, of course.
Still, if you can take precise measurements of sunset and sunrise times and follow them accurately, you’ll be much better off.
Using Exposure Bracketing For Sunset Photography
One trick worth knowing about, and discussing in-depth in our full guide to sunset photography, is exposure bracketing. Essentially, what you can do here is take a burst of shots in quick succession with changes in exposure between them.
So, for example, you might take one normally-exposed shot, one deliberately underexposed one, and one deliberately overexposed one. Afterward, you can superimpose them over each other, eliminating the aspects of each individual shot that came out poorly.
And voilà, suddenly you have one whole composite photograph where the exposure looks just right!
This technique is extremely useful for cases when you’re dealing with a lot of dynamic range. And in outdoor photography, sunsets just happen to be one of the highest-dynamic range environments you could think of.
Best Time Of Day To Take Pictures – Night Time Photography, The Trickiest One?
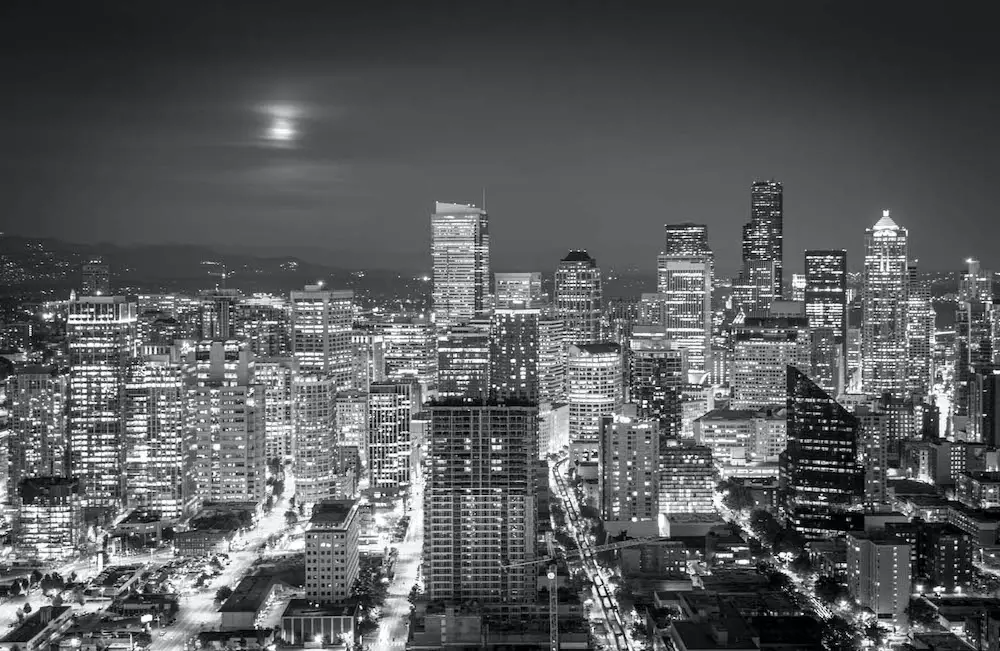
If you’re the kind to go out late a lot, you must also appreciate how much the same places, people, and events can have a whole different feel to them at night.
Part of it is our brains having trouble viewing things contrary to what we’re used to seeing every day.
But part of it is also down to the fact that the low light at nighttime plays with our surroundings in a very special way.
The night has its own feel, its own atmosphere, and there is no imitating it.
This means, of course, that there is a whole discipline dedicated specifically to photographing subjects at night. To many beginners, this can seem daunting. After all, if our cameras are light-boxes, how are we to survive in an environment with barely any light?
Finding Light In Hidden Places
The answer is: even at night, there will be light to go around. Sure, it won’t exactly be there in abundance. But a scarce resource remains a resource that can be harnessed.
All that it takes is finding light and seizing it. An obvious example is street lamps.
Shooting directly below one, while keeping a row of them in the frame, can easily produce a shot that expresses the dark moodiness of the night while still being well-exposed without the need for flash.
Other potential light sources include marquees and other signs, as well as headlights and reflectors from vehicles. And when out of town, don’t forget about the moon!
Bodies of water can also reflect surprisingly large amounts of light across large distances. This becomes more pronounced the closer you get to sunrise.
In fact, some use the term “blue hour” to refer to the period just before the first glimpse of the sun in the morning. This is when the sky and ambient light take on a faint blue tone.
Water can really flatter this hue incredibly well, and it can help you get better exposure in the dark thanks to its reflective power.
Creating A Stabilized Shot
When out and about late in the dark, your most interesting subjects are going to be on the move. From nighttime parties and festivals to subjects such as cars and nocturnal wildlife, most of what you can set your eye on at this time will not be perfectly still.
Of course, the combination of a fast shutter speed and extremely low light are anything but optimal from an exposure perspective. While you can (and should) shoot at a high ISO when photographing at night, this alone can’t solve your problem without adding significant noise.
Similarly, opting for a lower focal length might help. Telephoto lenses are much more sensitive to vibration due to their high magnification. But of course, if the shot you’re going for isn’t possible with a wide-angle lens, there’s no sense in trying to make it fit.
At other times of the day, such as in sunrise photography, this might call for using a tripod. But setting up a stationary camera set up in complete darkness can be too much of a hassle, not to mention dangerous.
Therefore, you have two options.
Image Stabilization for Nighttime Photography
Option number one: you use highly-stabilized lenses and cameras. Today, IBIS (in-body image stabilization) is all the rage, and most top-flight models from the major brands have it. Using IBIS means you can reliably reduce camera shake by a few stops no matter what lens or exposure settings you’re using.
But you don’t have to invest in a completely new system in order to benefit from stabilized handheld shots. Even on older camera bodies, lenses with sophisticated vibration-reduction mechanisms are now widely available.
Adding one of these to your bag could be the key to mastering low-light photography in the evenings and at night.
Improvising Image Stabilization Using Your Body
Option number two: you use your body to stabilize your images. This is a classic trick innovated by photojournalists, war photographers, and other pros that often have to make do without heavy equipment in the field.
There are many methods to stabilize pictures using your body, but let’s go over some essential ones.
First, you can hold your left forearm out and use it as a base for your camera. Sure, this will not get rid of vibration nearly as much as proper IBIS or VR systems would.
But it can still make enough of a difference to get a shot up to a salvageable level, and sometimes that’s all you need. Another plus: setting up takes about a second, and it can be done anywhere!
If you can afford to, of course, it pays off much more to have an immovable, stable surface to place your camera on. Whether it’s a wall, a table, a step on a stairwell, or even the ground, anything solid will do.
When using one of these kinds of surfaces, remember to position your body in such a way so that you can stabilize the camera from nearly all sides while it’s firing.
A more advanced trick involves squatting or sitting down on the floor and putting your elbows on your knees and pressing against the sides of your body. This way, with the camera held perfectly in the center, you can actually reduce vibration significantly.
So, What Is The Best Time Of Day To Take Pictures?
If you’ve stuck with me so far, you know that’s a trick question. In the end, there is no one best time of day to take pictures. There’s actually a whole lot of them!
The choice, of course, is yours to make in the end.
Depending on your genre, style, gear, and location, you might pick a totally different phase of the day to shoot in than what I would normally go for.
But then again, my preferences are probably not in line with those of the pro next door, and he’s different than his neighbor, and so on.
The bottom line is that every time of day can be used in its own unique way to create stunning pictures. It’s up to us photographers to figure out how, but rest assured it can always be done.