
Most aspiring photographers have used symmetry in photography, be it intentional or not. That is probably due to the fact that we are being surrounded by symmetry, and we are genetically predisposed to noticing it. Our body is fairly symmetrical. The left and right sides appear as they are mirrored. Most man-made objects we usually see are symmetrical. Think of buildings, parks, cars, streets, city blocks, etc.
Being surrounded by symmetry naturally will nudge you towards using it in your photography.
What Is Symmetry?
The definition of symmetry in the Oxford Dictionary is: “The exact match in size and shape between two halves, parts, or sides of something.” That applies to photography as well. Since every photo is basically a rectangle, you can split the image into two halves. When those halves mirror each other, you have achieved symmetry in photography.
If you approach symmetry literally, it would mean that one half of the photo should be a reflection of the other. While this is possible and achievable, it does not have to be this strict. There is some flexibility in specific scenarios. But usually, both halves need to be as mirrored as possible, especially geometrically or shape-wise.
For example, you can have symmetry in the background while your subject is asymmetrical.
Symmetry Also Means Balance, Right?
While all symmetrical photos are inherently balanced, not all balanced photos are symmetrical. People often confuse symmetry for balance. Or probably expand the definition of symmetry to incorporate balance.
For example, let us say that a photo is split in the middle by a line or a subject. The left and right halves of the background are not a mirror of each other, but they are similar. Think of two different buildings, but the same size in the background. That photo is balanced but not symmetrical.
That photo can be classified as roughly symmetrical, but in essence, it is not.
So, do not confuse the two terms, even though they essentially complement each other.
Types Of Symmetry In Photography
Symmetry is a simple concept. However, it has variants depending on how you split the photo. If you split it by the vertical axis, then you have vertical symmetry. By splitting it by the horizontal axis, you have horizontal symmetry. If you use circles, then you are looking at radial symmetry. Splitting the photo by its diagonal will result in diagonal symmetry.
All these types of symmetry are essentially the same thing (except for radial). The only thing that differs is the position of the symmetry line. That line dictates what you can shoot for the given symmetry.
Vertical Symmetry In Photography
Simply put, vertical symmetry means that the left and right halves of the photo should mirror themselves. To achieve a composition like that, you should look for elements that split the image vertically in the middle.
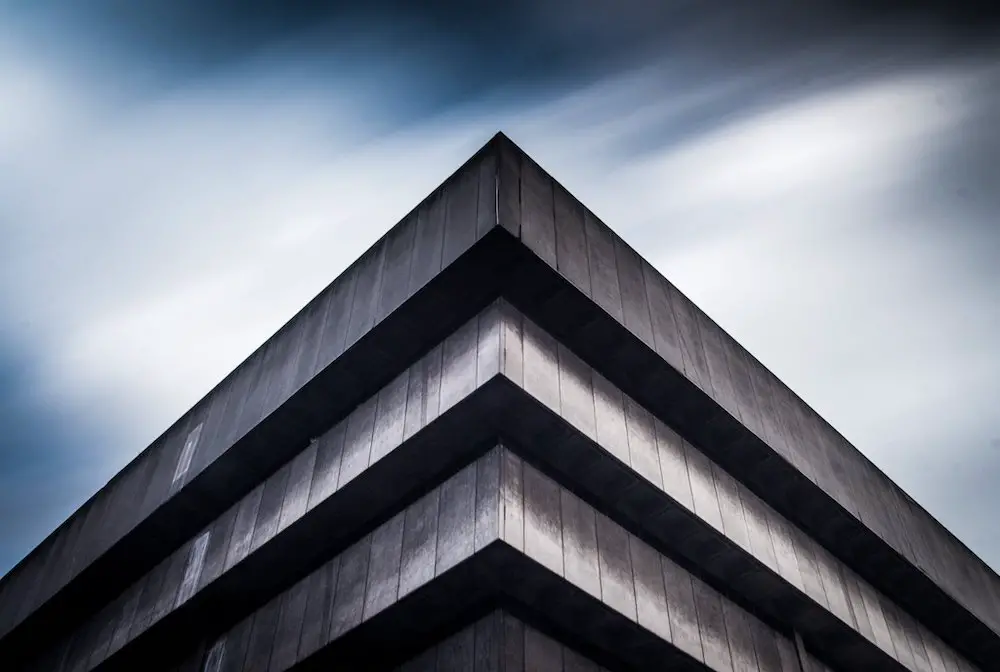
If you look up at a building with one of the corners being the dead center of the image, you will have a symmetrical photo. Especially if the building is symmetrical on the sides.
Other examples would be roads going straight to the horizon. That splits the image into two halves, especially if the horizon is in the upper third of the photo. If the road goes through woods, and you have trees on both sides of the photograph, that would entail an excellent symmetrical shot.
Long corridors work well for vertical symmetry if you play the light right.
Horizontal Symmetry In Photography
Vertical symmetry means that the left and right halves of the photo should mirror themselves. Horizontal symmetry is the opposite – the top and bottom halves should mirror themselves.
The most common horizontal symmetry example would be the reflection of objects in bodies of water. For example, that cool mountain reflects into the mirror-like lake below, or the Taj Mahal reflects in the large pool in front of it.
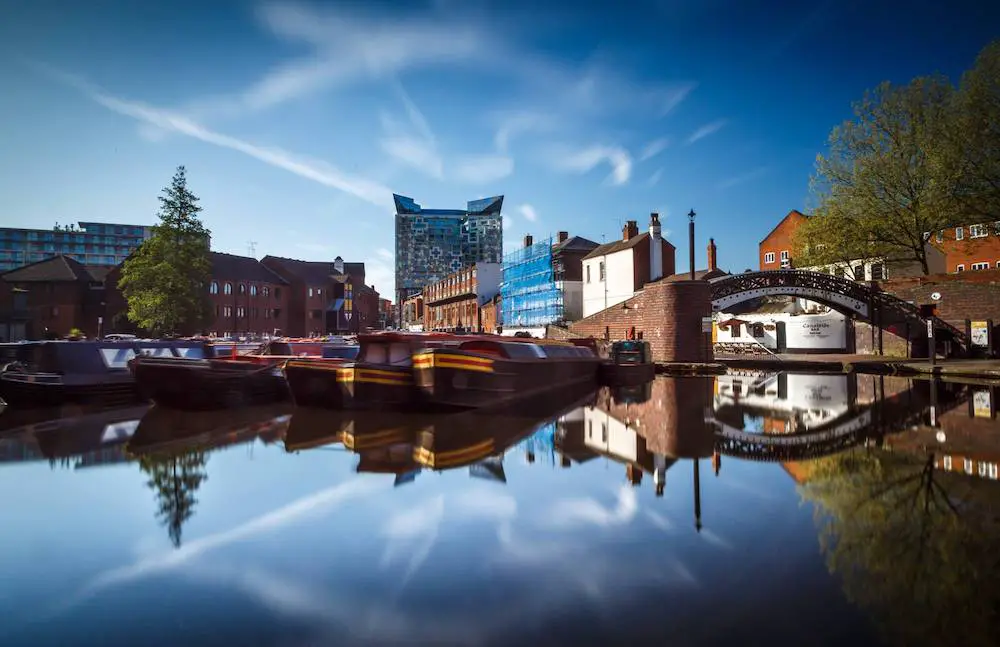
If you are creative enough, you can use any reflective surface to create horizontal symmetry. Simple things like a small mirror for street scenes or still puddles work well. You can use that technique to your advantage in any genre, not just landscape photography.
Diagonal Symmetry In Photography
If you can split the image horizontally and vertically, it should also follow that you can split the image diagonally. That will leave you with two right-angle triangles that should be symmetrical to each other. In other words, they have to be mirrors of each other.
That is not an easy task, as it is the most complicated symmetry to achieve, but it is still doable. But with creative use of the Dutch Angle, some creative perspective control, and you will get there.
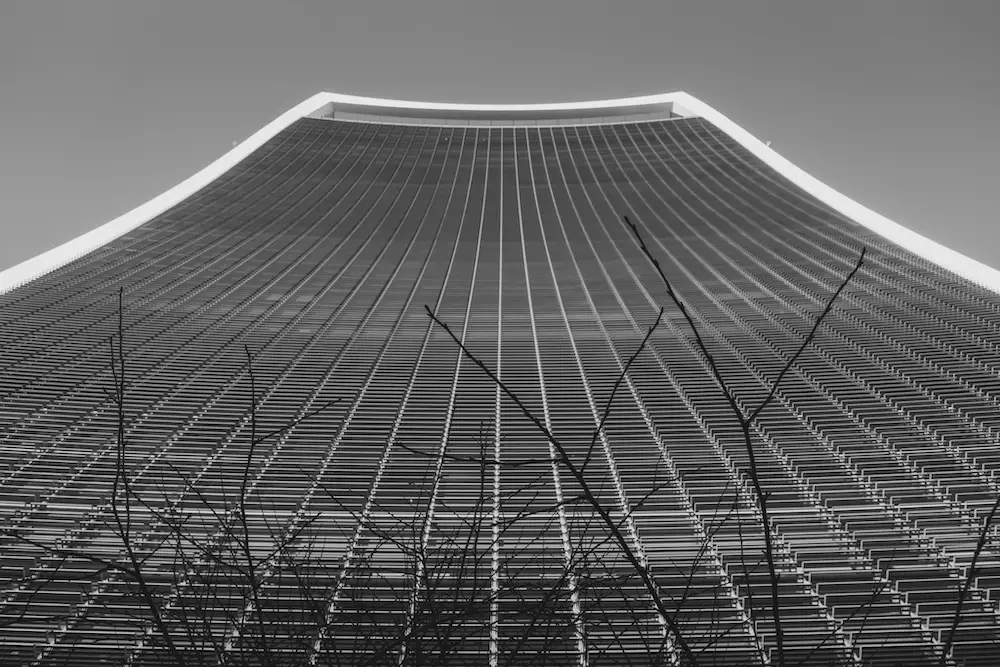
The simplest way to achieve diagonal symmetry is to put a pattern diagonally. For example, you can shoot the windows on a skyscraper with a telephoto lens, and the camera tilted to follow the diagonal.
If you are a drone pilot, you can photograph roads, rivers, and other lines in nature. You can position these diagonally to split the image into two halves.
Combined Symmetry In Photography
Combined symmetry may not be the most accurate term, but it illustrates the point well enough. You can combine horizontal and vertical symmetry in your photography. It is somewhat difficult to achieve, but it is rather stunning when done correctly.
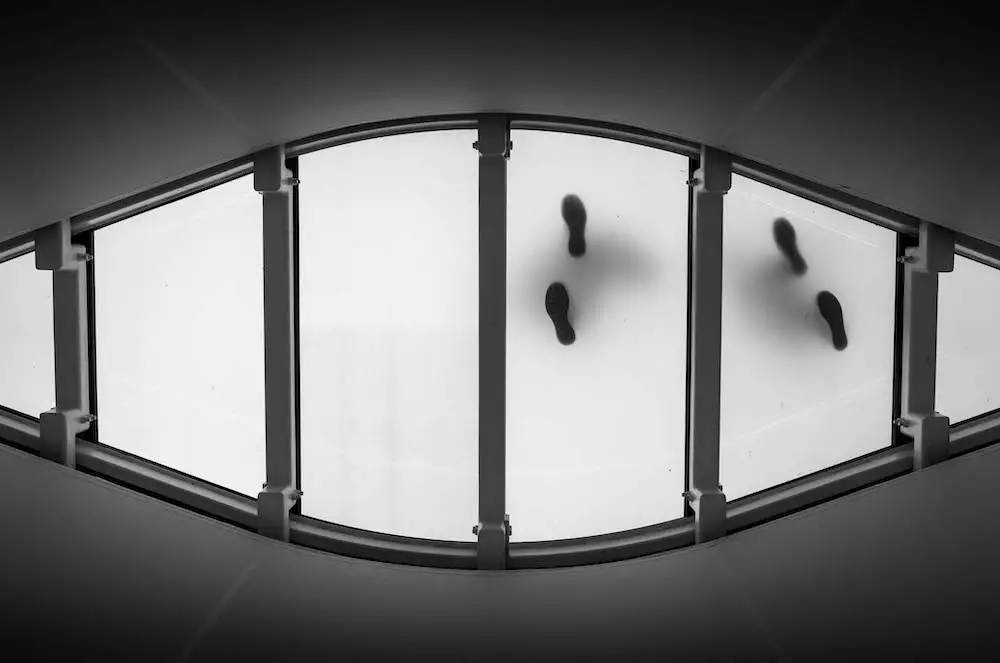
You will have to achieve a composition where the top and bottom halves mirror themselves while the left and right halves mirror themselves.
One infamous example that sparked this composition is the disqualified winner photo from a Nikon contest. Even though this is just a vertical symmetry, it inspired a lot of photographers to recreate similar scenes. There are examples where the symmetry is both vertical and horizontal.
Radial Symmetry In Photography
When thinking about radial symmetry think about any symmetry, be it vertical, horizontal, or combined but within a circle. Or concentric circles for that matter.
Think of circular ripples in water when an object gets tossed in it. Or any flower with a circular shape (daisy, rose, sunflower, etc.). Also, everything which is a circle, from a tunnel to wheels on a car or bicycle.
Usually, radial symmetry is associated with macro photography, as it is the easiest way to achieve this kind of composition. But as I mentioned previously, you can find a lot of circular objects or vistas in your everyday life. You simply have to look for it.
Patterns As Source For Symmetry In Photography
Patterns are inherently symmetrical, but often they are photographed at an angle or with a composition that makes the photo asymmetrical. I am not saying that there is something wrong with doing that, quite the opposite.
However, you can use patterns to create all sorts of symmetrical compositions. It all depends on the pattern and your creativity. High-rise buildings have a lot of windows that are nearly identical to each other. You can photograph four windows to create a combined symmetry composition. Or you can photograph rows or columns of them to get horizontal or vertical symmetry.
Additionally, bookshelves in a library are a good source for repeating patterns that are symmetrical on at least one axis.
Where To Look For Symmetry For Your Photography?
As mentioned previously, many man-made objects are symmetrical. You probably have a lot of them around you. From small things like your smartphone, wristwatch, speakers to large objects like buildings, roads, bridges, cars, boats, trains, train tracks, tunnels, etc.
Nature itself produces symmetry in plants, animals, and reflections. Most of the flowers are symmetrical if you look at them top-down. Animals are usually symmetrical too. You can go for portraits from your pets to wild animals like deer – the antlers look excellent if you manage to capture them symmetrically.
If you own and fly a drone, you have the whole landscape from top-down to photograph. That often opens up more options for symmetry, as you can use a lot of naturally occurring lines to capture it.
Using Symmetry To Enhance Your Photography
You do not have to focus on everything in your photo to be symmetrical. You can use symmetry as a tool to enhance the photograph. Instead of the symmetry itself being the photo’s subject, you can use symmetry to enhance and emphasize it.
Using Symmetry In Portrait Photography
As mentioned before, the human body is symmetrical. Well roughly. On closer inspection, you will realize that the left side of a person’s face does not exactly line up with the right side of the face.
Usually, one of the eyes is a bit higher than the other, and one of the ears is a bit higher than the other. That inherently helps us as human beings, but it ruins the perfect symmetry.
If you are using the body as the source of symmetry, the near symmetry of the human body is enough for the photo to look symmetrical.
Another way to approach symmetry in portrait work is to have a symmetrical background to draw attention to the portrait. Or you can use the portrait to split the background into two symmetrical halves.

If you feel creative enough you can combine a symmetrical background with a symmetrical portrait.
You can place your subject between two similar buildings or a symmetrical corridor and pose them so that their pose is as symmetrical as possible. That way, you will end up with a symmetrical photo.
Additionally, you can photograph a person against a symmetrical pattern like previously discussed. The pattern will provide symmetry while emphasizing the person in the photo.
Using Symmetry In Landscape Photography
There is a lot of symmetry occurring naturally on this planet. However, sometimes you’ll have to look for it if it is not that obvious. Of course, you have the usual bodies of water against a nice-looking vista, a proven concept.
But if you look closer, the corridors, roads, and other man-made, or naturally occurring openings through forests would work great for a symmetrical composition.

Sometimes a single tree in a smooth field can provide a good-looking minimalist symmetrical composition.
Or, you can enter an afforested forest and look for the pattern in which the trees are planted. Afforestation usually follows a pattern, and trees are being planted with equal distance between each other. You can use this to shoot symmetrical photos by finding the corridors that occur by this tree planting method. Especially with evergreen trees, as their tree trunks are taller.
Additionally, you can find a small wooden pier in a lake or a sea and shoot extremely long exposure at night. If you place it in the middle and have the water occupy two-thirds of the frame, you will have a photograph of silky smooth water. The photo will be divided by a pier in the middle, an excellent example of symmetry.
Using Symmetry In Architectural Photography
The fastest way to acquire a symmetrical architectural photo is to find a corner of a building with two identical sides. Put the corner in the center of your frame, tilt your camera up, and there you have it.
Most of the time, that photo will look average at best. It will be symmetrical, but symmetry is not everything in architecture. In this case, you will have to combine symmetry with a bit of geometry and, most importantly – light.
Architecture is nothing without good light, and it will not look good if you mess up the geometry.
Make sure the angles of the lines look natural, not too steep, not too straight. Additionally, make sure you position yourself well because if you do not, you will not be able to fix that in post-production. Placing yourself in the center, and the camera is positioned parallel to the building, with every line being geometrically correct is imperative.
Using Symmetry In Macro Photography
The macro world opens up a whole world of possibilities. You can shoot flowers to get radial symmetry. You can photograph tree branches in different orientations to get vertical, horizontal, or diagonal symmetry. Go for insects that are symmetrical, like spiders or ants. Spider webs are excellent subjects for combined symmetry.
On the other hand, there are man-made objects that are often symmetrical. From simple things like dice, small gears, Jenga blocks, watches to more complex things like electronics, chips, the insides of intricate machinery like clocks.
Insects, just like most living creatures, are often symmetrical. If you photograph them from the top down or belly up, you will most likely end up with a symmetrical image.
The insides of electronics or clocks often are somewhat symmetrical. Not everything is entirely symmetrical. However, the beauty of macro is that you can go for minute parts of the intricate insides. You can probably find a few gears in a clock that looks symmetrical or a couple of square chips in old electronics that are symmetrical.
Most of the electronic components are symmetrical, especially integrated circuits.
Using Symmetry In Product Photography
When photographing products, you have complete control over the scene. That means that you can create symmetry in many different ways.
You can use a symmetrical background to emphasize the product better. Especially, if the background contrasts the product or it has leading lines that point toward the product itself.
On the other hand, you can use a symmetrical product over a simple background, where the product itself cuts the image in half. This creates symmetry.
Or, if you feel like it is not too much, you can have both of them.
Additionally, you can incorporate patterns in the background. This way, your subject will break the pattern and will get emphasized. Just make sure that it breaks the pattern equally on both sides to keep the symmetry.
A Couple Of Tips On Getting Symmetry In Photography Easier
If you have read everything, you should have a good understanding of what symmetry looks like. But before you go out to hunt for it, let us go through some tips and tricks on how to achieve it easily. Please note that these require some practice, as symmetry is not a simple composition technique to master.
Camera Position
To avoid crooked lines, you should always aim for a straight horizon. Use the level in your camera. If your camera does not have a level, get a cheap water level aid that fits in the hot-shoe of your camera.
Once your horizon is straight, make sure your camera is parallel to the scene, so every captured line is perpendicular or parallel to the camera. Use the grids in the live view or EVF to aid you with this.
If you are shooting large objects, please make sure that your camera is positioned right in the middle of what you are trying to capture. Even a couple of inches off-center can mess up the symmetry.
View Angles
Sometimes you will have to look up or down to find symmetry. But when you do, make sure the angles are correct. Use the most common angle variations for more pleasing images. Try to stick to 90, 60, 45, 30, or 0 degrees. Somehow, when the angle of view falls near or exactly at those values, the images look more balanced.
Depending on your camera height, compared to the height of the subject, the camera angle relative to the ground might produce different angles in the image. The important thing is the lines on the photograph that are angled to match with the angles mentioned above, relative to the edge of the frame.
Combine that with a perfect center, and you have a recipe for an excellent symmetrical photo.
Wide Angle Lens
When you aim for symmetrical photos that incorporate a lot of lines in the photograph, for example, architecture, or portraits with architecture in the background, a wide-angle lens helps emphasize those lines.
In other words, with a wide-angle lens, the lines that create the symmetry will be more visible, and thus the symmetry will be more obvious.
However, stay away from fisheye lenses, as they will warp everything too much.
Most wide-angle lenses have some distortion, called barrel distortion, which bends the lines a bit. Sometimes you can use this to your advantage. If you do not like it, you can correct it with the lens profile corrections in Lightroom or CaptureOne.
If you want a lens without that distortion be on the lookout for rectilinear wide-angle lenses. Rectilinear means that they are barrel distortion-free.
Telephoto Lens
If you are chasing patterns for symmetry in photography, a telephoto lens will work better than a wide-angle one. That is due to the fact that you are capturing lines that are on a plane parallel to your sensor. In this case, a telephoto lens is better at that.
Additionally, having the ability to capture details, like a couple of windows from a skyscraper, opens up a lot of variation in patterns you can photograph.
Moreover, a telephoto lens will aid you with portraits as it compresses the background, thus bringing it closer to the subject. That makes it easier to photograph people against a pattern since the pattern becomes more obvious. You might need to close down the aperture if it gets lost in the background blur.
Conclusion
Symmetry is a great compositional tool, especially when used properly. It can be used to aid a photo or to be the main component of it. You can convert a boring building into fine art for your wall. The insides of an old clock or a toy under the proper light and with a symmetrical composition might end up in a gallery somewhere. Simple symmetrical cityscape might be the next windows lock screen photo. You never know.
A product with the company pattern as a background can earn you a good chunk of change if you do it right.
Make no mistake, to master symmetry, you will wear out a shutter curtain or two. It takes a little to mess it up and a lot to get it right. But once you get the hang of it, you will elevate your photography to the next level.
