
The very first thing you need to understand on your journey to becoming a professional photographer is that your camera is just a light-capturing device. To be able to understand how much light you need to provide to your camera, you need to understand the exposure triangle. This article aims to be the beginners’ guide to the exposure triangle.
In the beginning, grasping the relationship between the shutter speed, ISO, and aperture, can be a bit confusing. It is even more confusing when you read about terms that do not actually mean anything to you. Terms like DOF, stop of light, f-stop, EV, etc.
However, once you understand the basics of the exposure triangle and what the three basic settings do, this would be a pretty simple concept. With some practice, you will be managing the exposure triangle without even thinking about it.
- What Does Exposure Mean?
- What Is The Exposure Triangle?
- How To Balance The Exposure Triangle
- Conclusion
What Does Exposure Actually Mean?
Before you dive into the exposure triangle, you first need to understand what exposure actually is.
In plain words, exposure is the total amount of light the sensor has been exposed to. So, technically every picture ever taken is an exposure. Sometimes a single photo can have multiple exposures. But multiple exposure photography is a topic for a different day.
Camera sensors need the correct exposure to capture everything in the photo. If you underexpose the photo, you will lose the shadow details. If you overexpose the photo, you will lose the highlight details. Therefore, you should aim for the correct exposure in order to capture the details in the highlights and shadows equally.
Of course, if you shoot RAW (and you should), you have some leeway here and some room for error. But not too much. As camera sensors become better, this margin for error increases, but it is not infinite. At least not with current technology.
A Guide To Light For Beginners
To understand exposure, first, you need to understand light. As you probably know by now, not all light is the same. I am not going to bother you with too many technical aspects. However, you need to understand that light has specific properties that are important to know.
In terms of exposure, light has two properties: intensity and duration. Light intensity is merely brightness, and the light duration is how long the light shines.
For your day-to-day photography, your biggest concern would be the light brightness, as that directly correlates to the amount of light that your camera can capture. Usually, you want to maximize the light reaching your camera sensor.
Light duration is important when using flashes or other flickering light sources. That can affect the sharpness of the picture when there is motion. Flashes do not change the brightness of the flash when you change their power. They change the duration of the flash.
So, when you increase the flash power, the flash shines with the same brightness but for a longer period of time. The duration of the flash compounds gives the sensor more light, thus making a brighter picture.
It is important not to confuse light duration with exposure duration. In complete darkness, an exposure of 1 second or an exposure of 10 seconds will yield an image equally bright with a light source shining for 0.5 seconds during the exposure.
Try using a flash set on 1/8th power, for example. Go into a pitch-black room, set your aperture to f/8, and your ISO to 100. Take two shots using the flash. The first shot with 1/50 shutter speed, and the second with 1/4 shutter speed. You will see that both images are equally bright.
How Does The Camera Capture Light?
As the light travels outward from the light source, it bounces and reflects off of objects and air. The reflected light changes its properties depending on what it reflects off of. Because of that, you and I can see the shape and colors of objects, some gasses, and liquids.
For the camera to create a photo by capturing light, it needs to focus the light onto a medium. That medium is the sensor in your camera or film stock.
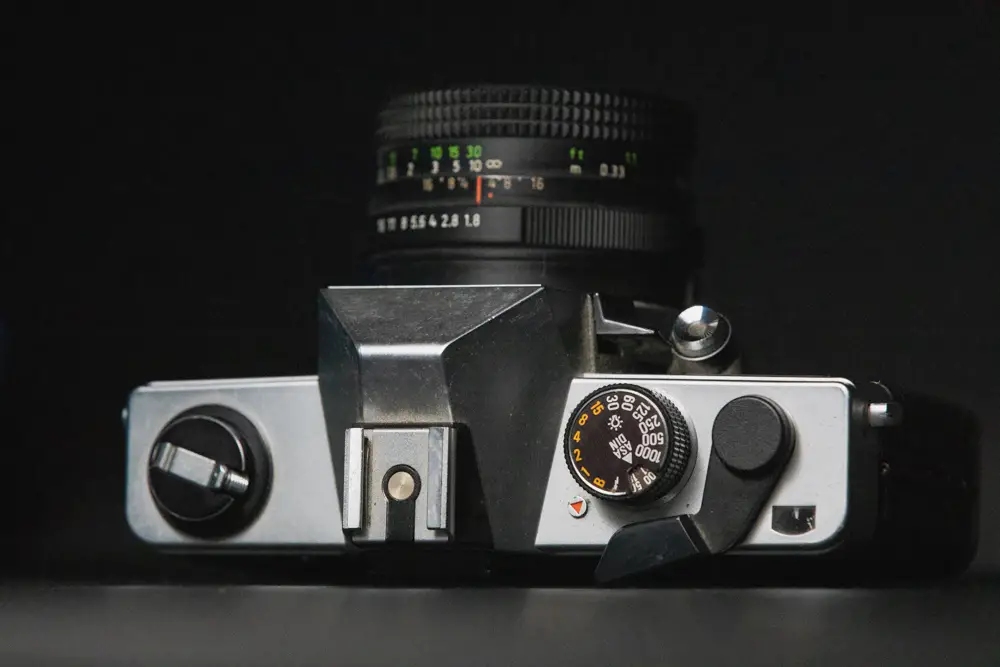
The medium is exposed to that focused light for a certain amount of time. Your camera uses the lens to focus the light onto the sensor and the shutter to control how long it exposes the sensor to light.
The lens has an aperture setting to control how much light is actually focussed on the sensor. The shutter speed of the shutter curtain controls how long the sensor is exposed to the light that the lens focuses. And the sensor controls how sensitive it is to light.
In film cameras, each film type has a different sensitivity to light. Aperture and shutter speed work the same.
What Is A Stop Of Light, Or EV?
A stop of light, or EV, is a relative measure of exposure. EV, or exposure value, is just an easy way of measuring light relative to the camera’s capabilities of capturing said light.
Let us take an example of three exposures, 1EV or 1 full stop of light apart:
- -1EV
- 0EV
- +1EV
-1EV will have half of the light (brightness) than the 0EV exposure. While +1EV will have twice the light that 0EV has. In other words, -1EV is one full stop darker than 0EV, and +1EV is one full stop brighter than 0EV.
In the viewfinder of your camera, you will see the light meter. The light meter has values ranging from -2EV to +2EV. The camera measures these values in EV. That means that the light meter shows you a range of 4EV, two in each direction. You should try to get your exposure in the middle of your light meter. That is 0EV or correct exposure.
What Is The Exposure Triangle?
Now that you know that exposure is the amount of light that your camera captures, you will need to understand how to manage the camera’s capability of capturing light.
The exposure triangle refers to the correlation between the shutter speed, aperture, and ISO to generate exposure. Each setting is a trade-off. To keep the same exposure, if one setting brings in more light, another has to cut down on the light to keep the balance or vice versa.
Let us say that the goal is to keep the photo at 0EV. If you decrease the shutter speed and gain 1EV, you need to either decrease the ISO by 1EV to counter that or decrease the aperture by one 1EV to counter that. Or, you can decrease the ISO and aperture by 0.5EV and counter the 1EV gain from the shutter speed.
Additionally, if the light meter in your camera shows that your photo is 1EV overexposed, you can achieve correct exposure by decreasing any setting by 1EV. Or, you can decrease multiple settings by amounts that add up to 1EV.

If you are concerned with brightness only, then manipulating the shutter speed, ISO, and aperture to balance the amount of light is easy. However, increasing or decreasing these settings has additional effects on your photo besides the exposure.
So, the exposure triangle illustrates the balance between the shutter speed, the aperture, and the ISO. More precisely, the effect the settings have on the exposure and the additional effects they have on the photo. The use of the exposure triangle is to help you get to the correct exposure easier.
How Does The Shutter Speed Affect The Exposure Triangle?
One of the three components for creating an exposure is the shutter speed. That is the time factor of the exposure. In other words, the exposure duration. If you hear terms like ‘long exposure’, it refers to an exposure created using a slow shutter speed.
In the camera, the shutter speed is measured in seconds or fractions of a second, depending on the settings. For example, if you set your shutter speed to 1 second, it will be displayed as 1″, while if you set it to shorter than that, the camera will show it as a fraction like 1/200, or 1/50.
In terms of exposure, the shutter speed is a linear measurement. 1/50 is exactly 1EV brighter than 1/100. A shutter speed of 1 second is exactly 1EV darker than a shutter speed of 2 seconds.
Shutter speed controls the amount of light gathered by allowing the sensor to gather light over a period of time. The downside to that is that slower shutter speeds introduce motion blur. So, the more light you allow the camera to gather via slowing down the shutter speed, the more motion blur you will get.
Use Case Scenarios
You can end up with motion blur in your photos in three ways: subjects moving too fast, your camera is shaking, or both.
You can use the reciprocal rule to avoid motion blur due to camera shake. The rule is simple: you should use shutter speeds faster than 1 over your focal length.
For example, if you use a 35mm lens, your shutter speed should be faster than 1/35th of a second. For modern cameras with high-resolution sensors, it is usually twice that. So for a 35mm lens, 1/70th of a second should be the minimum. Considering you are shooting handheld without any image stabilization.
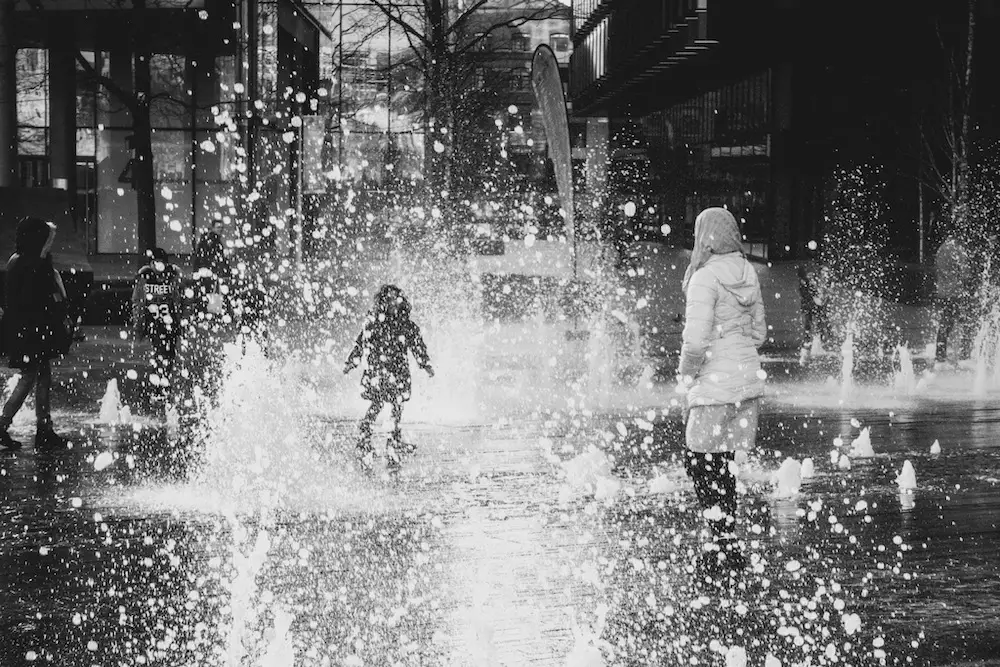
If you want to avoid motion blur caused by your subjects moving in your frame, in that case, you will have to go by eye. There is no simple rule for this. Usually, if you keep a shutter speed faster than 1/200th of a second, you can freeze most of the moving subjects in the photo.
For fast-paced subjects, you might need to go for a shutter speed of 1/1000th of a second. Otherwise, you will get motion blur.
On the other hand, you might want to add motion blur, and in that case, it is still wise to avoid camera shake. So, set your camera on a tripod, and feel free to use slower shutter speeds.
How Does The Aperture Affect The Exposure Triangle?
The aperture or the lens opening dictates the amount of light that can hit the sensor. The shutter speed the aperture and dictate the total amount of light that will hit the sensor. All lenses have a maximum aperture, and almost all lenses have an aperture mechanism (diaphragm) that can reduce the maximum aperture.
Inside the camera, the aperture is measured in f/ numbers, referred to as f/-stops. Do not confuse f/-stops with stops of light. They are different measurements, even though they both refer to the amount of light. Well, at least partly.
If you see f/3.5 or f/5.6, or any other f/ value, that is your aperture setting.
The aperture affects the amount of light that can hit the sensor, but it also affects the depth of field. Depth of field, commonly referred to as DOF, represents the size of the field of focus.
A shallow depth of field means that you have little in focus, and the background is blurry. While a deep depth of field means that you have a lot in focus, and the background is a little or not blurry at all.
So, the smaller the f/stop number, the more light the lens lets in, and the shallower the DOF is. Higher f/stop numbers mean less light and more things in focus. So at f/2, you will let in a lot of light, and have a blurry background. At f/16, you will let in less light, but you have almost everything in focus.
Bear in mind that the f/stop numbers are not linear. f/1.4 is not twice as bright as f/2.8. Instead, f/1.4 is twice as bright as f/2.
Use Case Scenarios
If you are shooting portraits and you want to separate the subject from the background, you should go for a smaller f/stop, something like f/2 or f/1.4, if your lens can do that. Also, you should use the widest aperture or close to that in any low light scenario, as you need as much light as possible.
If you are shooting landscapes and you want everything in focus, put your camera on a tripod and set your aperture to f/16. That way, you will have everything in focus. However, some lenses tend to lose sharpness if you close them down too much. So make sure you test that.
What About ISO? How Does It Fit In The Exposure Triangle?
Unlike the shutter speed and aperture, the ISO does not affect the amount of light hitting the sensor. However, the ISO affects how sensitive the sensor is to light. That means it can change how bright the photos are for the same amount of light.
It does that by boosting the signal from the sensor, with special hardware designed just for that. As a downside, the more you increase the brightness via the ISO, the more noise the photos have.
You will find the ISO in your camera settings marked as simply ISO and measured in numbers starting from 100 upwards. ISO 100 is 1EV darker than ISO200, while ISO400 is 1EV brighter than ISO 200. For each stop of light, the ISO multiplies by a factor of 2.
Use Case Scenarios
The ISO generates noise the more you increase it. That is why it is used more as a corrector. The goal is to provide the sensor with as much light as possible. So, you do not have to increase the ISO too much.
That said, a sharp photo with a lot of noise is better than a blurry photo without noise. If you have to crank the ISO up because there is no other way to create a good exposure, go for it.
So, How To Balance The Exposure Triangle?
Now you know what the exposure triangle is and what the three main settings do. Now all you need to figure out is how to manage all these. In essence, it is not that complicated. In practice, well, it will require some practice.
If you are not sure where to begin, managing the three settings can be somewhat overwhelming since you will need to balance them in different scenarios.
Depending on what you shoot, you pick base settings and compensate with the rest for the correct exposure. Usually, depending on the genre, you have one or two settings already chosen since what you shoot dictates it. And you compensate with the third set to achieve the correct exposure.
Examples For Balancing The Exposure Triangle As A Beginner
As previously mentioned, balancing the exposure triangle is not that difficult if you have a starting point. And almost always, you have a starting point with at least one setting, often two. So a lot of the guesswork is eliminated.
1. Portraits
In this case, you want a blurred background and as little noise as possible. That means that you start by opening up the aperture as much as you need. That is your base setting. Once you have the aperture set to what you need, you set the shutter speed according to the reciprocal rule.
This leaves the ISO. Using your light meter, increase or decrease the ISO accordingly so you would get to the correct exposure.
If you are shooting on a bright day, you will see that you will be at ISO100, aperture wide open, and the shutter speed set to the reciprocal rule, and you are overexposing a lot. Now, just increase the shutter speed until you get to the correct exposure.
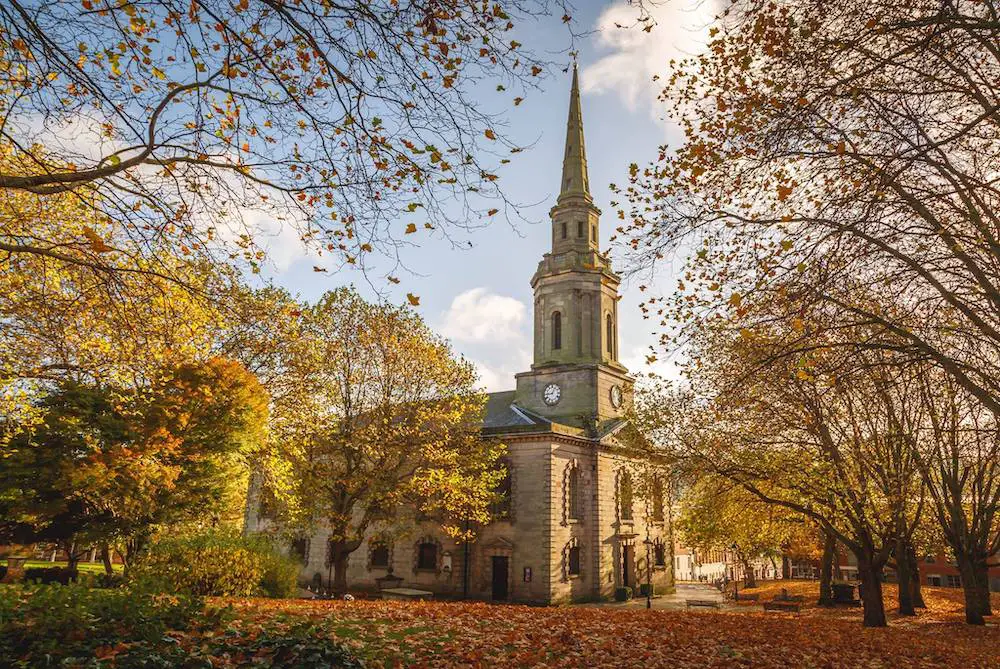
2. Landscapes
If you are shooting a landscape, you know that the base criteria for a good photo are deep depth of field and low noise. So, in this case, you already know two of the three settings. You know you want the ISO as low as possible, and you know that you will have to close down the aperture significantly.
So, depending on the lens, you will start at around f/11 and ISO100. Set your camera on a tripod, and read your light meter. Use the shutter speed to compensate for the exposure.
Be careful, if you close down the aperture too much, you will have an even deeper depth of field, but you will start losing sharpness significantly due to diffraction. Some lenses handle diffraction better than others, so make sure to test this out.
3. Sports And Action Photography
In this case, you know that you need to capture the action. That means fast shutter speeds. Fast shutter speeds mean that you will need to let in a lot of light via the aperture and probably boost that via the ISO.
So, set your shutter speed to whatever you think is fast enough for the action you shoot. I would start at 1/500 and go from there. Since you need a lot of light, open up the aperture as much as possible. Thus far, you have two settings basically set in stone.
All you need to do is compensate for the exposure via the ISO.
Of course, if you are shooting sports without a lot of action, you can slow down the shutter speed to get photos without a lot of noise. You do not need a shutter speed of 1/500 if you photograph chess. However, if you photograph motocross, a shutter speed of 1/500 might be too slow. You will have to adjust according to the action.
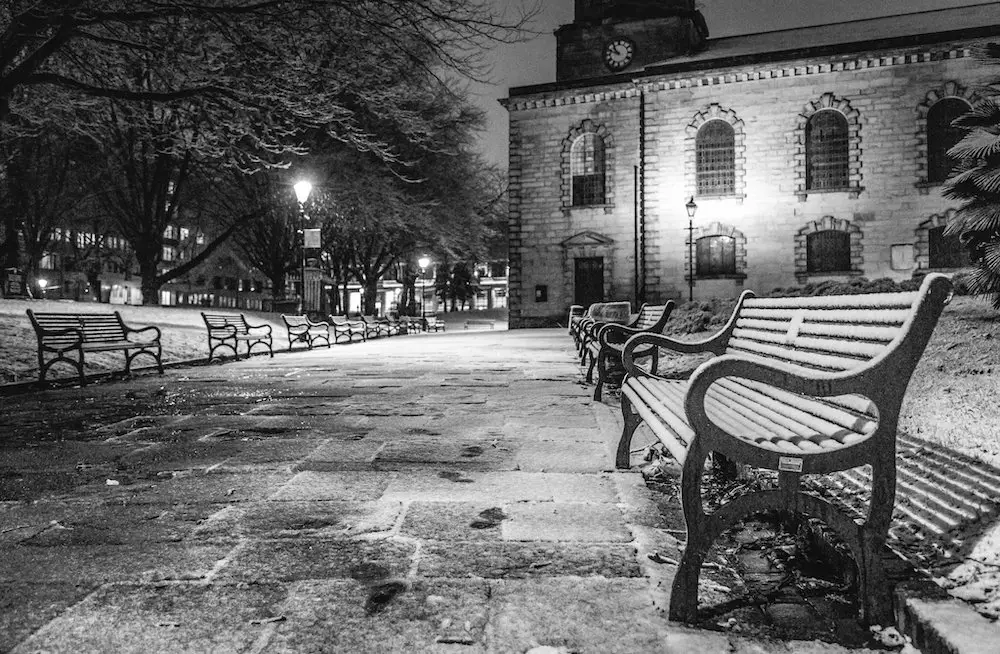
4. Low Light Scenarios
If you find yourself in a low light scenario, you know that you are dealing with a lack of light.
Your starting point is to do everything you can to provide the sensor with as much light as possible. In other words, use a wide aperture and a shutter speed as slow as possible.
That means that you will be using the reciprocal rule to figure out the start point for your shutter speed.
So now you have a starting point, and from here, you compensate with the ISO to achieve correct exposure. You might need to adjust your shutter speed slightly if it is too slow.
Conclusion
All this might sound slightly overwhelming at first glance, but it is a little bit of theory, so you can enjoy shooting much more. Once you figure out that the camera is quite a simple device to manage, you will focus more on your composition rather than your settings.
Being near or at correct exposure is very important. That way, you retain as much detail in your photo regarding highlights and shadows. Additionally, you do not have too much work in Lightroom afterward.
After the first couple of thousand shots, most, if not all that is discussed in this article, will be muscle memory, and you will not even think about it. By then, you will be learning other important photography concepts.
Just remember, use the dictated settings according to the situation, and compensate with the remaining setting or two to achieve a correct exposure. It is quite simple.
