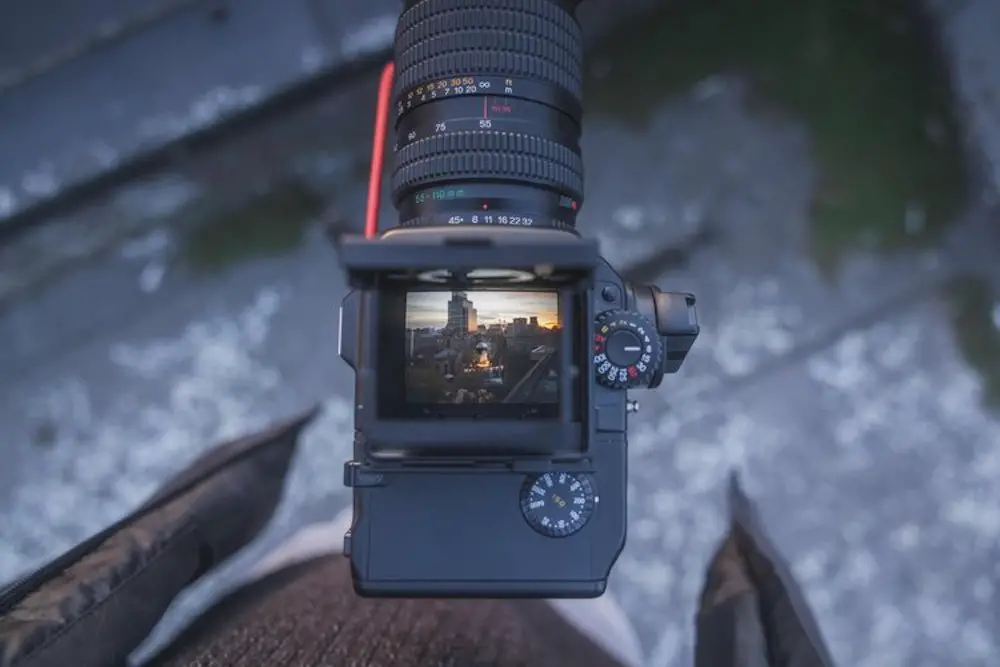
So you are scrolling through your favorite photo-sharing app, and you come across those landscapes with silky smooth skies and ghostly calm waters. Or you come across photos of the glorious milky way with thousands of stars in the frame. And often, in the description, you will see long exposure photography mentioned somewhere.
By deduction, you realize that you need to do long exposures to capture beautiful images like that.
Well, this comprehensive guide will get you started on long exposure photography and help you master most of the techniques associated with this genre.
- What Is Long Exposure Photography?
- What Gear Do You Need?
- How To Take Long Exposure Photos?
- Choosing Settings For Different Scenarios
- Conclusion
What Is Long Exposure Photography?
Simply put, when you are using super slow shutter speeds, you are doing long exposure photography. The common misconception is that long exposure photography means using shutter speeds of 30 seconds and above or photographing at night.

Any exposure time that you can not handhold pretty much falls into long exposure photography. You can shoot long exposures during the day, during the night, or anywhere in between. You can even stack multiple exposures to create even longer exposures. The sky’s the limit. Well, with long exposures, you can see beyond the sky.
What Do You Need To Take Long Exposure Photos?
Sadly, having just a camera and a lens will not cut it for long exposures. If you are crafty enough, you can get by with just that in a pinch, but you will be severely limited in what you can do. Long exposures are pretty much gear-dependent. At least, the gear can be a gatekeeper.
So, what do you need?
1. Decent Tripod Is A Must For Long Exposure Photography
Long exposure photography requires your camera to be super steady. You can not always put your camera on a flat surface that can act as a makeshift tripod. So, investing in a good and sturdy tripod is really worth it. If your tripod is not sturdy enough, you will end up with blurry photos every time there is a slight gust of wind.
When looking for a tripod to buy, do not risk it with no-name brands and stick to the tried and true manufacturers. Some of the top-quality brands include Manfrotto, Vanguard, Benro, Gitzo, and others.
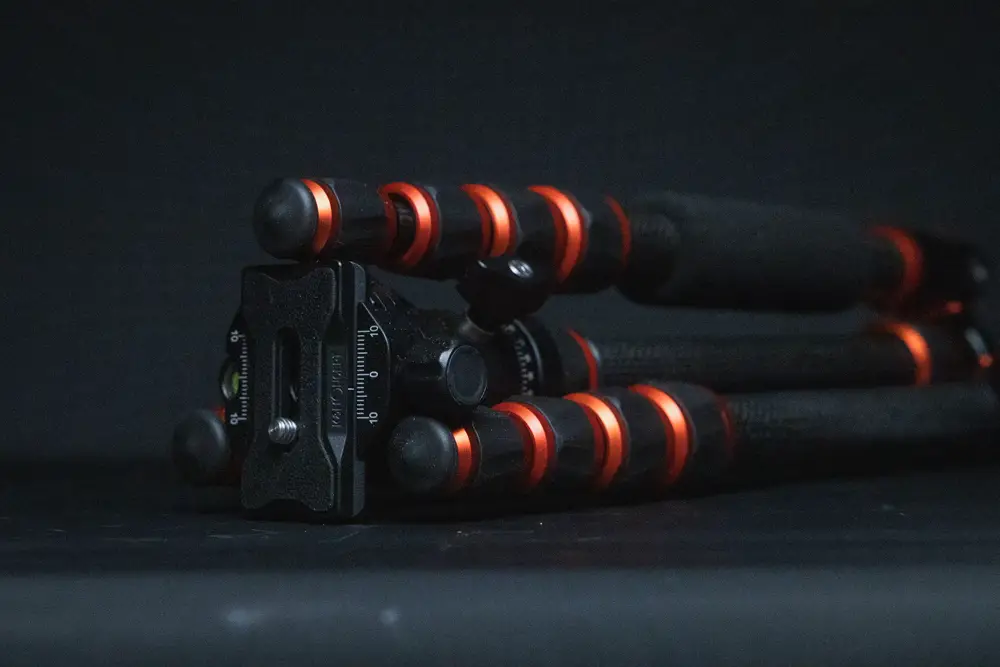
A tripod consists of a tripod head and tripod legs. The head is equally important as the legs. You can find plenty of sturdy tripods, but if the tripod head is lousy. That can be a problem.
1.1 Tripod Head
The tripod head design impacts how you position the camera on your tripod and how stable the camera is on the tripod legs. Consider getting a tripod head that supports portrait orientation and has a full range of motion in both landscape and portrait orientation.
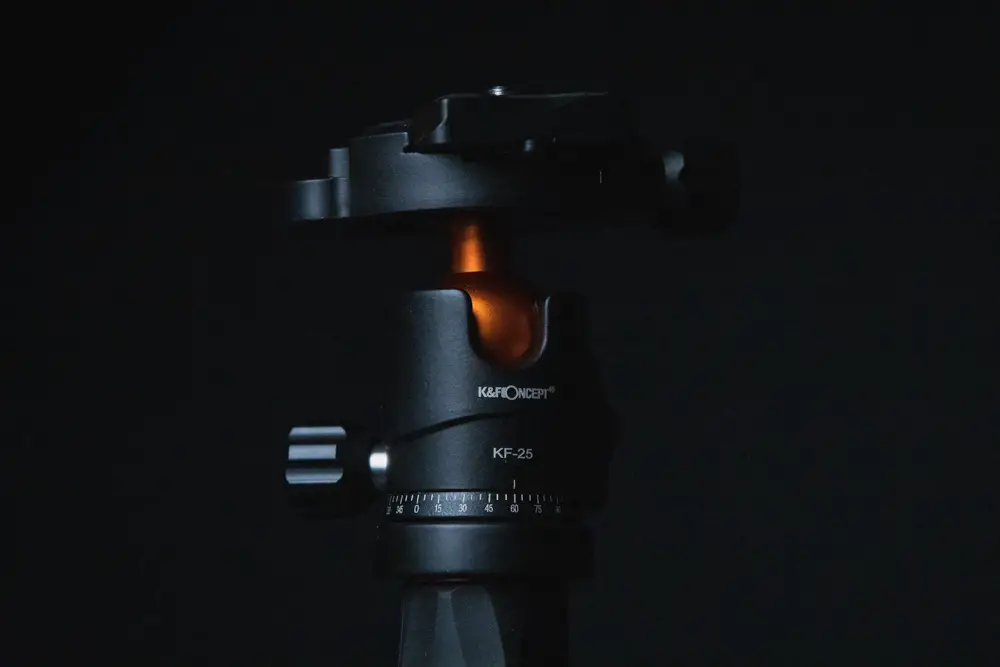
Additionally, make sure that the tripod head can hold your camera securely. You should ensure the tripod head can support at least 50% more weight than what the camera with all its accessories attached weighs. That way, you are future-proofing for heavier lenses and accessories while ensuring that wear and tear do not affect stability significantly.
1.2. Tripod Legs
On the other hand, the tripod legs have a weight limit too. Look for a tripod that can hold at least 50% more weight of the camera and tripod head combined.
You can choose between aluminum alloy and carbon fiber tripods nowadays. Both materials are tough enough to hold your camera. There is no doubt about it. The only difference that matters is the weight. With small tripods, the weight difference is insignificant. However, that difference becomes more apparent in larger, sturdier tripods.
Leg section locks also matter. Make sure that you pick the right ones. I prefer snap locks, but twist locks are more durable. Twist locks require more time to set up and can be tricky to tighten enough in cold weather.
Most manufacturers list the weight limit on their tripods combined. For example, if you see the specs of a Manfrotto BeFree tripod, you will get the weight limit of the head and tripod combined. In this case, make sure that limit is 50% higher than the weight of your camera.
2. Remote Shutter Release
Pressing the shutter button introduces a camera shake, which is not really something you want in a long-exposure photo. So, a remote shutter release, whether the release is a wired or wireless one, is a really helpful tool for long exposures.
If you are crafty enough, you can make your own wired shutter release, or you can buy them. If you can find simple ones, without intervalometers and other fancy gizmos, they will not be expensive.
Wireless remotes are not that expensive too, but if it is an IR one like most cameras use, you might have to stand almost in front of the camera to be able to actuate the shutter since the receiver is on the front side of the camera.
3. Neutral Density Filters For Long Exposure Photography
If you want to shoot long exposures during the daytime, you will probably need a neutral density filter. Probably being the keyword here. You see, you can close down the aperture and lower the ISO to the minimum to increase the length of the exposure. However, in bright daylight, that might not be enough.
So, your lens might need sunglasses in the form of a neutral density filter.
There are three types of neutral density filters: Fixed, Graduated, and Variable.
3.1. Fixed Neutral Density Filters
Fixed neutral density filters are simply a filter that removes a certain amount of light from your photo. You can find ND filters that remove up to 10 stops of light. Being fixed filters, they remove an equal amount of light no matter the settings. So, an ND64 filter will always remove 6 stops of light.
Even though fixed neutral density filters can be slightly limiting, they outperform variable ND filters in image quality.
3.2. Variable Neutral Density Filters
Even though most of the time videographers use them, variable neutral density filters can be a good solution if you want to travel light. By nature, they allow you to change how much light you remove by turning the VND ring around.
Unlike fixed ND filters, the variable ones can not remove that much light. Their design limits the amount of light they remove because they are two polarizer filters sandwiched together. With that, variable ND filters can often introduce unwanted polarization in the image and heavy color casts.
Also, using them with a polarizer as well can produce weird results with artifacts.
3.3. Graduated Neutral Density Filters
You will find these filters among the landscape photographers, especially those that shoot film. In essence, graduated filters are neutral density filters that fade to transparent. They are used to darken the sky while leaving the ground unaffected.
Their use diminishes nowadays since you can achieve the same effect with greater control in post-production. However, graduated neutral density filters can be useful in particular scenarios from time to time.
How To Take Long Exposure Photos?
Now that you know what you will need for taking long exposure photos let us explore how you actually do that. Taking long exposure photos involves some planning, setup, and execution.
Step 1: Decide What You Are Going To Photograph A Long Exposure Of
Before you do anything, you need to decide what you will take a long exposure of. Taking a long exposure of something just for the sake of it being one is pointless. Long exposure photography provides effects that can pose a problem if not used correctly.
So, whether it is a landscape, an architecture shot, or a busy urban street, think about whether that scene will benefit from a long exposure? Will a long exposure give you significant improvements on that photo over a regular exposure? Will the long exposure cost you details you would otherwise get with a shorter exposure?
If you still think that a long exposure is the way to go, then it is time to plan the shot.
Step 2: Plan And Scout Your Location For Long Exposure Photography
The first thing you need to figure out is the location. If possible, it is wise to scout it first. While there, snap a few test shots, and make sure the angles work. Once you are satisfied with the composition, pick the best time of the day for a long exposure.
Once you have the best time of the day, check the weather forecast and see whether the weather conditions work for you. For example, if you are shooting astrophotography, you will need a day without a moon but without clouds too. So the weather forecast is important.
For example, if you are shooting in the city on a busy street, the weather forecast is still important. If it rains, you are in for a bad time.
Step 3: Preparing To Shoot The Long Exposure Shots
Once you are on location, the first thing you need to do is to set up your tripod. Make sure it is level and that it is placed firmly on solid ground. If it wobbles, or it is easy to topple over on one of the sides, you are doing something wrong. Your tripod must be as stable as possible. So take your time, and position it well.
Now put your camera on the tripod and double-check that everything is stable. If you have a camera strap, remove it. The camera strap acts as a sail, and it can cause enough vibration to introduce a camera shake. In higher winds, it can topple a tripod over.
Once that is done, power on the camera and find your composition. Do not worry about settings just yet. Make sure that your composition is perfect. Once that is done, it is time to dial in the settings.
Step 4: Dial-In The Settings For Long Exposure Photography
The goal of long-exposure photography is to reduce the amount of light the camera sees. In order to get as long shutter speed as possible, start by setting the ISO to 100.
It might be tempting to use ISO 50, but even though it cuts one stop of light, you are sacrificing precious dynamic range if you use it. That trade-off is usually not worth it.
With the ISO at 100, close down the aperture to the lens’s sweet spot. Usually between f/8 and f13. You might need to test your lenses to see where they start losing sharpness. To find the sweet spot, you can take photos at each aperture and see how far you can close down the aperture before you start losing sharpness.
Now, follow your light meter, and reduce the shutter speed until the light meter shows you that you are at or near 0EV. That might not be exceptionally accurate, especially in the dark. So take a test shot, and see whether you are exposing correctly. If not, adjust the shutter speed.
If you are doing this during the day, you might not get a long enough exposure, so this is the right time to put your neutral density filter on your lens.
That is a good time to turn off all image stabilization options on your camera and lens. Having image stabilization turned on might introduce motion blur on your picture even if your tripod is stable.
Image stabilization uses gyroscopes and accelerometers to counter camera shake. But they are not really good at standing still. That is why they can throw in slight false values of motion to the image stabilization when there is not any. Thus, you get motion blur.
Step 5: Focus And Shoot
If you are using neutral density filters or if you are shooting in the dark, your autofocus will be unreliable. In cases like this, you will have to resort to manual focus. Luckily, there are some tricks and assists that you can use to aid your manual focus efforts.
Make sure your lens is set to manual focus, and use the live view function of your camera. It should have an exposure simulation option, which will brighten the image to simulate how bright the final result will be. That will help you to see better and focus correctly.
If the camera does not have exposure simulation turned on, you can bump up the ISO. You will need to do that until the image becomes bright enough so you can focus. Almost all cameras allow you to zoom in while in live view, so use that to fine-tune your focus. Once you are satisfied with your focus, you can return the ISO to 100.
Make sure you do not touch the lens focusing ring, and if you are using a zoom lens, do not change the zoom. If you zoom in or out, you will have to focus again. Most lenses are not parfocal, meaning they do not retain focus when zooming in or out.
With the focus out of the way, using your remote shutter release, press the shutter button and take a picture. And with that, you have successfully taken a long exposure shot.
Pro tip: if you do not have a remote shutter release, set your camera on a 10-second timer. It will give it enough time to stabilize from you pressing the button, and it will take a picture without any camera shake.
Choosing The Correct Settings For Different Long Exposure Photography Scenarios
You will find yourself in different scenarios that benefit from long exposures. However, you can not always use the same settings for long exposures. Different scenarios call for different approaches, and thus different settings.
1. What Settings Should You Use For Waterfalls?
If you want to photograph waterfalls and have the water be calm and silky, instead of it looking as if it was flash frozen, then shutter speeds of around 1 to 5 seconds will work great. Depending on how fast the water moves, you will have to experiment with the shutter speeds a bit.
With higher waterfalls, the water moves faster when it falls. Thus you can get away with 1-2 seconds. With shorter waterfalls or running rivers, you will need a bit of a longer shutter speed, somewhere in the range of 2-5 seconds. Keep in mind that depending on the light conditions, you might need an ND filter to achieve exposures that long.
The rest of the settings are up to you.
2. How Long Should My Exposure Be For Light Trails From Cars?
In order to capture light trails from moving traffic, your exposure lengths can vary a lot. The length of the exposure and the speed of the flowing traffic will determine how long the light trails will be.
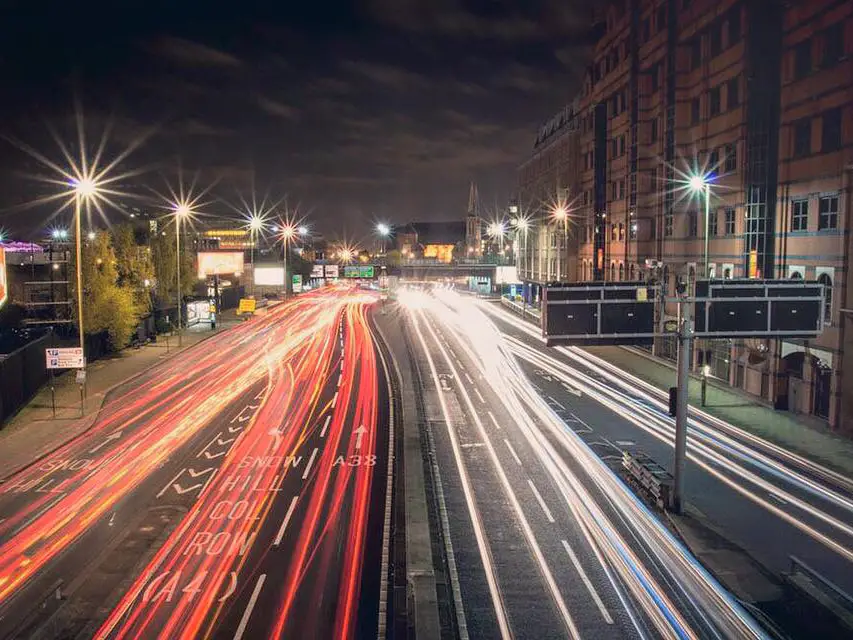
So a longer exposure means longer light trails. If you are shooting highways, longer exposures will also mean more overlapping light trails, which shows a more significant passage of time. However, if your exposure lengths are too long, the light from the headlights will overexpose everything. So you will have to find the balance there depending on the scene.
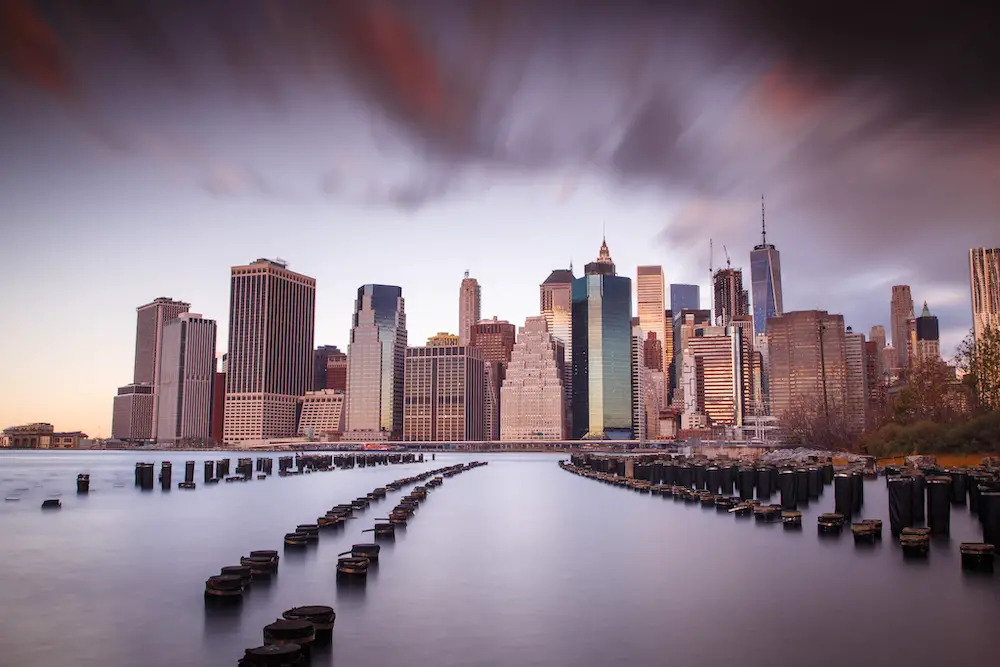
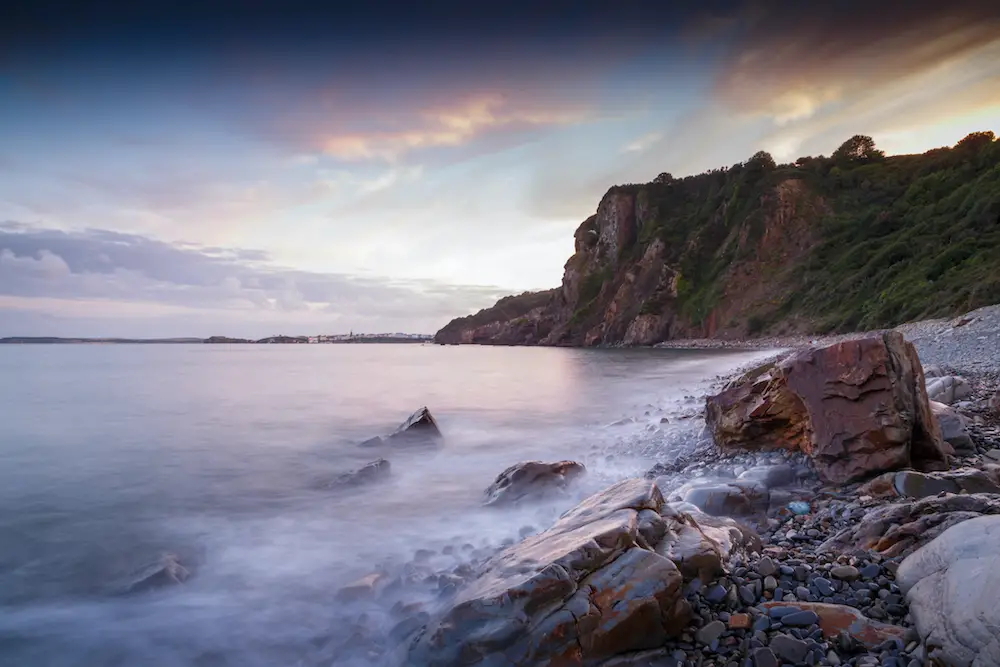
3. What Settings Make Silky Smooth Looking Water?
You have probably seen photos from the sea or lakes, where the water is smooth and ghostly looking. As you probably figured by now, that gets achieved through long exposures. In this case, you will need shutter speeds of 30 seconds or more.
To achieve that extremely smooth water, you will need exposures a couple of minutes long. That means you will need a remote shutter release and a sturdy tripod. You will also need an ND filter and a circular polarizer filter. You can stack a flat neutral density filter and a circular polarizer. It is not wise to stack variable neutral density and a polarizer.
Put your ND filter first, and then the polarizer on top of it. Twist the polarizer until the water loses most of the glare. It is imperative to set the polarizer correctly. That way, the water will not look like white fog. Once you have the polarizer set, it is time to do some math.
4. Calculating Exposure Time
Set your shutter speed to 30 seconds, your lens to your sweet spot, and the ISO to 100. At this point, your light meter will most likely be wildly inaccurate. So take a shot. And see how underexposed it is. If it is near or completely dark, bump up the ISO to 1600. That is 4 stops. Take another shot.
If the image is getting near to correct exposure, bump the ISO a little bit more until you get to correct exposure. For the sake of argument, let us say you landed at ISO3200, which is 5 stops brighter than ISO100. Now set the ISO back to 100. Now you need to calculate the exposure length.
To increase the shutter speed by 5 stops, you will need to double the shutter speed 5 times. From 30 seconds, you get to 60, then 120, then 240, then 480, then you land at 960 seconds. Set the camera to Bulb mode, open the stopwatch on your smartphone, click the shutter button on the remote shutter release, and hold it for 16 minutes.
Or use a shutter release with a switch or a timer, so you do not have to hold the button pressed for 16 minutes. Or you can use a small rock and gaffer tape to stick the button in the pressed position.
5. How Do I Set My Camera Up For Astrophotography?
Astrophotography is probably the toughest one to get right. Up until now, the settings varied from scene to scene. With astrophotography, the settings will vary between scenes and between lenses.
The earth spins at a constant rate, meaning that the stars in the sky move at a constant rate.
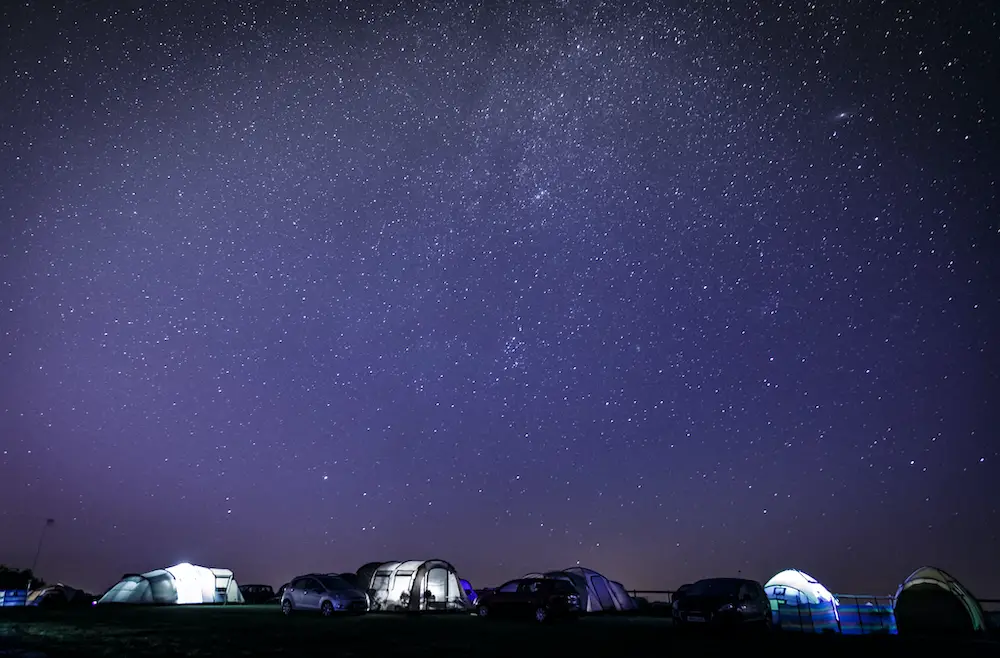
So, if you are photographing the night sky and use an exposure that is too long, you will encounter star trails. When you get star trails, you will notice that regardless of the exposure time, Polaris will never leave a trail. The rest of the stars will have increasingly longer trails the further they are from Polaris.
5.1. How To Avoid Said Star Trails? Or Achieve Them?
To avoid these trails, you’ll need to do some math. There are two rules that can help you to avoid or achieve star trails, depending on whether you keep your exposure time under or over the threshold.
5.2. The 500 Rule
The 500 rule is quite simple. You divide 500 by your focal length, and as a result, you get your threshold exposure length. So for a 50mm lens, you will get 10 seconds of exposure time.
Please note that the 500 rule is not perfect. It is more of a ballpark rule. Most of the time, it will produce some star trailing, and you’ll have to shorten the shutter speed to avoid that.
5.3. The NPF Rule
If you want a more accurate rule, you will have to do more serious math. The NPF rule or the NPF formula takes a lot more factors into consideration. The formula creator, Frédéric Michaud, took into account everything that he could think of.
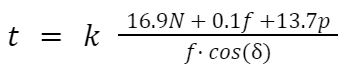
- t = recommended shutter speed
- k = Multiplication factor (allowed motion trailing)
- N = F-number
- ƒ = focal length of the lens in millimeters
- p = pixel pitch in micrometers
- δ = minimum declination
The multiplication factor ranges between 1 and 3, where 3 is the least accurate. Somewhere between 1 and 2 will yield the sharpest results. You can find the pixel pitch in the user’s manual of your camera or with a quick google search. It is camera dependent, so find the pixel pitch of your specific camera model.
The declination measures how far the stars are from the celestial equator, measured in degrees.
Once you input everything into an app that will do the math for you, you’ll get a shutter speed that is much closer to perfect.
5.4. The Rest Of The Settings
Once you find the shutter speed for your lens focal length, you can derive the rest of the settings from there. For astrophotography, you want your lens wide open. Since you are working with the least light, opening up your lens as much as possible will ensure that you can use lower ISO values.
You will probably have to bump up the ISO a lot. With an f/2.8 lens and a 10-15 second exposure, you will often find yourself using ISO1600 or more. That is the nature of astrophotography.
It will take a couple of shots to dial in the ISO. Having a predetermined shutter speed and aperture means that finding the ISO will not be a difficult task for you. The light meter will be useless here, so you’ll have to do that manually via trial and error.
5.5. How About Star Trails?
If you want to achieve star trails, all you need to do is to use exposure times that are longer than what the 500 rule suggests. 2-3 times longer or more, depending on how long you want the star trails to be. In this case, it is up to you. You can experiment with extremely long exposures here, getting star trails that create concentric circles.
Or use slightly longer shutter speeds than the 500 rule suggests with a longer lens to create a shooting stars effect. It is completely up to you.
Conclusion
Long exposure photography is a bit complex at first glance. But once you understand that it is a simple exposure triangle balance, with a few limitations here and there, it is not that complex to grasp.
With some practice and patience, you will master it. The only downside is that you need to lug a tripod with you.
