
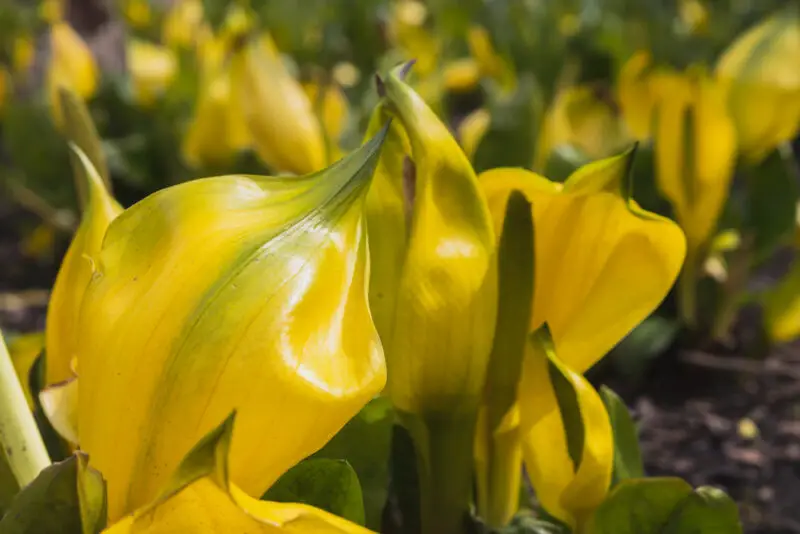
Flowers are a popular and beautiful subject that every photographer can enjoy. They provide a diverse range of colors, and shapes, and can also invoke a diverse range of feelings in the viewer. They are readily available almost anywhere you travel and because they are stationary, they lend themselves as a willing participant. A flower’s unique beauty and high availability are both contributing factors to the popularity of flower photography. This style of photography is perfect for both new and experienced photographers alike.
There are many different styles of flower photography and we are here to offer you some great tips regardless of the style you choose. Keep reading our in-depth guide for great inspiration for your next shoot.
- Simple Flower Photography Techniques
- Settings for Flower Photography
- Flower Photography Equipment
- Advanced Techniques
- Respect Nature
- Conclusion
Simple Flower Photography Techniques
There are a few basic techniques that should help you on your flower photography journey. These techniques include composition, textures, weather, and perspective. While these techniques are often considered basic skills, they are some of the most important to master.
Add Texture To Your Flower
The flowers themselves are beautiful and will make a unique, stunning photo. But you can make them even more unique by adding a bit of texture. You can do this in a few ways.
- Add water
- Photograph bugs
- Include the butterflies
By adding these elements, it draws focus to the natural elements. This will not only add a point of interest to your photo, but it will also give it a very natural appearance.
To add some water, pack a spray bottle and mist your chosen flower. Bugs, insects, and butterflies are more difficult to deliberately capture. But if you are patient, your added photography subject should eventually crawl into your field of vision.
Change Perspective
Perspective is an important element of any photograph. By changing the angle of your shot you can drastically change the look of your image. Try experimenting with different perspectives to see what creative spark you can give your image.
To help you choose angles, imagine what different people and animals would see when they look at your chosen flower. An ant would crawl up to a flower and see something as large as a skyscraper. Get down low to the ground and shoot from an ant’s perspective. Alternately a butterfly would see flowers from above, similar to an areal view. To mimic this, try getting up high and shooting from a butterfly’s angle. Toddlers also offer a unique perspective of the world. Try to set your camera at the same height as a 4-year-old. You will be amazed by the different ways the world can be viewed.
Use Live View For Flower Photography
Using the live view feature will help you compose your image and work out where you want your main focal point. While this feature is mainly used when the camera is on the tripod, it is also useful when you are doing a handheld shoot.
Using live view can also be helpful if you are shooting from down low. Rather than straining your neck to try looking through the viewfinder that is only 2 inches off the ground, switch to live view so that you can comfortably see the image preview. Lying in an uncomfortable position is not only likely to cause you pain, but it can also lead to a shaky photo.
Flower Photography As Portraits
Did you know the techniques used in taking portraits can be applied to flowers? Like people, flowers have unique features. It may be a blemish on the petal, a small discoloration, or even a tear. Whatever the feature, it creates a unique beauty. By applying the same techniques as you would to portraits you can capture and enhance this natural aesthetic.
As with human portraits, you should also be thinking about your photo composition. Applying the rule of thirds, adding framing, or using triangles will add a beautiful aesthetic. While you do not need to follow composition guides perfectly, it is a good idea to be familiar with them.
Fill the Frame With Your Flower
As your subject is often very small, a common mistake people make is not using the flower to fill their frame. By not filling the full frame with your chosen flower, you leave a lot of empty space that can detract from the image.
Empty space can also allow distractions to present themselves in your photos. It can also make your photo have less impact on the viewer. So rather than leaving empty space in your frame, move closer and use the flowers to fill the frame as much as you can.
Use The Weather To Your Advantage
The weather plays a big part in the lighting available. Direct sunshine creates both glare and shadows on flowers causing problems with exposure. By contrast, an overcast day diffuses the light and creates balanced light on your subject matter. In turn, this creates a soft tone for your flower photography. If your area isn’t known for its overcast days, you can also utilize clouds. You only need one cloud in the sky that will travel in front of the sun to create this effect.
Broaden Your Horizons
Instead of focusing on just one flower, you can also feature an entire field of flowers! Even a small bouquet can drastically change the look and feel of your photo. You can still focus on just one flower, or 3 if you wish, but by zooming out, you can include some very pretty and interesting backgrounds.
Be aware that when you include busy backgrounds, you will usually draw focus away from the flower itself. This is perfectly fine if that is the effect you are looking for. But if you are wanting to draw attention to a single flower, keep your background noise to a minimum.
Settings For Flower Photography
Like with all forms of photography, your settings play an important part in capturing flowers. Your aperture, shutter speed, and f-stop are all important factors when setting up your camera. There is also a 4th setting that can be equally important when photographing flowers. That is your focal point setting. Keep reading for our best tips on adjusting these settings.
Adjusting Aperture
If you have been learning about photography, chances are you know that adjusting your aperture can change the depth of your photos. It’s a setting that is commonly used to show the expanse of mountains and to blur the background of your portraits. However, the aperture setting can be very hard to master when you are photographing flowers up close. Even if you set your aperture to a very low setting when you photograph something so close you are likely to encounter blurriness.
Set Your Shutter Speed
Shutter speed is a great way to control the sharpness of your flower. You can either opt for a crisp, clear image or attempt a more abstract look. Either way, your shutter speed will help you accomplish your goal. If you are photographing flowers outside a shutter speed of 1/200 or faster is recommended for a sharp, clear photo. Because of the movement created by the wind, a shutter speed any slower will allow blur.
Like always, experiment with your settings! Slow down the shutter and see what happens when you add a blurred texture. You will also brighten your photo with a longer shutter speed. Speed up the shutter speed to give the illusion of complete stillness. Faster shutter speeds will also darken your photos. Experiment with this setting and find the one that speaks to you the most.
Use A Single Focal Point
Focusing your flower photography can be challenging due to the shallow depth of field we mentioned earlier. Because your depth of field is so shallow and you are so close to your subject, even small movements can add significant blur. To help correct this issue, try changing your focal setting to a single point.
Single focal point photography may help alleviate blur because you can be very specific about what you are focusing on. Though this strategy is not foolproof and blur is still possible. Once you have taken your photo, check your image in the preview pane and zoom in on your focal point. By zooming in, you will be able to see whether you captured the correct focus. If it is not as clear as you would like, you can now adjust your focal point and try again. Keep repeating the process until you are happy with your flower photography.
You should also consider using manual focus rather than autofocus to ensure you have full control of your image. Autofocus may change as you take the photo if there are any moving elements. This includes any wind, insect, or other wildlife.

Flower Photography Equipment
When you photograph flowers, you can do so with just your basic camera and lens. However, there are also a number of accessories that will make your flowers stand out. Read below for some of our favorite pieces of equipment for capturing flowers.
Use Different Lenses
Flowers can be captured with a range of different lenses. While a good macro lens will be the easiest to shoot with, it is not necessary. Photographers have been known to use good macro lenses, standard 70mm lenses, 300mm lenses, and even the lens that came in their starting kit. Regardless of the camera and lens you own, it is important to remember you can use it in flower photography.
Macro lenses will allow you to get up-close with your subject. You will be able to control your camera movement, the angle of your photo, and your focal point. A standard 70mm lens will require you to sit slightly further away. You will have no control of the flower because you won’t be able to touch it. However, sitting further away also allows different lighting. With this lens, you can also include other background content or possibly even a field of flowers.
A larger lens like a 300mm can also be used in different scenarios. If you are at a botanical garden and the flower you want to photograph is on the other side of a fence, a zoom lens is perfect. Though, these zoom lenses can be used on any flower, not just ones that are far away. By using a high zoom lens you can mimic the macro effect. Your depth of field will be different from a macro, but you can still give the illusion of being up close and personal with the flower.
Regardless of which lens you choose, you can still take a stunning photo. Try using different lenses at different angles, varying times of day, and in different settings. You may be surprised at the different photos you can capture with each lens.
Try Flash Photography
Natural lighting is beautiful and adds a neutral feel to your photos. But natural light isn’t always ideal. It may not be the look you are aiming for in your photo. Perhaps you are wanting to create a specific feel or look to your image that does not include natural aesthetics. Maybe you are looking to create a more abstract image. Whatever the case may be, if natural light is not giving the desired effect, add some artificial light.
Flowers love artificial lighting. This can be in the form of a flash, a ring-light, or if you don’t have either of these, a flashlight. You can add extra shine or highlights by utilizing any of these artificial light sources. Despite what you may think, a flash or artificial lighting can be used at any time of the day. It’s obvious that you could try using artificial lighting at night, but did you know it can also improve your midday shots? Try it out and see what you think of daytime flash photography.
Use A Tripod For Better Flower Photography
If you are struggling to get a crisp, clear image, you may want to consider a tripod. By using a tripod, your camera will be much more stable providing a better focus. This is because you have added stability to your camera and your photo will not show the minuscule shake in your hands.
The other benefit of a tripod is that it tends to make you think about your composition. When people take photos by hand, they tend to be a bit trigger-happy. Rather than planning out the photo and composition, they just take a dozen photos. Because a tripod needs to be set up for every picture, people tend to think more about the composition of their setup. This in turn helps make their photos more pleasing to the eye.
Hold Your Flower With A Helping Hand
A helping hand is a fantastic addition to your flower photography equipment. This tool features two arms that can be adjusted to different positions. Each arm contains a clip to hold the subject in place. You can use it to hold the subject itself, like a flower, or you can also use the arms to hold other items such as light reflectors.
A helping hand is a very small tool that should fit in most camera bags and makes a big difference to the quality of your photo. It can be used outside in nature or in your kitchen to hold a handpicked wildflower. The possibilities are endless.
Try wrapping a small piece of paper towel around the stem of a wilting flower. Then place each end of the paper towel in the clips of your helping hand. This will give the illusion of the flower standing upright. It can also be a great way to move a flower into a different lighting position.
Advanced Techniques For Flower Photography
Once you have mastered the techniques above, you may want to try something a bit more challenging. This can include things like post-editing, advanced settings and features on your camera, as well as creating abstract art with your photos.
Learn To Use Your Camera RBG histogram
It can be tempting to use your LCD screen to check your exposure. But when you are outside, your LCD screen can make the image look brighter than it actually is. To make sure you have a good exposure level, make use of the RGB histogram. By using the histogram, you can see exactly what is happening in your photos along with how much light and exposure they have. You can get some more details on finding and using an RGB histogram from the video below.
Stack Your Photos
When you photograph flowers, you are often very close to your subject matter. This means that even if you use a very low aperture setting, you may find that parts of your photo are blurry. To achieve a photo that keeps the entire flower in focus, you can use a technique called photo stacking.
To do this, you will need to take multiple photos from exactly the same position. We suggest using a tripod to achieve this. Each photo you take should feature a different focal point of the flower. The idea is that between all of your photos, every part of the flower is in focus.
Once you have collected all of your photos, you will then need to do some post-editing. You can look here for more details on how to complete this process.
Create The Illusion Of A Black Background
Sometimes you want to feature just your flower with no background. This can be accomplished by using a flash and high shutter speed. The idea is that a flash of light will illuminate the flowers but will not highlight the contents of the background. Though this technique will not always make your background completely black. You may find that some additional editing is needed in post-production.
If you are looking to try this method, try starting with a shutter speed of 1/125 with an f/5.6 or f8. A manual flash is best for this technique. If you can, set the flash to 1/8 or 1/16 power. These settings are just a starting point, you will likely need to experiment further and see what works for you and the environment you are in.
Make Your Flower Abstract
You don’t always need to capture the entire flower in your photo. Try just photographing the tip of a flower. Shoot in portrait mode and only include half of the flower in your image. The beauty of abstract flower photography is that it adds an element of mystery to your image. This mystery then grabs the viewer’s attention and creates a photo that will capture the imagination of its viewers.
Aside from abstract photography producing an intriguing and unique photo, they are also just plain fun to experiment with. While there are specific techniques you can follow to capture an abstract image, you can also largely throw away the rule book and experiment.
There is no right or wrong way to capture an abstract image because abstract images speak to different people in different ways. The beauty of these images is quite literally in the eye of the beholder. It all comes down to what you want to portray and whether you love the photo you have captured.
Respect Nature
As always, when you complete any photography, you should always leave the area in exactly the same condition you found it (or better if possible). Do not crush the flowers or break branches walking in places you shouldn’t. Make sure you don’t accidentally leave any trash or litter behind. Leave the area in a state where another photographer like yourself can enjoy the experience and participate in this wonderful past-time.
Conclusion On Flower Photography
Flower photography is a beautiful and natural way to improve your skill level as a beginner or an experienced photographer. You can find flowers wherever you go. That could be your backyard, the local park, or while you are traveling aboard. It is all part of the unique allure of flower photography.
Flower photography does not have to be difficult. Because they are stationary objects, you can keep shooting photo after photo until you achieve the look you desire. You can come back multiple days in a row and spend hours with your subject. Flowers provide the perfect subject to practice on until you reach an expert level.
Hopefully, these tips and tricks will help you on your photography journey and you are able to use them to capture stunning images. In our mix of ideas, we hope that you find at least two or three of them to be useful and that they provide you with some motivation to get out there a create some stunning imagery.
