
So you just started out in photography, and you want your photos to stand out from the others. It is totally normal and expected to aim for better photos. In fact, it should always be your goal. Do not be discouraged if you need to practice a ton. Since photography, like any other art, is quite complex. It is one of those – easy to get into, hard to master, kinds of things.
The mere fact that you are reading this article means that you are striving for improvement. So let me help you on your journey to take better photos.
Take Better Photos By Better Understanding Your Camera
Many amateur photographers fall into the Gear Acquisition Syndrome trap. This happens especially when they hit a wall in their photography progress. At this point, the notion that you need a better camera to take better photos starts to become more prominent. However, unless you have come to the stage where the camera is really the bottleneck, chances are, you need to improve other aspects of your photography instead of your gear.

Usually, this is the point where you probably need to learn how to use your gear better instead of upgrading it.
Using The Exposure Triangle For Improved Photos
If you played around with a camera that is a bit more complex than a smartphone, you probably know that it has three settings: shutter speed, aperture, and ISO. The smartphone camera has these settings, but they are usually handled without the user being aware.
The relation between the shutter speed, aperture and, ISO is called the exposure triangle. In short, the goal is to manipulate the three settings to get the correct exposure. Correct exposure is considered when the image is not too dark and not too bright. This, of course, is about what the photo is supposed to look like when previsualized in your mind.
Following the light meter will usually get you near a correct exposure about what the scene actually looks like. If your photo is too bright or dark, you will have to manipulate the three basic settings.
- Decreasing the shutter speed darkens the image since it reduces the time the sensor is exposed to light. As a side effect, the shorter the shutter speed, the less motion blur you get.
- Opening up the aperture lets in more light, and that way, it provides a brighter photo. The side effect of that is the shorter field of focus. The more open the lens is, the fewer things you have focused on.
- Increasing the ISO brightens the image. This makes the sensor more sensitive to light. As a consequence higher the ISO, the more noise you get. Bear in mind that a properly exposed image with a higher ISO will have less noise when compared to an image that is underexposed and then brightened in Photoshop/Lightroom.
When Do You Over Or Underexpose Your Photo?
Usually, the safest bet is to go for a proper (correct) exposure. There are instances where you should experiment with underexposing or overexposing a photo. For example, if a darker scene is exposed correctly will no longer be a darker scene. In that case, you will have to underexpose the photo. But be careful if you do it too much, you will lose detail. It is safer to keep a bit of leeway and darken it in Photoshop/Lightroom afterward. That way, you are not losing anything.
On the other hand, if you have a brighter and dreamy scene, you will need to overexpose the image a bit. In this case, it is safer to keep a bit of leeway because if you go too far, you will lose the highlight detail. If the photo is already quite bright, brightening it up a bit more will not introduce any noise. And even if it does, it will not be anything significant.
When Do You Use Aperture Priority, Shutter Speed Priority, Or Manual Mode?
When you aim to improve your photography, one of the first steps you need to do is to get out of Auto mode. Most cameras have several auto modes, usually called scenes. But the camera modes you should be interested in to get better photos are Aperture Priority (Av), Shutter Speed Priority (Tv), and Manual (M). You have to get out of Auto mode, so you have complete control of how the photo is exposed.
Aperture Priority And Shutter Speed Priority
The most used semi-auto mode is the Aperture priority. This is because it is the easiest one to use. Run and gun photographers do not often change the aperture, as they usually keep it wide open. So they let the camera do the shutter speed calculation for them. In this mode, you set the aperture and ISO value to what you want, and the camera will calculate the shutter speed for you. Shutter speed priority is the inverse of aperture priority, you set the shutter speed and ISO, and the camera does the math for the aperture.
Manual Mode
Manual mode, on the other hand, is a different beast. In this mode, you have to manually control everything. You manage all the settings and, you do all the math. This is where you should start practicing to understand your camera. Once you master manual mode, you can begin using Av and Tv for a bit faster operation. If you do it the other way around, you are just losing precious time.

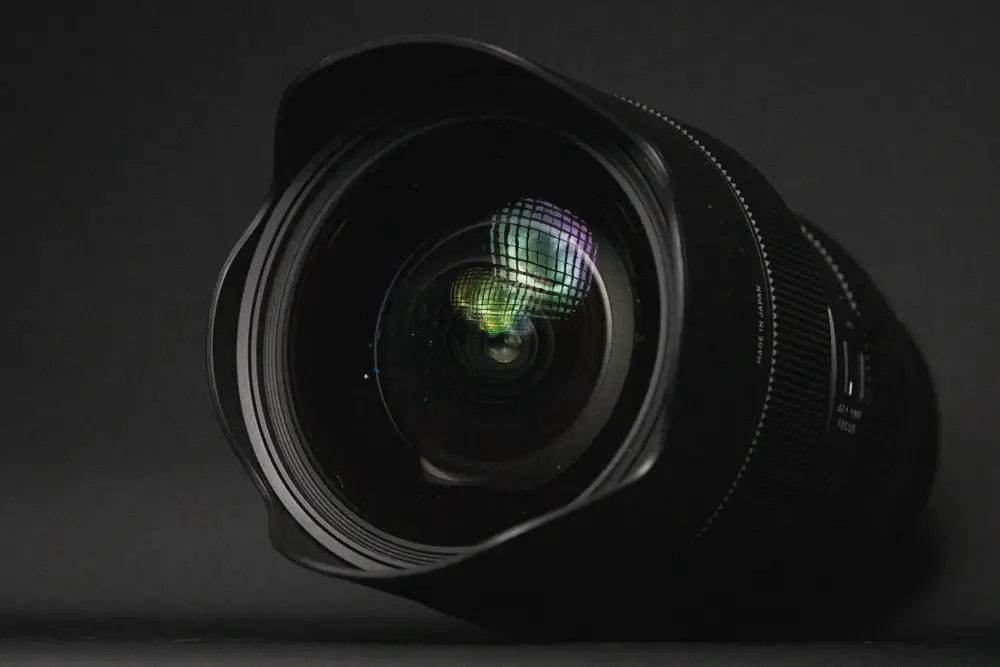
Choosing The Right Lens For The Right Occasion
Lenses range from wide-angle to telephoto. Wide-angle lenses, 16mm, for example, have a wide field of view, meaning that they capture more in the frame. Telephoto lenses have a narrow field of view, or in other words, they look further. Simply put, wide-angle lenses zoom out, telephoto lenses zoom in.
Besides the field of view, lenses behave differently at different focal lengths. If you use a telephoto lens, with a 200mm focal length, for example, to shoot a close-up portrait, it will look quite flattering. If you use a wide-angle lens to photograph the same frame, it will make the nose look big and exaggerated and, the rest of the head will be round and small.
For landscapes, wide-angle lenses will help you capture more of the landscape, but the things that are further will seem small in the frame. A telephoto lens will do the inverse, and it will compress the things that are further and make them appear closer.
Knowing this, you can choose the focal length to produce a different look from the same scene or subject.
Muscle Memory Is Key For Better Photos
Most of the time, the best photos happen when you least expect them. And in those situations, you need to be ready to capture the shot. If you need to look for the buttons to press to change the setting you need, the moment is gone.
This is where practice comes in handy. Have your camera in your hand for several hours a day, or as long as you have time. Put yourself into scenarios where you have to change settings often, move into darker and brighter rooms in your house, move around parks where light conditions change rapidly. The more you change the settings and use the camera, the faster you get at doing it. The quicker you are, the higher the chances of you capturing that once-in-a-lifetime moment are.
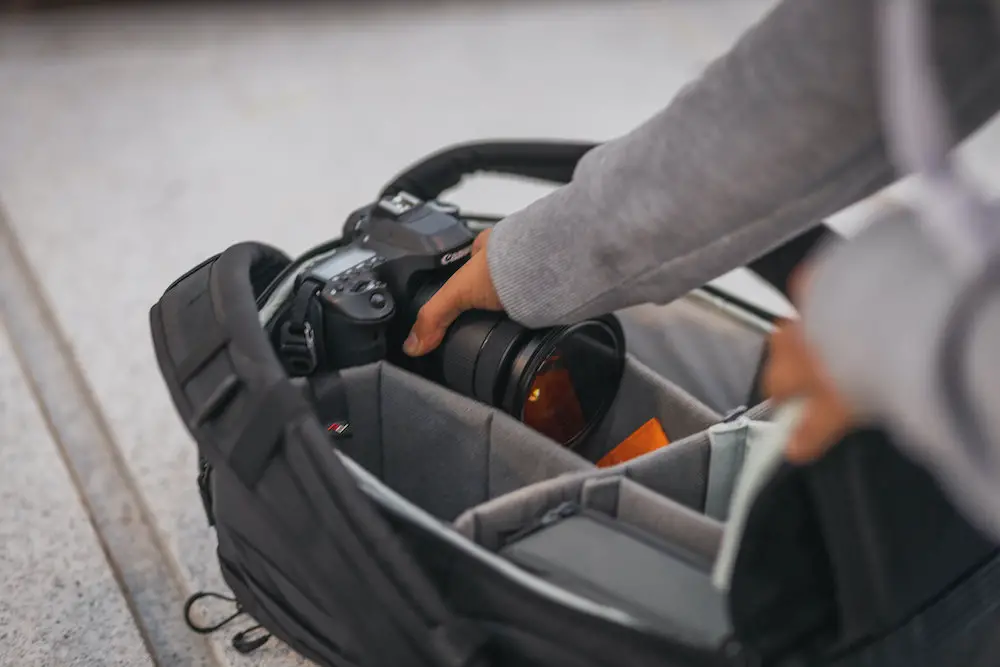
Have Your Camera Locked And Loaded
You can increase your odds of this by keeping the camera with a general-purpose lens on it at all times. Use something like a 24-105mm or a 35mm lens, depending on your shooting style. Having to assemble the camera costs time and lost moments. Instead of turning the camera off when moving, keep the camera on with a short sleep timer.
I put my sleep timer at 1 minute, and the camera goes to sleep once 1 minute of inactivity passes. This prevents the batteries from discharging while the camera does nothing, and the camera is always ready to shoot. Waking the camera up from sleep takes less than a second while turning it on might take a couple of seconds.
Every second you can trim increases the odds of getting that shot. That is a decent way to get better photos.
You Do Not Always Need Better Gear For Better Photos
Once you realize that you have not made the most out of your gear, you will realize that gear is just a tool. A giant hammer is not always better when you have not used a hammer before.
Buying the newest camera or the more expensive one does not mean you will produce better shots. You might end up making the same basic mistakes and, you will have the same low-quality photos as you did with your previous camera. Or you might end up lost with all the settings and quirks the new camera has that your old one did not, and this can be so overwhelming.
You only upgrade your gear when you know that the one you have is a bottleneck and not a lack of knowledge.
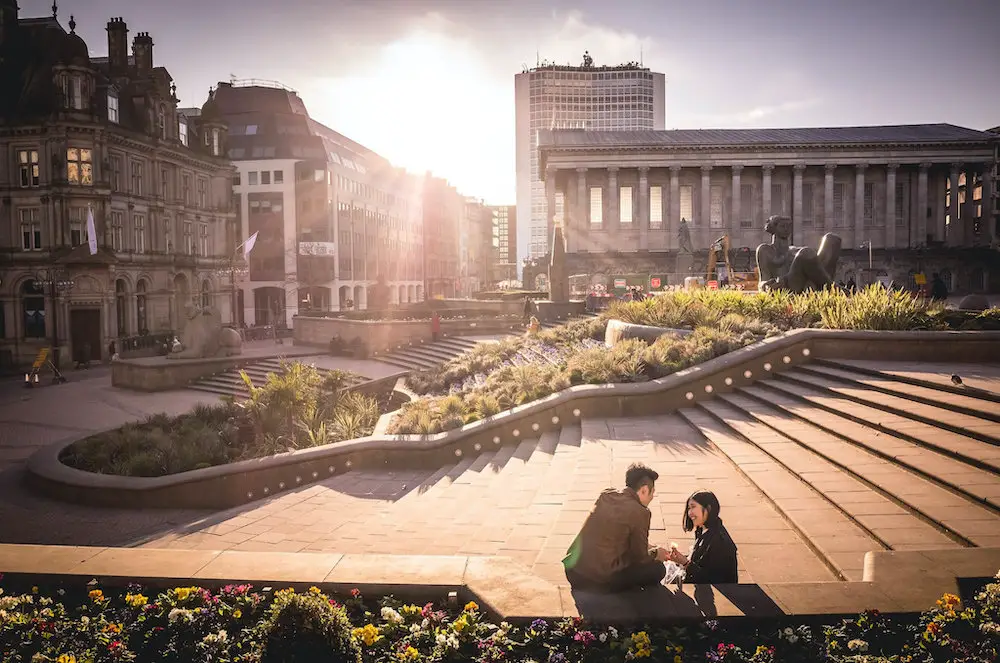
Using Composition To Improve Your Photography
In every visual art form, be it painting, photography, cinema, or anything else you can think of, composition is one of the foundations you need to master to improve your photography.
The good thing about composition is that it will improve your photos with zero investment. And it applies the same whether you are shooting with a smartphone or a $100 000 Hasselblad.
Some Composition Rules That Always Apply For Better Photos
No matter what kind of composition you are using, some rules apply to all of them. You should be aware of those at all times, as those things often separate a snapshot from a good photo.
- Avoid cutting off limbs at the joints. This makes it look as if the people actually have their limbs missing. When cutting the frame, cut between joints, as close to the middle as possible.
- Keep the horizon straight. Whether you are shooting a landscape, or a portrait, try to have the horizon straight. This is one of those things you can easily miss that makes the photo look unprofessional. It is an easy fix in post-production, so there is no excuse for a crooked horizon. Unless you are doing Dutch Angle and is really hard to pull off nowadays.
- Keep the verticals straight or symmetrical. When possible, the vertical lines (whether it is a building, a window, or simply a room) should be straight or symmetrical if straight is not possible. Having crooked verticals will make the viewer feel like something is not right, and it will not keep his attention.
- Simplify things. Having too many elements in the frame makes it confusing. It is hard to have a photo with many subjects and make it visually pleasing. If you are incapable of planning and executing that kind of photograph, keep it simple. Simplicity always wins. And by simplicity, I am not talking about minimalism.
Now let us take a look at some rules of composition.
Rule Of Thirds
The most common composition rule used is the rule of thirds. It works simply. You divide the image into thirds, both vertically and horizontally, and you place your subjects on the intersection points in the divisions. Most cameras that have live view will allow you to turn on the guidelines for the rule of thirds. So will most smartphones.
If you are shooting a portrait photograph, the eye closest to the camera should be placed on the top-right or the top-left intersection. On the other hand, photographing a landscape, the horizon line should fall on the top or bottom third.
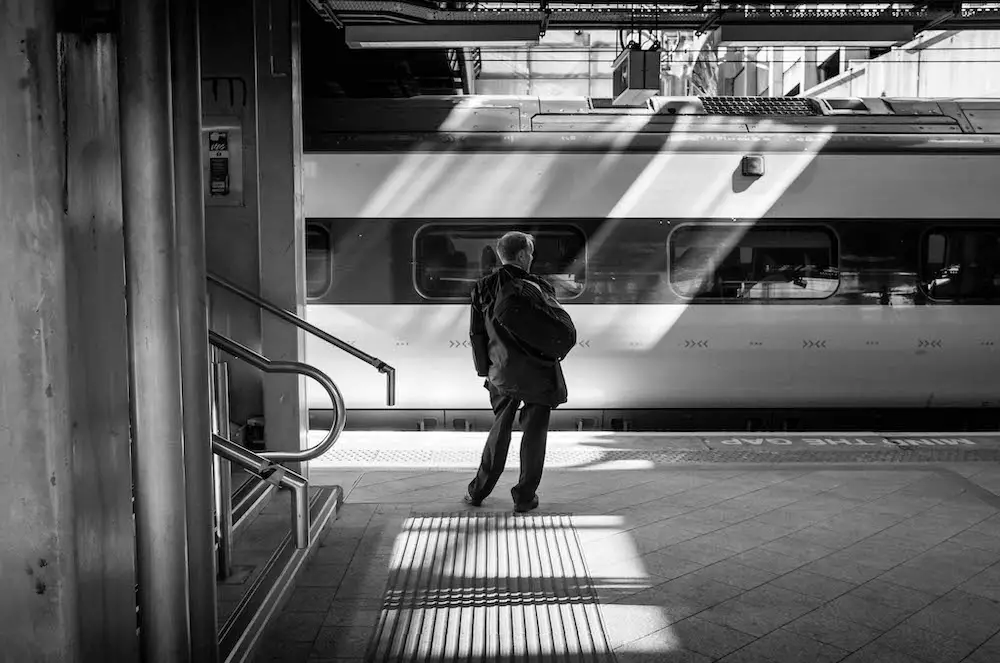
Leading Lines
When your composition requires something to lead the eye towards the subject, leading lines is the tool you can use. Look for naturally occurring lines that lead to a point. Place your subject or frame your shot for the leading lines to guide the eye towards the subject. And there you go, you have successfully used leading lines to emphasize a subject.
This is a simple rule that can you can combine with other ones, for example, the rule of thirds. It is a tool that adds another layer to your composition that can work in tandem with different rules for better results.
Frames
You can use naturally occurring frames to frame up your subject better. Just like leading lines, they are used to emphasize your subject. You can start by using the most common ones like windows, mirrors, doors, and so on, to the less obvious ones like trees forming a shape or a tight passage somewhere. Putting your subject in a frame leads the eye towards them due to the natural muscle memory; you look through the window by default, but you are not looking at the window.

Fill The Frame
If you really want to emphasize your subject, you can fill the frame with it. This is a powerful composition tool that you can use with other composition methods in tandem, such as the rule of thirds, symmetry, or patterns. Filling the frame rids of a background as a distraction, so the subject is literally in-your-face. Since it is a direct method, there is no room for error. In this case, everything else has to be perfect, or every mistake you make will be emphasized. So use this method wisely.
Centered & Symmetry
Placing your subject in the center creates a composition that is the exact opposite of the rule of thirds. This is a case where the rest of the photo is quite symmetrical and works in favor by emphasizing your subject. You can use leading lines to aid this composition, or frames for that matter. Make sure that everything is straight and symmetrical here.
Patterns & Odd One Out
You can look for naturally occurring patterns or make your own patterns in your photos. This technique is often combined with the odd one out. For example, you are taking a photograph of a person wearing bright clothes among people wearing dark clothes. The people with dark clothes create the pattern, and the person with vivid clothes is the odd one out. In this scenario, the subject belongs in the scene, but the bright clothes make them stand out.
Negative Space & Subject Isolation
You can use depth of field to blur the background or use a simpler one to isolate the subject, making it stand out since there is nothing else to take away the attention. Additionally, you can use a bit of negative space to allow the subject to breathe in the background. Placing the subject against a more extensive background where it stands out will prove to be a better photo. If it faces the left side, the negative space should be towards the same side the subject faces.
You Can Combine And Break Rules As Long As You Understand Them
Rules are meant to be broken – is a proverb that we hear very often. However, to know how and when to break the rules first, you have to understand them. That is why you have to learn the rules and then experiment by breaking them.
Additionally, there is no harm in combining several to achieve better photos. Just be careful not to overdo it and end up with a mess.
Understanding And Implementing Color For Better Photos
Color is one of the foundations of photography and art in general. Understanding and handling color properly most certainly will provide a better result.
Color Theory Basics
Every color has a meaning. Some colors mean different things in different cultures, but understanding what colors actually mean in general will allow you to use them to your advantage. The best way to do this is to pick up a color theory book on the topic. You can probably find several ones in the art history section in your local library. It does not matter whether the book focuses on paintings or design color theory is universal.
Colors And The Common Meanings
- Red – often signifies romance, sensibility, passion, willpower, and danger. This, of course, depends on the context.
- Green – usually is associated with nature, foliage, plants, and life. But additionally, depending on the context, it can signify illness and jealousy. Think of – He turned green before he vomited.
- Blue – usually means stability and confidence. That is why most corporations use blue as the base color for their design and why lawyers use blue suits.
- Yellow – the color of the sun. Often associated with joy, positive feelings, intellect (think of lightbulb for the idea), and in some cases nostalgia (think of vintage film).
- Brown – most often found as the color of a tree trunk or a root. Most of the time signifies foundation and security. That is the main reason why courtrooms, town halls, and government buildings have the brown color as their base color.
- Violet – it is complementary with lavender and purple, a set of colors associated with spirituality, youth, vitality, luxury, mystery, etc. It depends on the context.
- Grey – the color of the bland. Think of – He feels grey, or – The weather is grey. Sometimes grey can be associated with elegance, but other color combinations are required.
- Black – the darkest of them all. It is associated with power and elegance but also with evil and death. The way you use it will decide which emotions are associated with it.
- White – the brightest of them all, associated with innocence, safety, illumination, perfection. Think of everything celestial – angels and gods are portrayed as white.
Color Palette And Color Harmonies
When you take or plan a photo, you should have a color palette in mind. A color palette is a combination of colors used in a photograph. Those combinations are called color harmonies. There are many harmonies, but there are a couple most often used:
- Analogous color harmony – when the color palette consists of the three neighboring colors on the color wheel. For example, if the primary color is yellow, the two other colors will be green and orange.
- Monochromatic color harmony – is a color palette that consists of shades from the same color hue. Most often used in black and white. But a photo that consists of only blue shades will be a photo with a monochrome palette.
- Triad color harmony – when the color palette consists of three colors equally distant from each other on the color wheel. Imagine putting an equilateral triangle on the color wheel and selecting the colors on the triangle edges. If the primary color is blue, the second and third colors will be red and yellow.
- Complementary/Contrasting color harmony – when the color palette consists of primary color and the color opposite of the primary color on the color wheel. If the main color is red, the complementary color will be green.
Adobe has a great tool called Adobe Color for creating color palettes with all the harmonies you can think of. Bookmark it. It is free, and it is helpful.
Making The Most Out Of Colors To Improve Your Photos
Understanding color and using it wisely can and will make your photos stand out. That said, do not fall into the amateur traps of over saturating or overusing color. Take a look at what pros do, and see how they use color. You do not have to go over the top simplicity is the key. Combine that with everything else, and you are on the road to a better photo.