As you probably know by now, your camera is simply a tool that captures light. While this is obvious, when it comes to photographing at night, or night photography, you are devoiding your camera from the only thing it needs the most – light.
Therefore, you need to understand the circumstances while taking night photography. And, how to balance what you do with your light-capturing tool during those times.
Bear in mind that there is no such thing as settings that “always work” or “best” camera settings to use in night photography. That’s no matter the scenario. There is, however, an understanding of principles and manipulating those. Even in the most consistent scenarios, things will differ.
A dark night is not always equally dark. Sometimes it is a bit brighter due to the moon or street lights, other times it will be a bit darker due to cloud coverage. Therefore, if I tell you that a shutter speed of 1/50, aperture of f/2, and ISO 1600 will always work – that would be a lie.
That being said, this article aims to give you the tools to decide which settings work for the vision you have and be able to manage your camera settings for night photography.
Why Shoot Night Photography?
Most photographers that are just starting out in photography are afraid of the dark. Pun aside, shooting at night oftentimes seems more challenging than shooting during the day. This might be partially true if you don’t understand that fundamentally shooting during the day and during the night is the same.
During the day, you are balancing the same three settings as you would during the night. The only difference between the day and night is the amount of light available naturally.
Having less light available doesn’t mean that you can’t shoot effectively during the night, it just means that you’ll have to concede to having a bit more noise in your shot, or to bring a tripod with you.
That said, your camera settings will differ if you mount your camera on a tripod, or not. So first of all, you need to answer the following question:
Handheld Or Tripod For Night Photography?
When photographing at night, you have a fundamental decision to make – either shoot handheld or set your camera on a tripod. Deciding between the two fundamentally affects the settings that you pick. You simply can’t handhold a 30-second exposure even if you have the steadiest hands in the world.
When deciding whether you are going to shoot handheld or on a tripod, you need to decide what you are going to shoot first. If you need to be mobile and be able to change the frame quickly, then you’ll have to shoot handheld. Otherwise, a tripod is a good idea.
That said, picking between handheld shooting and a tripod requires making sacrifices.
As you probably know by now, balancing the exposure triangle is all about careful sacrificing. In this case, you are dealing with a lack of light. This can be solved by altering the three main components: shutter speed, ISO, and aperture. The goal is to get as much light to the sensor as possible.
Shooting on a tripod or shooting handheld effects which camera settings will be prioritized, and which can be sacrificed to get the desired result.
1. Tripod
Usually, using a tripod is synonymous with long exposures. And to be honest, this is often the case with night photography. Putting your camera on a tripod allows you to shoot with shutter speeds far slower than what you would use when shooting handheld.
This allows the ISO and aperture to be managed with a bit more freedom, and still get an image that is properly exposed.
Bear in mind that, even if you don’t have a tripod with you, in some cases you can simply rest your camera against something to achieve a stable setting similar to a tripod.
For example, often you can get away by placing your camera on a bench or a wall. I’ve done it countless times. As long as there isn’t a lot of wind, you’ll be good.
Using Your Tripod Properly For Night Photography
Shooting on a tripod looks fairly straightforward. Just put the camera on the tripod, pick your desired settings, and shoot. However, not understanding how tripods work, might result in you having blurry photos, or your tripod toppling over with your precious light-gathering device on the top.
Secure Your Tripod
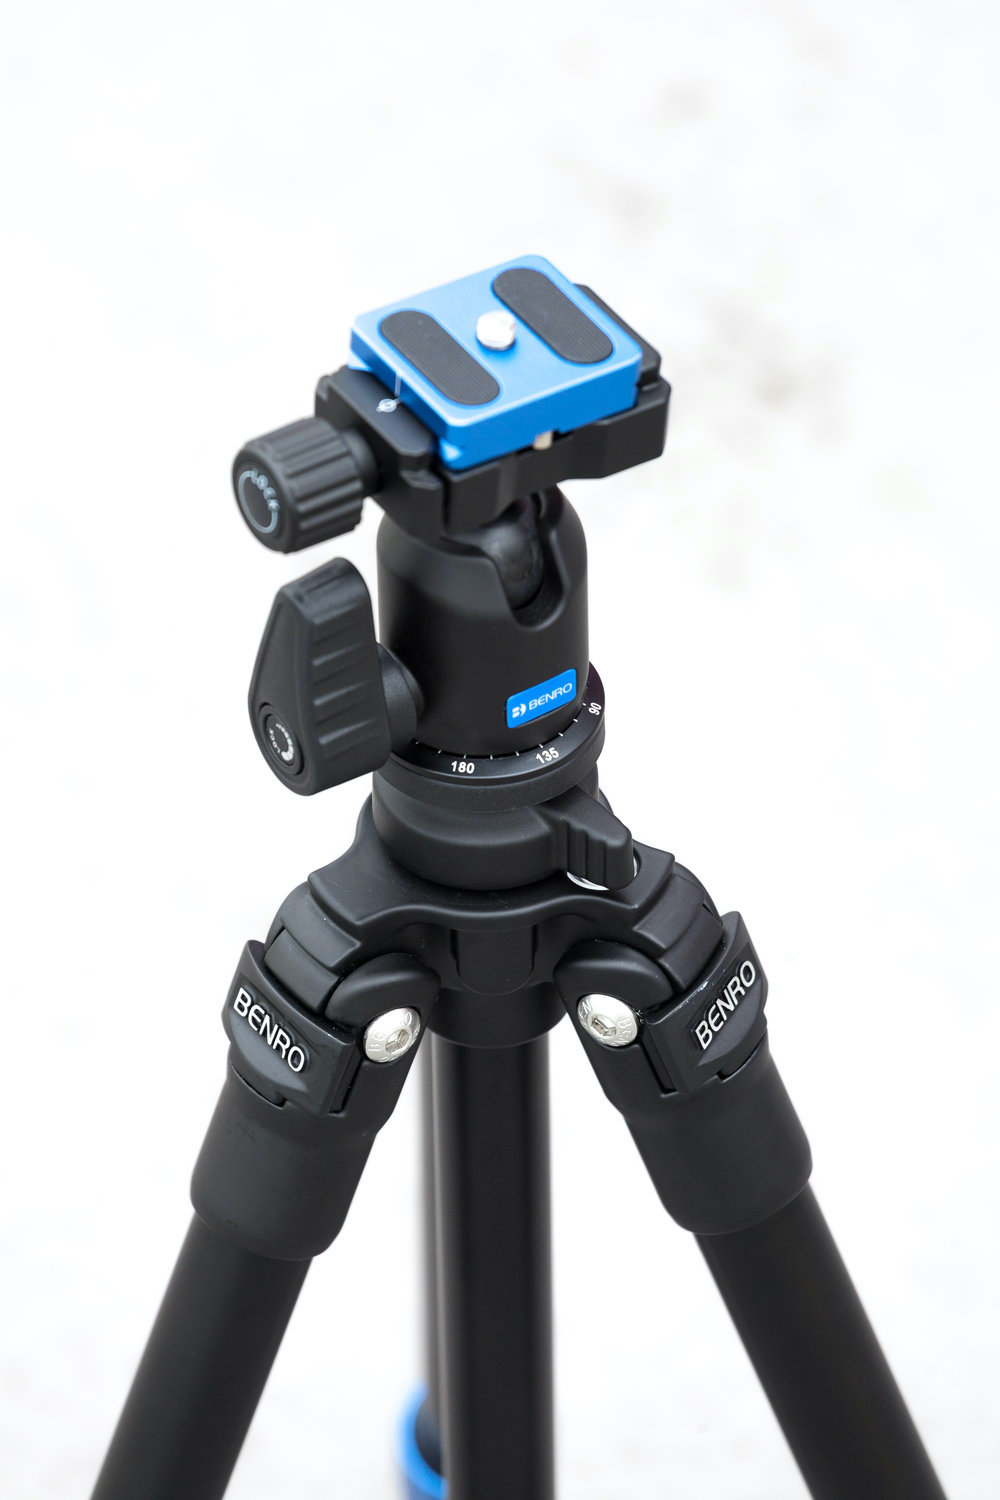
A tripod has three legs. Otherwise, it wouldn’t be called a tripod. Now, when placing your tripod first make sure that all three legs have firm placement on the ground and that they aren’t slipping. You don’t want your tripod toppling over because you’ve put one of the three legs on loose ground.
Next, make sure that if the ground isn’t level, you compensate for that with the length of the legs. Your tripod central column (the stick that has your camera attached to it) must be as vertical as possible.
If it leans one way, your tripod can topple over on that side. Most tripods have legs that can be extended in sections, use that to adjust the position of the tripod so the center column is as vertical as possible.
Additionally, on a ground that isn’t level, your tripod has to have one leg under the lens. In other words, where the lens is pointing, you have one of the three legs pointing as well.
That way, with lenses that are on the heavier side, you have a single leg supporting that weight. This shifts the center of gravity a bit backward, and thus supports the camera better.
Wind
Even though your camera doesn’t have a large surface area, it has a lot of bends and creases, and thus wind catches it a lot. Wind can easily topple a tripod over if it is not secured enough.
Grim scenario aside, wind also affects the steadiness of the camera. It can introduce enough camera shake to make your photos blurry and useless.
In windy weather, you can take some measures to prevent wind from toppling over your camera, or shaking it enough to affect your exposures.
First of all, and I can’t stress this enough, remove the camera strap. Straps act as sails. If the wind catches it, it is a recipe for disaster. I’ve had my camera on a tripod topple over due to wind catching the strap. If you shoot on tripods often, a quick-release system for the camera strap will come in handy.
Next, if possible, weigh your tripod down. Most tripod manufacturers include a small hook on the bottom of the center column. That hook is used to attach sandbags (or whatever heavy thing you have available). Now to avoid stressing the legs, don’t have that weight just hanging, as it might introduce some camera shake if it starts swinging.
The weight is usually put on the ground, with a string tied to the hook. The string should be almost tensioned, loose enough so it doesn’t stress the tripod legs so they break, but tensioned enough to prevent the tripod from toppling over.
The way I do it is just to place the tripod without the camera on it, put my backpack under the tripod (usually it weighs around 20lbs with all my gear in it), and tie the string to the hook, then tie the string to the backpack handle, tensioning it just right.
Spreading The Tripod Legs
Most tripods that aren’t the cheap ones have independent legs. In other words, the tripod legs aren’t connected one to another. However, they have a few settings for the angle of the legs. This is useful when the default angle isn’t stable enough, and the tripod is shaky due to wind or camera weight.
You can reduce this by increasing the leg angle and effectively spreading the tripod legs out. This creates a wider surface area and lowers the center of gravity for the tripod, meaning that it is far more stable and harder to topple over. As a downside, you lose a bit of the height.
Shutter Speed For Night Photography
Having your camera on a tripod means that you can decrease the shutter speed (increase exposure length) as much as you want. At least, theoretically. The exposure length is limited by certain factors, up to a certain point. More on that later.
Slowing down the shutter speed, effectively allows the sensor to gather light for a longer time. With more light hitting the sensor, you can reduce the ISO to achieve a photo with less digital noise. Or you can close down the lens to have more things in focus.
Bear in mind that if you are using a tripod and longer exposure, turn off all image stabilization systems in the camera. This means that you need to turn off lens image stabilization, in-body image stabilization, and electronic stabilization.
Not all cameras and lenses have all the systems, but if any of them are present, turn them off. Usually, this isn’t such a big problem but it can introduce a bit of camera shake when there isn’t any and ruin a photo.
Use Cases
Now that your camera has a fixed position, and is free from all motion, you can get creative with your shutter speed.
Sure, most of the time you’ll need that half or one-second exposure to get everything just right, but now you have the ability to go for 10+ seconds in exposure length. And that opens up a whole world of possibilities.
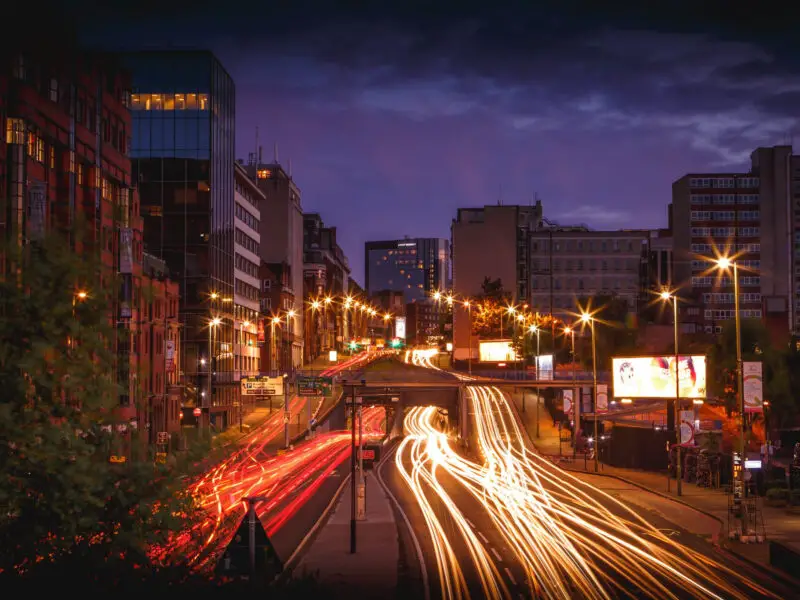
Let’s say you are photographing a busy intersection. With a shutter speed of half a second, the cars will be slightly blurred, and everything will be messy. However, doing a 30-second long exposure will basically delete the cars, and just have the head and tail lights trails.
This in turn will add another dimension to your photograph – time. The longer the shutter duration, the more light trails there will be, thus you are portraying a longer duration of time.
Long exposures, for example, a couple of minutes long (using bulb modes) can be fun too. With that long of an exposure, you can catch significant motion in clouds, or achieve that ghostly but still water when photographing the sea. Or both for that matter.
To achieve exposure times that are a couple of minutes long, you’ll have to push the ISO as low as it goes, (usually 100, in some cases 50), and close down the aperture (often to around f/16 or f/22 depending on the lens). Of course, these are subject to change depending on the conditions you photograph at.
Aperture
Usually, when shooting at night, the rule of thumb is to open up the aperture as much as possible in order to gather more light. However, now since your camera is on a tripod, you can close down the aperture as much as you need, because you can increase the exposure length (decrease the shutter speed).
So if you need a deeper depth of field (more things in focus) you can close down the aperture and decrease the shutter speed while keeping your ISO low. This way you can have more things in focus, and less noise (due to low ISO).
This is useful when shooting landscapes or cityscapes, or anything else that involves a still subject. You can have multiple things (or almost everything) in focus, with little to no noise.
Best ISO For Night Photography
When on a tripod, ISO usually stays as low as possible since you have the luxury of having a longer exposure. Having the sensor at base ISO (ISO 100 for most of the cameras) makes sure that you keep the digital noise to a minimum.
The only case where you should increase the ISO when your camera is on a tripod is if you need to shorten the shutter speed in order to freeze moving subjects. In this case, you should open up the aperture (if possible), pick your desired shutter speed, and compensate for the image brightness by bumping up the ISO.
In this case, you are trading more digital noise for frozen subjects.
2. Handheld
Shooting handheld in low-light situations is the polar opposite of shooting on a tripod. You can keep moving more freely as you don’t have to set up the tripod, but you lose the ability to do long exposures. That is the simple trade-off.
Shooting Handheld Properly For Night Photography
Shooting handheld might look simple enough, however, when shooting at night you need to be at the top of your game. Make sure you are doing everything right to make the most out of your camera.
Image Stabilization
Many modern cameras (especially mirrorless ones) feature in-body stabilization, where the sensor is stabilized on multiple axes. Additionally, many of the modern lenses feature some form of optical image stabilization. When used in conjunction they provide a significant amount of motion blur reduction. Meaning that you can drag your shutter a bit more.
That being said, when shooting handheld, always have all forms of image stabilization turned on. This will let you shoot with a bit longer shutter speeds, and depending on how steady you are, you can get away with exposures as long as two seconds.
Body Position
To be able to squeeze as much as you can from your camera, you’ll have to keep it as steady as possible. Image stabilization helps in situations like this, but it can only do so much. Your body position is as important as everything else when shooting in low light. It matters during the daytime as well, but it is not impairing you as much as it does when there is a significant lack of light.
First, make sure you have as many points of contact with your camera as possible. So rest the eyecup on your eyebrow, your right hand on the camera grip, your left hand is positioned on the lens barrel, but as close to the camera body as possible.
If you have it too far out it might be harder for you to tuck in. As for you to be as stable as possible, your elbows need to be tucked in (basically digging in your waist). This way, your arms, and head form a triangle, which is a stable structure.
Next, if possible, lean against something. A wall, a lamppost, a tree, or whatever you can find that can support your weight without moving. This way, you are eliminating the motion that your back makes.
To summarize, tucking in your elbows and resting your camera on your eyebrow eliminates most of the motion introduced by your arms. Leaning against something eliminates most of the movement introduced by your back and spine.
Everything else remaining is to stiffen up your neck as much as you can as at this point it is the only free-moving part of your body, and most of the remaining camera shake will come from there.
At this point, with a little practice, you should be able to handhold a ½ second exposure easily with a 35-50mm lens. With image stabilization, 1 second should be achievable.
Shutter Speed For Night Photography
Since you are out and about during the night, shutter speed is extremely important. As shutter speed is your main choice on how much light your camera gathers. After that, the remaining factors are again aperture and ISO.
The slowest shutter speed in these situations is the one you can handhold. However, when you are shooting handheld, chances are you are shooting scenes that are more dynamic rather than stationary. In cases like this, you are going to choose shutter speeds that suit the things you are photographing.
Usually, if you are photographing street scenes you will be hovering around 1/50th to 1/200th of a second in shutter speeds. Sometimes less, sometimes more. It all depends on the scene, subject, and available light.
There is a rule of thumb that precedes image-stabilized cameras, called the reciprocal rule, and it states that the minimum shutter speeds should be 1/lens focal length. In other words with a 50mm lens, the minimum shutter speed should be 1/50th, with a 100mm lens, the minimum should be 1/100th of a second.
This is for full-frame cameras. For crop sensor cameras the math is 1/(lens focal length*1.5) due to the crop factor being 1.5x.
Of course, image stabilization will allow you to go lower than that, but this takes into account the average moving of subjects in the frame too. I tend to follow that rule, and only break it when I have to. That way I know that I am using the longest shutter speed I can, which keeps my ISO down thus having an overall cleaner image.
Some cameras, my 6D2 for example, allow you to set the minimum shutter speed in aperture priority to be dictated by the reciprocal rule.
Aperture For Night Photography
Unlike the tripod scenario where you can increase the exposure times as much as you want when shooting handheld, you are grasping for light. Therefore, the aperture usually stays wide open to gather as much light as possible to keep the ISO down too.
Since the shutter speed is a bit limited by body physics, the only other factors that can increase the image brightness in situations like this are the aperture and ISO.
Of course, if you find yourself in a situation with a bit more light, you can close down the aperture a bit if necessary. For example, if you are shooting a portrait in a well-lit alley with a lot of lights from the stores around (think Brandon Woelfel), you can shoot down to f/4 and still have ISO low enough (under 1600) to avoid significant noise.
ISO
The tale with ISO is always the same. Do what you can to keep it as low as possible. Lower ISO values mean less noise, more dynamic range, and better color reproduction. When shooting handheld the ISO is usually the one that is sacrificed. That’s since you can’t infinitely open up the aperture (there is a physical limit, which is different between lenses). Plus, you can’t use extremely long exposure times as well. So the ISO goes as high as it needs to be.
Luckily, most cameras produced in the last couple of years handle ISO a lot better unlike cameras when I was starting out. ISO 1600 is a breeze for the average Sony/Canon sensor, while ISO 1600 was the highest the ISO went for my first camera.
You can use ISO 3200 photos with most modern cameras without any issues. You’ll have to do some light noise reduction in post-production, and you are set. Even my old Canon 6D produces decent photos at ISO 3200.
Bear in mind, however, 99% of the time it is better to increase the ISO in-camera, rather than to increase the exposure value in Lightroom after the fact. The photo will always have less noise with higher ISO when compared to a photo that has been artificially brightened in Lightroom or Photoshop.
Don’t be afraid to go crazy with the ISO if necessary. There are a lot of solutions to reduce noise after the fact. You can use Topaz Denoise AI, Imagenomic Noiseware, the built-in Photoshop/Lightroom denoising plugins, and so forth to remove some if not all the noise in your photos.
All these tools work decently enough to rescue most of the noisy photos. But remember, it is better to have a noisy photo than not to have a photo at all.
Summarising Night Photography
Shooting at night isn’t as difficult as it seems. Most of the time it is just fear of the unknown. Once you try it (and fail) a couple of times you’ll start to realize where you need to make certain sacrifices. Once you do, you’ll begin to realize that it is pretty much the same as shooting during the day. The same principles apply, but you’ll have to work on the photo a bit more.
