No matter how much you stick to the rules of photography, sometimes you need to employ some photography tricks to spice up your photos. Some photography tricks are simple, some of them require a bit of work. Most importantly, you can do everything with little to no cost.
Not every photography trick requires buying an expensive lens or an expensive gadget. Almost everything on this list is something you can do at home. All they need is a bit of creativity and a bit of tinkering.
Photography Tricks That Involve Manipulating Shutter Speed
Shutter speed is one of the three main settings you can manipulate in your camera. You can use shutter speed in certain ways to yield weird and different results. That means you can use those to your advantage to achieve better photos.
Slow Shutter Speed For Light Trails
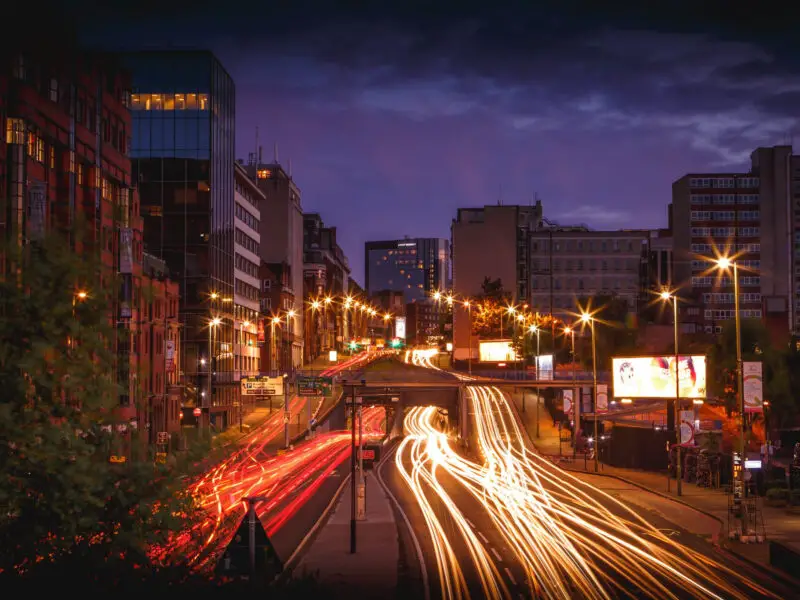
Reducing the shutter speed or increasing the exposure time will expose the sensor to light for a longer time. That means everything in the frame that emits light and moves will leave a trail. That is something that you do not want if you are shooting portraits. However, it is a handy photography trick if you intend to show the passing of time.
If you are shooting a busy street at dusk or dawn, you can use slower shutter speeds to capture the light trails that passing cars will produce. You will need a tripod for this and an exposure time of a couple of seconds.
Often around 15 seconds will suffice. Additionally, you will probably need to close down the aperture a bit and set your ISO to 100 (or 50 if your camera allows it) to avoid overexposing the photo.
Even Slower Shutter Speed For Dreamy Water And Clouds
If you have a tripod and an ND filter on hand you can achieve extremely slow shutter speeds. That allows for some weird results if you do not use it correctly. However, if you are photographing bodies of water, be it waterfalls or the sea, using long exposure times will smooth out the water.
For example, if you are on the beach after dark and you manage the exposure of 1-5 minutes, the sea will look extremely still, even if it has some waves. The water will be silky smooth and a bit satin. The reflections will be a bit blurred.
If the sea is a bit wilder, the waves will look like there is a low fog over the silky sea. Though for these scenarios, you will probably need to be a bit toward the 5-minute mark.
The same concept applies to clouds. Since they are moving all the time, the longer the exposure, the smoother they look. As a bonus to the water scene, you get both the silky clouds and the water.
The Slow Shutter Speed And Rear Curtain Sync Photo Trick
For this photography trick, you need a flash. Luckily, most cameras feature a built-in flash (except the pro bodies). You can set it to fire on the rear curtain sync. That means the flash will fire at the end of the exposure instead of the beginning.
This way, with a little longer exposure, one to a couple of seconds, you can still freeze your subject and have it sharp while the background is streaky and messy. You can twist the camera around your subject to create a circle in the background and have it frozen and sharp by the flash firing at the end of the exposure.
With a zoom lens, you can zoom in or out during the exposure to create a tunnel-like effect.
Use Slower Shutter Speed For Panning
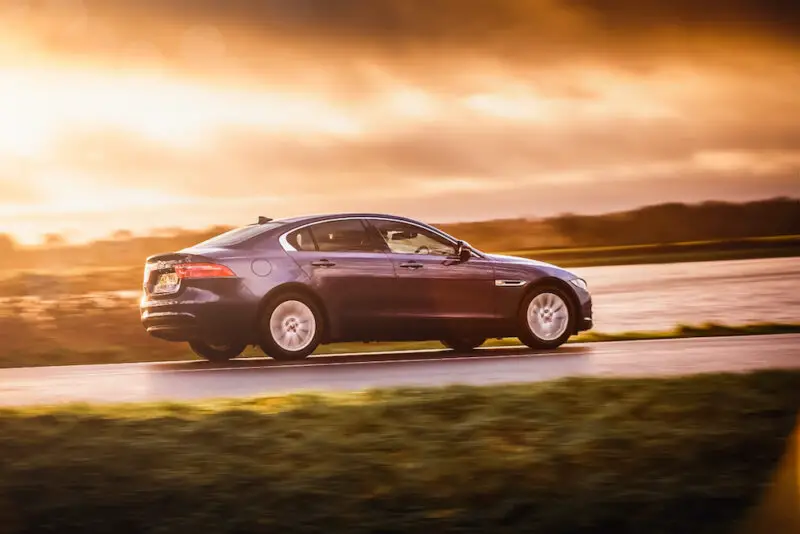
Panning is one of those photography tricks you have probably seen on photos involving cars, motorbikes, and other fast-moving objects. It takes a lot of practice to master consistency with panning, but all it takes is a lens with a longer focal length (50mm and up) and image stabilization if your hands are shaky.
It is not impossible to do panning with a wide-angle lens, but it is a lot harder to do, and the result looks weird due to parallax issues. If you try it, you will see that the motion blur does not flow in one direction, instead, it is wavy, which looks weird and confusing.
The way you do it, you set a slower shutter speed, somewhere around 1/30th to ½ a second, and you follow the subject (let us say a car) in your frame matches the motion of the car with the motion of your frame. Then continue to follow it as you snap a photo.
While the shutter is open, you continue to move the frame (albeit without seeing, you will have to do this by feel) until the shutter closes. If you match the speed of your panning to the moving car, your car will be sharp, and the background will have lots of motion blur. That will provide a sense of speed in the photo.
You Can Use Fast Shutter Speeds To Freeze Action
Anything that moves fast can be frozen if your shutter speed is short enough. The faster the subject moves, the shorter the shutter speed needed to freeze it. However, this can yield some very cool effects. For example, pretty much every sport you can think of that does not involve cars.
That is why pretty much every photographer who shoots sports uses fast shutter speeds. If you photograph baseball and use slow shutter speed, the ball and the bat will always be smudged in your photos.
Photography Tricks That Involve Manipulating The Aperture
Just like the shutter speed, the aperture is one of the three main photography settings you can manipulate. The aperture controls the amount of light that enters the camera and the depth of field.
Bokeh Is One Of The Most Used Photography Tricks
You have probably heard of the term bokeh. That refers to the way the out-of-focus blur looks, specifically the shapes the specular lights get. Usually, the bokeh looks like circles within the blur, but they can change their shape if you close the aperture a bit.
Some lenses which have fewer aperture blades (like the old Canon 50mm) will produce bokeh of a hexagonal or pentagonal shape instead of a circle. With lenses like these, you should close down the aperture just slightly (f/2.2 works well on the old Canon 50mm) to get the bokeh that isn’t a circle. Vintage lenses have fewer aperture blades as well.
Lenses with a wider aperture produce larger bokeh balls. Lenses with longer focal lengths produce larger bokeh balls. The closer the subject is to the lens produces larger bokeh balls. Combining multiple of these factors stack for, you guessed it, larger bokeh balls.
Close Down The Aperture To Have Everything In Focus
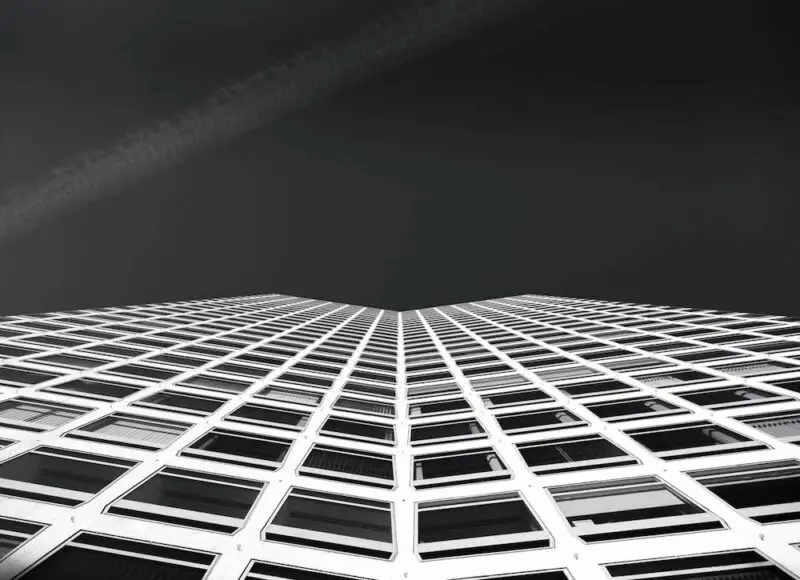
One of the photography tricks that landscape and architectural photographers often use is to close down the aperture significantly to get everything in focus. Well, almost everything. You cannot have literally everything in focus without focus stacking the photo.
That said, if you want to have almost everything in focus you can close down the aperture as much as it goes, or near that (to avoid sharpness loss due to diffraction), and then focus on the hyperfocal distance.
Now you are thinking, what is the hyperfocal distance? I am glad you asked.
Hyperfocal distance is the distance you focus the lens to, so you can have the most stuff in focus. It is based on the aperture value and the focal length of your lens. There are plenty of apps that will do the calculation for you, and you pre-focus the lens to the distance on the focus scale on the lens.
You Can Get Those Fancy Light Streaks If You Close Down The Aperture
Another byproduct of closing down the aperture is that light streaks start appearing. The larger the sensor and the smaller the aperture, the longer light streaks you get. Additionally, lenses with more aperture blades get more streaks.
Most of the time, photographers who shoot landscapes with the sun in the frame go for light streaks as they help get the viewer’s attention.
There are starburst filters that mimic this phenomenon, but they look weird and unpleasant. That is the reason why they are used rarely.
Composition Photography Tricks
Composition is the easiest tool to manipulate to achieve a creative look. The mere fact that you are not limited by the physics of the camera that much opens up a whole world of possibilities.
Use Foreground Objects To Make Simpler And Cleaner Candid Photos
Good candid photos often employ foreground and background to bring attention to the subject. That is a pretty simple concept, have everything blurry except for the subject, and the viewer has no choice but to look at it.
However, sometimes you do not have the luxury to have good foreground elements right in front of the subject. That does not mean that you can not create your own.
The trick is that you can use pretty much anything you can find and handhold it in front of the lens for different effects. You can use a branch, a flower, a few blades of grass, pretty much anything to create a foreground blur that will frame up your subject.
Additionally, you can use a glass, a mirror, a prism, even your smartphone to reflect light to create a foreground as simple as a light streak or as complex as an almost clean reflection.
Also, you can use light sources to create light streaks, simple things like the flash of your smartphone or a lighter. However, be careful with flames as you can melt the plastics or damage the coatings on the front element of your lens.
Freelensing Photography Trick For Selective Focus And Light Leaks At The Same Time
If you remove the lens from your camera, that does not mean that the lens stops working. The lens focuses light onto the sensor. However, if you remove the lens from the camera you misalign the focal plane of the lens with the sensor.
The images you create with freelensing are partially in focus, with a bit of tilt-shift effect and light leaks. That is often used for dreamy looks where the perfect focus is not essential.
Some cameras require you to unlock shooting without a lens from the menu, so do not be surprised if you can not take a photo without a lens attached. It is usually named something like shutter release without a lens.
Using A Tablet As A Surface Is An Easy Photography Trick For Mirror Reflection
If you want to photograph products that require a reflection on the bottom and you do not have specialty surfaces for that, a tablet will do just fine. Yes, I know that a mirror is the first thing you think about, however, you need the reflection to be a bit darker than the subject in this case, and a mirror will not achieve that.
Most tablets use gorilla glass which is tempered glass with a super smooth finish. And since that glass is right on top of an LCD panel, the reflection is quite darker than the subject, making it the perfect surface for a DIY approach.
Reflections Are Cool Photography Tricks If Used Correctly
Mirrors, water, polished metal, and other reflective surfaces are things you need to be aware of in your surroundings as they can be a perfect tool for your next photo.
A simple puddle with still water can provide a great opportunity to photograph a building or a person in a cool frame.
A person next to or in front of a mirror is also a perfect opportunity to create a portrait that is not the everyday boring photo you often ignore on your feed.
You can also shoot through semi-reflective surfaces for a nice foreground effect, for example, a window of a cafè. All these are useful photography tricks to have in your
Do-It-Yourself Photography Tricks Are Important Tools For Every Photographer
Thinking outside of the box and having a do-it-yourself attitude will help you in many scenarios. Nobody will care whether you have the most expensive gear or whether you use some MacGyver contraption to achieve your result. So when push comes to shove, DIY is the way to go.
DIY Macro Tubes From Toilet Paper Roll
Every lens is a macro lens if you separate it from the sensor far enough. However, freelensing will not work well for macro, as you will need a bit more stability and no light leaks. Even though macro tubes are rather inexpensive, you do not always have them with you.
However, a roll of toilet paper is something you can get your hands on easily. The cardboard tube holding the toilet paper works well as a replacement for a macro tube. A bit of gaffer tape to hold the lens on the tube (or you can hold it yourself, really), and you are all set.
The width is wide enough to get around the sensor and not touch the mirror box and wide enough to fit the mount of most lenses. That way you will not have tilt-shift effects.
The only issue you will face with this method is losing a lot of light. That is where the dedicated macro lenses have an advantage.
UV Filters Are Pretty Much Useless Until You Modify Them
Using UV filters nowadays is pretty useless. They do not have any positive effect on the photo, but unlike film cameras, sensors have UV and IR filters built into them. Additionally, some people use them for protection, but the glass from the UV filter can damage the front element more than it can protect it.
However, one can modify UV filters for some creative looks. In other words, you can damage UV filters for creative looks.
One way to do it is to use vaseline or pretty much any greasy substance (lip balm works well too) around the edge, leaving just the center of the UV filter clean. That will provide a photo with a dreamy look, where the edges of the frame will be blurry and glowy, while the center will be clean.
Another way is to use dry erase markers or permanent ones as you can clean them with alcohol, to paint the edges of the UV filter in any color you want so the color can be cast onto the image. Depending on the marker, this will add glow too. The thicker the layer of paint the marker leaves, the more glowy it will be.
Cool Cinematic Flares Using Fishing Line
Most lens manufacturers do all sorts of magic behind the scenes to reduce lens flaring and ghosting. However, some photographers and directors cannot get enough of them. Yes, I am thinking of J.J. Abrams too. The flare you often see in cinema is hard to achieve with regular lenses. It requires anamorphic lenses that are pretty hard to come by.
However, you can achieve a similar flare by placing a fishing line vertically right in front of the lens. The closer to the front lens element, the better. Usually, you tape the fishing line on the lens filter thread.
The fishing line must be nylon and translucent. I am not sure whether the flare will work with a solid wire.
Sunglasses As ND Or CPL Filter Photography Trick
Just like lenses, your eyes sometimes need filters. Sunglasses are ND and polarizer filters for your eyes. In a pinch, you can use your sunglasses for your camera too.
Yes, most sunglasses have a color cast. I guess it is a trend. However, most of the time, you can correct the color cast in post-production. I have used several different sunglasses as a filter for my camera, and the result I am getting is a moderate polarizing effect and around 1 to 2 stops of light reduction. Not great, not terrible.
Some sunglasses have several different polarizations applied to their lenses, and you can use these to achieve different photography tricks.
Do not forget to rotate the glasses around the lens to vary the polarization, as you would with a circular polarizer filter.
Photography Tricks For Product Shots: Tablet Or Laptop Screen As A Background
Previously we talked about using the glass surface of the tablet screen as a surface for product photography. You can use the screen on a tablet or a laptop, with a picture or color on it as a background for a product shot. Yes, you are still limited to smaller products, but it still opens a whole world of possibilities.
And yes, for larger products you can use a TV in the same manner.
Since screens on tablets, laptops, and TVs are emitting light, if you don’t light your product it will be a silhouette. So for this technique, you will have to use a source of light on the product that will work in tandem with the light that is emitted by the screen on the device.
Additionally, screens have pixels, and pixels cause moirè. To avoid moire, make sure the device in the background is at least a little blurred by reducing the depth of field.
Also, do not forget about the flicker. Screens usually flicker at 60 Hz, while some devices with higher refresh rates flicker on higher frequencies. To avoid having a partial background, make sure you use a shutter speed slower than the flicker speed. So if the refresh rate of your TV is 100hz, you should use a shutter speed that is 1/100th or slower.
Conclusion
Remember, these are just a few photography tricks that we can share in this article. There are many, many more tricks you can use. Just be creative and think outside of the box, and you will figure out many tricks yourself. You will probably invent a few. Do not forget that you can mix and match most of these to achieve the perfect photo.
The sky is the limit.


